Disclaimer: This post is sponsored by HarperDB. Learn more about sponsored content.
What is NextAuth.js?
NextAuth.js is a library that makes it easy to drop-in authentication into a Next.js application.
It comes with a variety of Providers that allow you to add things like Social login as well as some Adapters for a few databases.
But what if you want to use a database they don’t support or your own custom database solution?
What is a Custom Adapter?
Custom Adapters are a way for anyone to extend the capabilities of NextAuth.js and use their own solution to manage connections and relationships to a database.
For instance, if we want to use HarperDB as our database solution, NextAuth.js doesn’t currently have an out-of-the-box Adapter, so how can we make our own?
But first…
What is HarperDB?
HarperDB is an application platform that provides a bunch of features, but what we’re interested for this walkthrough, is their database solution, which allows us to easily spin up a new database instance that’s globally distributed.
The fun part is their dynamic schema, which (in my opinion) makes it easier to use, as you have to worry less about the complexities of changing data structures when all you may want to do is add a new column to store some additional info.
What are we going to build?
We’re going to learn how to create a Custom Adapter for NextAuth.js that will allow us to persist our sessions in a database.
For our walkthrough, I’m going to be using my 50reactprojects.com website where I’m currently building an online version of my PDF ebook located at https://50reactprojects.com/projects.
In order to access the full content and features, the visitor needs to be logged in. This part is already set up, but to set up features like someone being able to check off the work they’ve completed, we’ll need to persist that information in a database, which is where our Custom Adapter, allowing us to store additional data in the future.
Note: For this project, I’m going to assume you already have the basics of NextAuth.js set up on your own project, but if you need to learn how to get started, you can check out my article How to Authenticate Next.js Apps with Twitter & NextAuth.js or the NextAuth.js docs.
Step 1: Configuring a new NextAuth.js Custom Adapter
Diving in, our first step is going to include a lot of template configuration.
NextAuth.js currently requires 10 different methods to comprehensively cover each part of the sign in flow, each providing a different part for storing session and account details and getting those details.
Those methods are:
createUsergetUsergetUserByEmailgetUserByAccountlinkAccountcreateSessiongetSessionAndUserupdateSessiondeleteSessionupdateUser
While we could dump this in the [...nextauth].js file, we’re likely going to have a better experience creating function that will serve as our Adapter, which we’ll import and invoke.
To start, let’s create a new directory called adapters next to our pages directory and add a new file harperdb.js.
Inside adapters/harperdb.js add:
export function HarperDBAdapter() {
  return {
    async createUser(user) {
      return;
    },
    async getUser(id) {
      return;
    },
    async getUserByEmail(email) {
      return;
    },
    async getUserByAccount({ providerAccountId, provider }) {
      return;
    },
    async updateUser(updatedUser) {
      return;
    },
    async linkAccount(account) {
      return;
    },
    async createSession(session) {
      return;
    },
    async getSessionAndUser(sessionToken) {
      return;
    },
    async updateSession(session) {
      return;
    },
    async deleteSession(sessionToken) {
      return;
    },
  }
}
This is a lot of template code, but this will give us a starting point for creating each of our methods.
Note: This is similar to the example code provided by NextAuth.js but with a few tweaks in argument names and shape… and semicolons!.
We’ll get to setting up these functions in one of the next steps, but to use our adapter, we need to update our NextAuth.js config file.
Inside pages/api/[...nextauth].js, we’ll first import our new adapter:
import { HarperDBAdapter } from '../../../adapters/harperdb';Tip: Depending on where you created your
adaptersdirectory, your relative import might be a bit different.
Then we can use our Adapter in our configuration.
Add a new adapter property to the top level of the NextAuth configuration object and add our HarperDBAdapter function:
adapter: HarperDBAdapter(),At this point, if you try to load your app, you might not see anything different, but if you try to go through your authentication flow (trying to sign in), you’ll notice it doesn’t quite work.
Next, we’ll learn how to create a HarperDB database instance with tables along with a secure client to allow our Adapter methods to interface with our database.
Step 2: Creating a new HarperDB instance and Tables for managing data
Before we set up our first database, you’ll need to make sure you have a HarperDB account. You can head over to studio.harperdb.io/sign-up to get your free account.
Once inside HarperDB, the first thing we’ll want to do is create a new HarperDB Cloud Instance.
Click Create New HarperDB Cloud Instance.

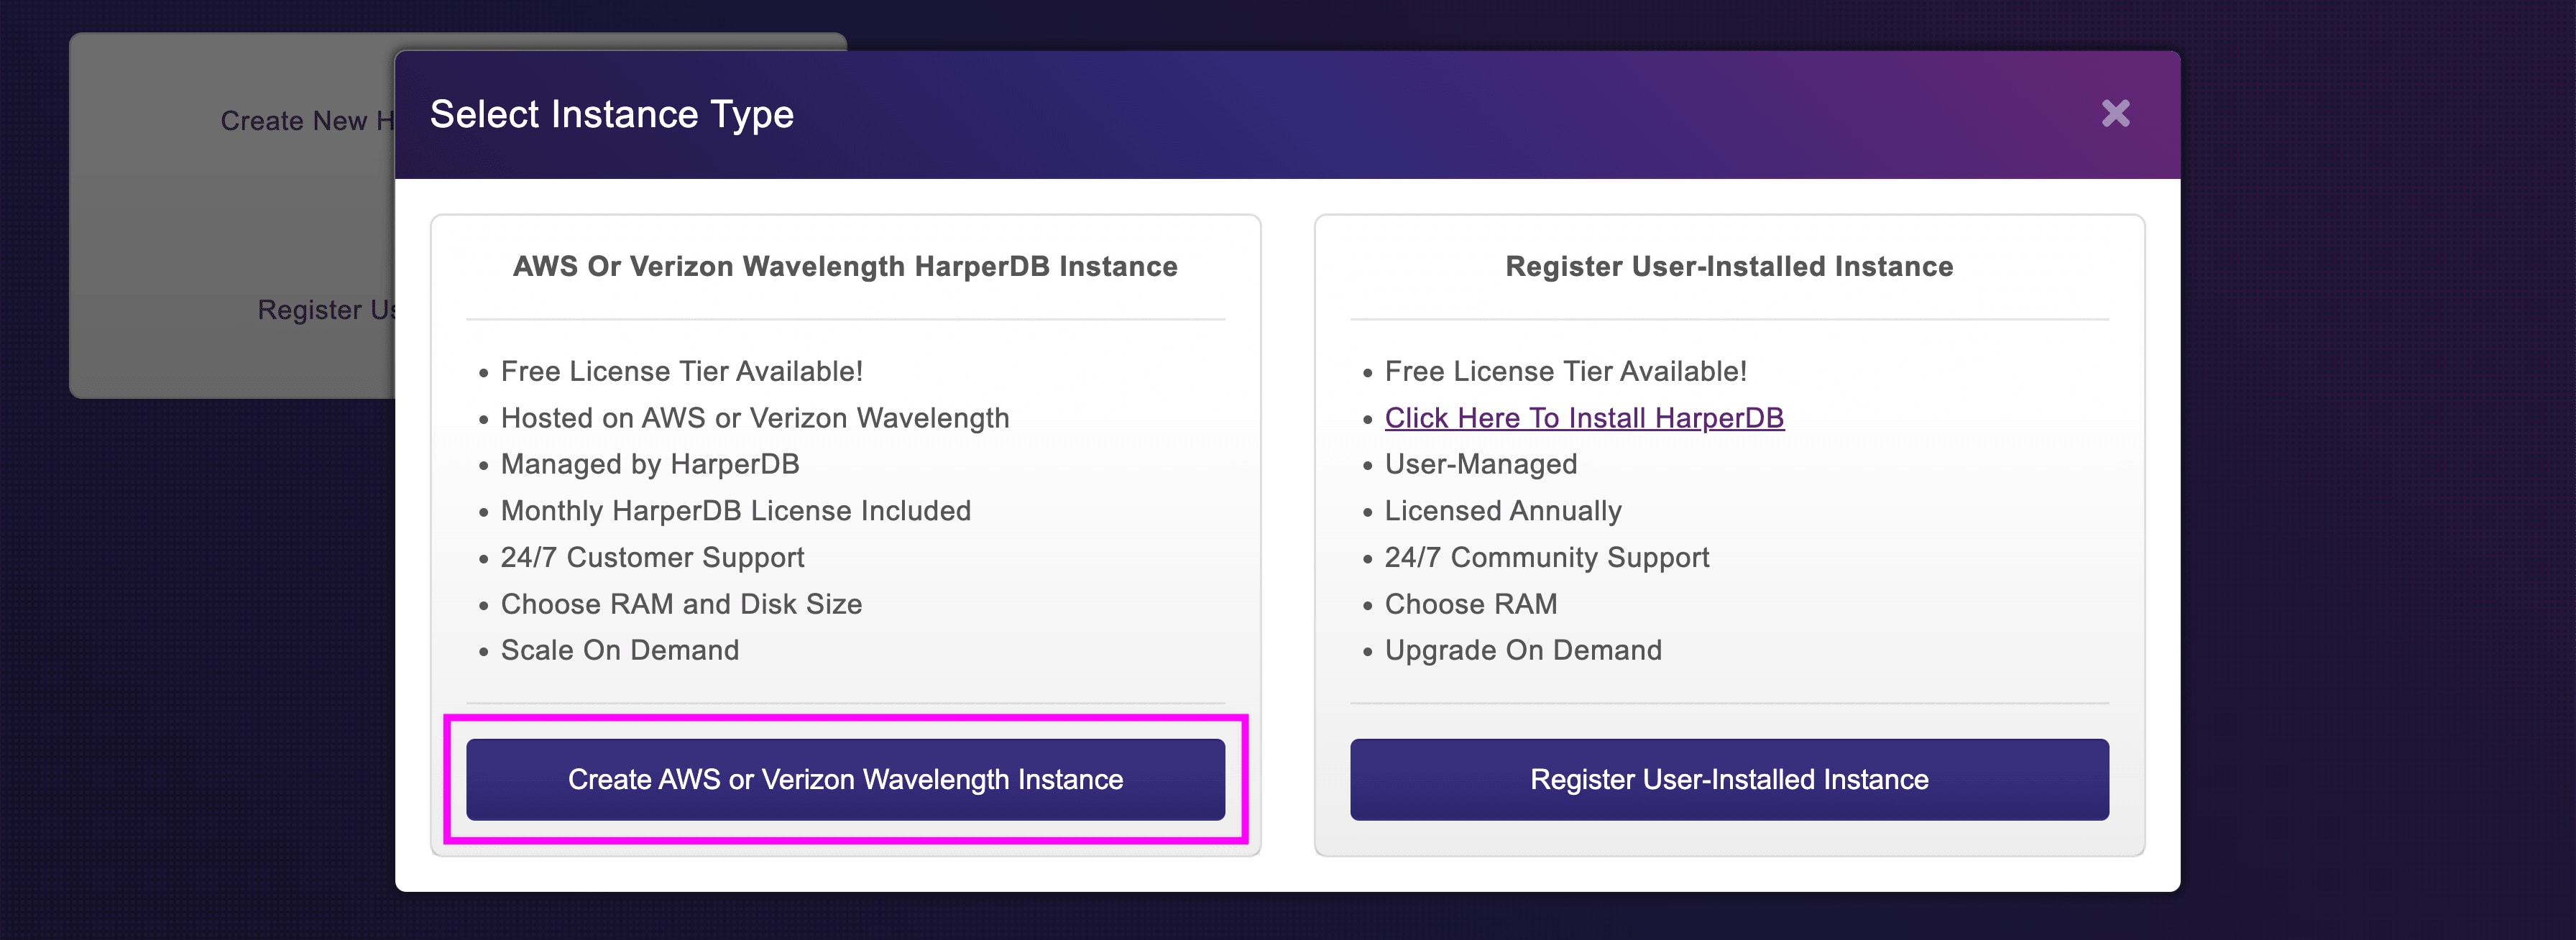
Harper will give you two options for the type of database you’d like, but to follow along with a free Harper-managed instance, select Create AWS or Verizon Wavelength Instance.

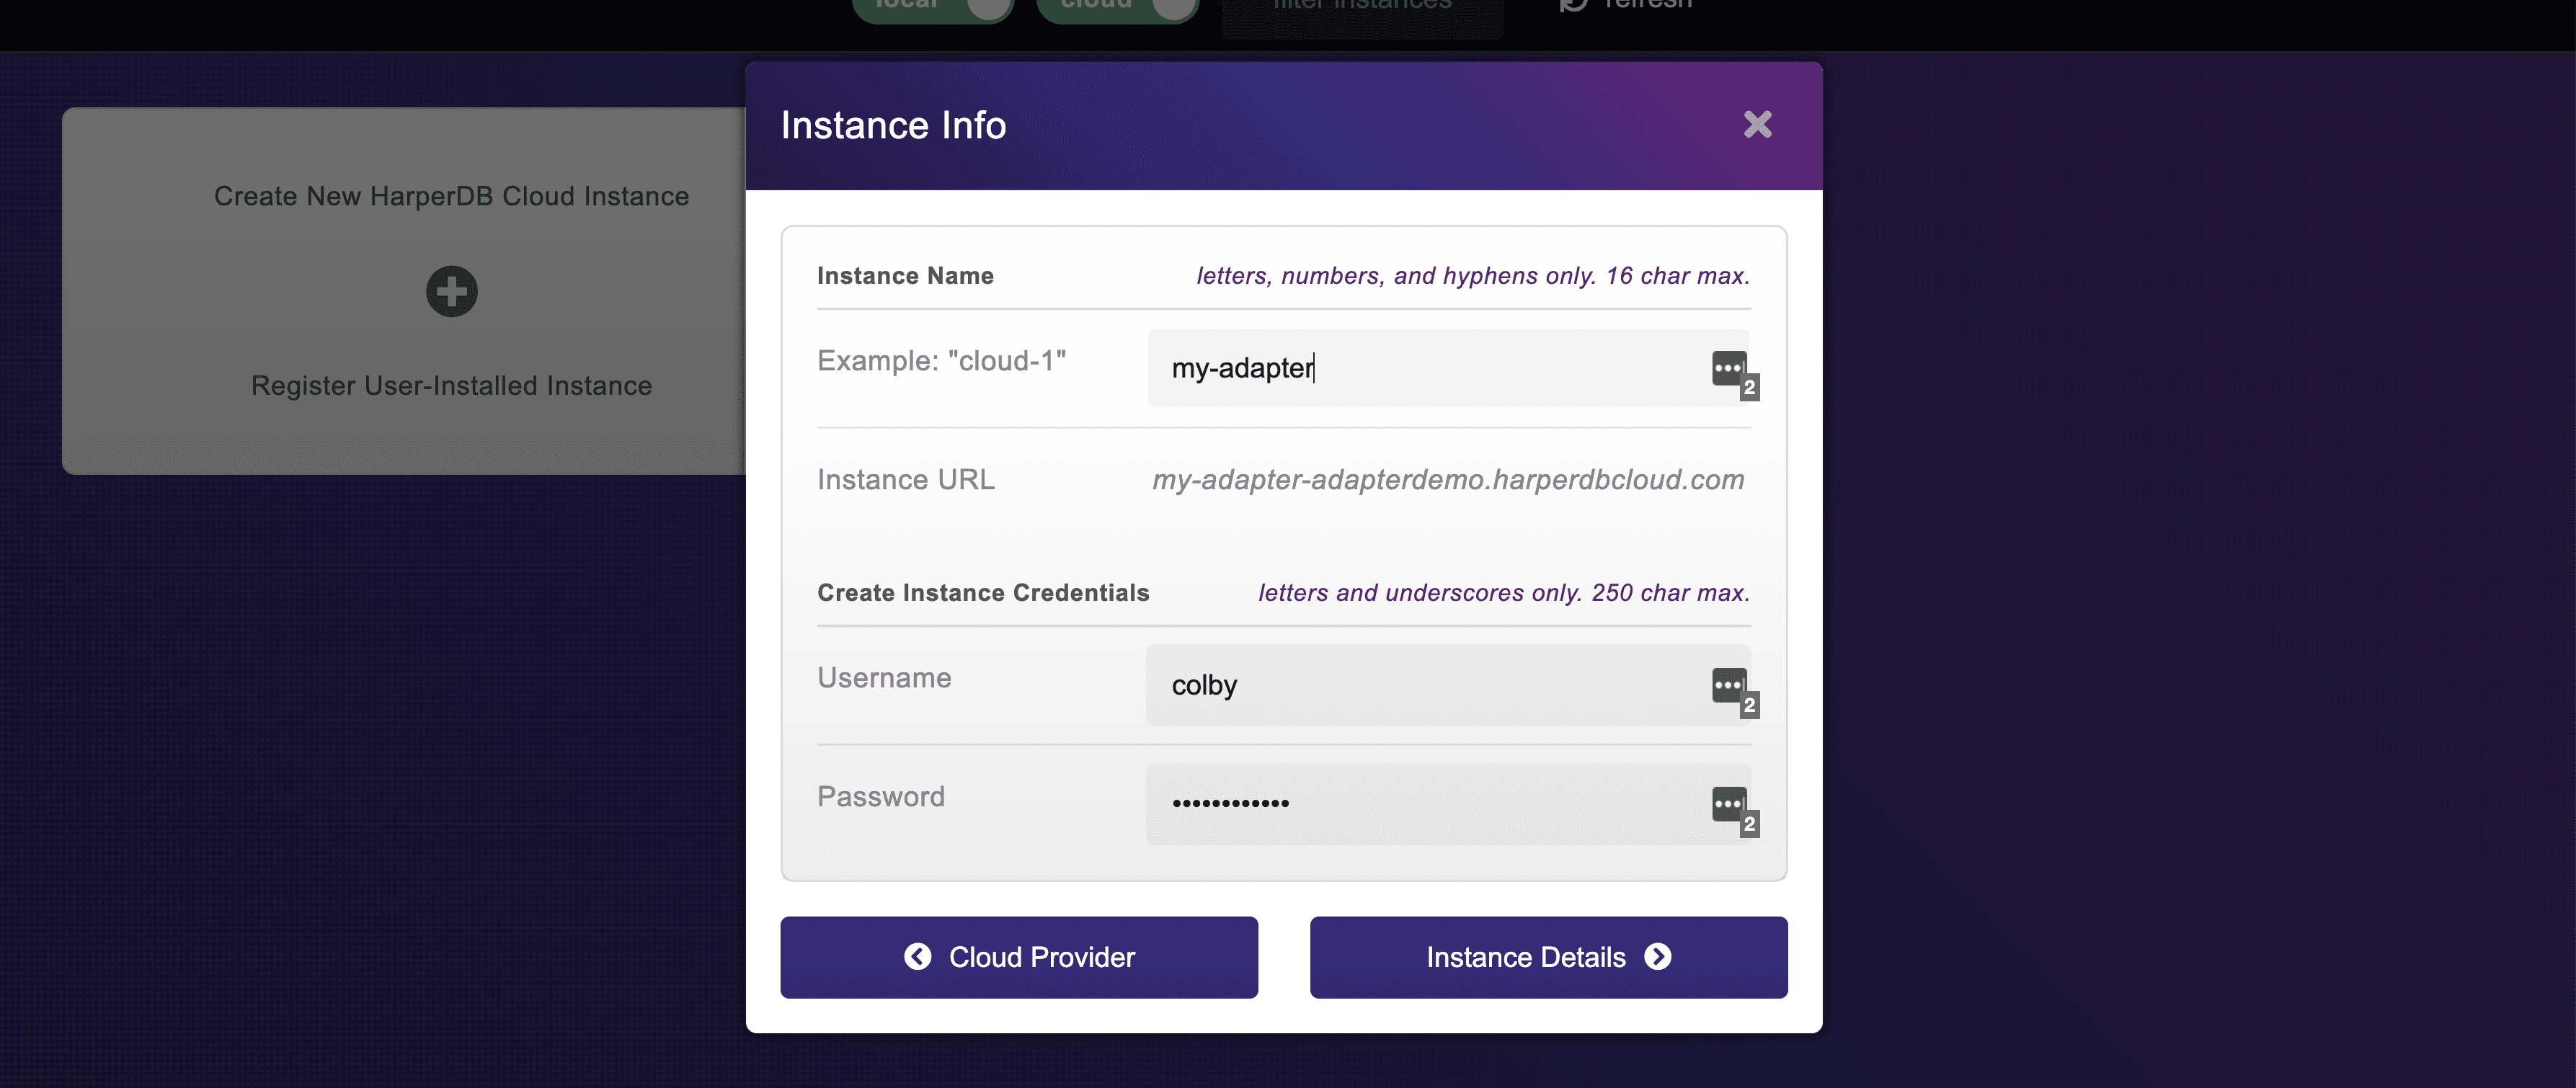
You’ll also be asked which Cloud Provider to use, which we can choose AWS (unless you prefer Verizon), and then our Instance Info, including the name and credentials.

Finally, you can add your Instance Specs, including the RAM, storage size, and region, where for RAM and Storage Size, you can select what you need if more than the Free Tier, and Region can be the area closest to wherever you expect requests to be made from.
But once configured, you can confirm your Instance Details, agree to HarperDB’s terms, and click Add Instance.
Once complete, you’ll be dropped back into the main dashboard of the HarperDB studio where you should now see your new instance!

It will take a few moments to create the instance, but one complete, you’ll get an email notification that we’re ready to go.
So next, we need to set up the Tables we’re going to use.
In Harper, we have 2 main concepts:
- Schemas: the grouping of related tables
- Tables: group of records along with a specific set of columns that correspond to data
So first, we need to create a Schema for our data.
Once you navigate into your new instance, head to the Browse tab where we see the field to create a new Schema.
You can enter whatever value you want for this, but try to use something that clearly defines the relationship between all of the different Tables. I’m going to use “Auth” as ultimately we’re using these Tables for auth and user data.

Click the green check next to the entered name and you have your Schema!
Next we can create our Tables that will allow us to start sending data.
We’re going to create 3 Tables that define the different Models that NextAuth.js needs to work:
- User
- Account
- Session
To start, right under our Schema selection we should see our Table creation UI. Let’s start with the first one and enter “Users” for the Name field and “id” for the Hash Attribute.

The “id” will be our unique identifier for every table row.
Click the green checkmark and that’s it!
Because of how HarperDB works, we don’t need to go through the process of manually defining all of our columns and specifications, which makes it much easier to work with. When we insert our data, Harper will automatically create those columns for us.
But now, go ahead and create a new table for Account and Session, using the same “id” for each Hash Attribute and we’re ready to start sending in our data.

Step 3: Creating a HarperDB client to make secure queries to a database
In order to make requests and queries to HarperDB, we’ll need to be passing along our API key, and rather than doing that for every request function, we can create a client that handles that for us.
Similar to how we created a new adapters folder, we’re going to create a lib directory (or you may have one).
Inside of lib create a harperdb.js file add:
export async function harperClient(body) {
  const requestOptions = {
    method: 'POST',
    headers: {
      'Content-Type': 'application/json',
      'Authorization': `Basic ${process.env.HARPER_API_KEY}`,
    },
    body: JSON.stringify(body),
    redirect: 'follow',
  }

  const response = await fetch(process.env.HARPER_DATABASE_URL, requestOptions);
  const result = await response.text();

  return JSON.parse(result, (key, value) => {
    if ( !isNaN(Date.parse(value)) ) {
      return new Date(value);
    }
    return value;
  });
}
Here we have a function wrapping a fetch request that:
- Passes in our API key as authentication
- Along with some request settings recommended by HarperDB
- Makes the request to our database URL
- Returns the response as text, so we can create a custom JSON parser that will give us date objects to work with
For this to work, we’ll need that API key and database URL.
Next.js convention is to add a .env.local file in the root of the project, so create a new file .env.local in the root and add:
HARPER_DATABASE_URL=""
HARPER_API_KEY=""
Now to fill out these values, let’s first get our database URL.
Inside of the Studio dashboard where you see your new instance, you should see a URL with a little clipboard icon to the left.

Copy this value and paste it as HARPER_DATABASE_URL.
Next let’s grab the API key.
Navigate to that same instance by clicking on it in the dashboard, then head to the Config tab.
Inside Instance Overview on the top right, you’ll see Instance API Auth Header.

Similar to the Database URL, copy this value and paste it as HARPER_API_KEY.
Now we won’t be able to test this out quite yet, but as we’re setting up our Adapter methods, we’ll be able to see the data start to flow.
Step 4: Setting up NextAuth.js Adapter methods to get and update data from HarperDB
Finally we’re ready to make the magic happen.
We have our database with the tables needed and our client to make the queries, so all we need to do is hook everything up.
First we want to use our client, so let’s import it into adapters/harperdb.js:
import { harperClient } from '../lib/harperdb';Now the rest of this step includes updating each and every one of our NextAuth.js methods (10 of them!), but most of the code should be straightforward for us to work through.
I’ll include the snippet we want to use with a brief explanation of each, that will be used to update the method inside of adapters/harperdb.js.
Note: We’ll also be referencing the Schema and Tables in these requests that we created in the previous step, so make sure if you’re not following along with the naming I used, to update the snippets to those.
Double Note: I’m purposely not abstracting the request logic in the functions below, but there are a lot of repeated requests, such as looking up a user, that you can clean up
createUser
Replace the createUser function with:
async createUser(user) {
  const existing = await harperClient({
    operation: 'sql',
    sql: `SELECT * FROM Auth.Users WHERE email = "${user.email}"`
  });

  if ( existing && existing[0] ) return existing[0];

  const result = await harperClient({
    operation: 'insert',
    schema: 'Auth',
    table: 'Users',
    records: [user]
  });

  if ( result.error ) {
    console.log(`Failed to create User: ${result.error}`);
    throw new Error('Failed to create User');
  }

  return {
    ...user,
    id: result.inserted_hashes[0]
  };
},
Here we’re:
- Querying for our user by their email
- If they exist, return that user
- If they don’t exist, create a new user
getUser
Replace the getUser function with:
async getUser(id) {
  const user = await harperClient({
    operation: 'sql',
    sql: `SELECT * FROM Auth.Users WHERE id = "${id}"`
  });
  return user && user[0];
},
Here we’re:
- Query for the user by their ID
getUserByEmail
Replace the getUserbyEmail function with:
async getUserByEmail(email) {
  const user = await harperClient({
    operation: 'sql',
    sql: `SELECT * FROM Auth.Users WHERE email = "${email}"`
  });
  return user && user[0];
},
Here we’re:
- Query for the user by their email
getUserByAccount
Replace the getUserByAccount function with:
async getUserByAccount({ providerAccountId, provider }) {
  const account = await harperClient({
    operation: 'sql',
    sql: `SELECT * FROM Auth.Accounts WHERE provider = "${provider}" AND providerAccountId = "${providerAccountId}"`
  });

  if ( !account || !account[0] ) return;

  const user = await harperClient({
    operation: 'sql',
    sql: `SELECT * FROM Auth.Users WHERE id = "${account[0].userId}"`
  });

  return user && user[0];
},
Here we’re:
- Query for a user by provider (like Twitter) and the ID for that provider
- If it doesn’t exist, return
- If it exists, query for that user by their ID defined in the database
updateUser
Replace the updateUser function with:
async updateUser(updatedUser) {
  const existing = await harperClient({
    operation: 'sql',
    sql: `SELECT * FROM Auth.Users WHERE id = "${updatedUser.id}"`
  });

  if ( !existing || !existing[0]) {
    throw new Error(`Can not update user ${updatedUser.id}; Unable to find user.`);
  }

  const user = {
    ...existing[0],
    ...updatedUser
  }

  const result = await harperClient({
    operation: 'update',
    schema: 'Auth',
    table: 'Users',
    hash_values: [user]
  });

  return user;
},
Here we’re:
- Query for a user by their ID
- If they don’t exist, throw an error
- If it exists, create a new user object for the updates
- Update the User in the database
linkAccount
Replace the linkAccount function with:
async linkAccount(account) {
  await harperClient({
    operation: 'insert',
    schema: 'Auth',
    table: 'Accounts',
    records: [account]
  });
  return account;
},
Here we’re:
- Inserting a new record that links the Account to the Session
createSession
Replace the createSession function with:
async createSession(session) {
  await harperClient({
    operation: 'insert',
    schema: 'Auth',
    table: 'Sessions',
    records: [session]
  });
  return session;
},
Here we’re:
- Inserting a new record for the active session
getSessionAndUser
Replace the getSessionAndUser function with:
async getSessionAndUser(sessionToken) {
  const session = await harperClient({
    operation: 'sql',
    sql: `SELECT * FROM Auth.Sessions WHERE sessionToken = "${sessionToken}"`
  });

  if ( !session || !session[0] ) return;

  const user = await harperClient({
    operation: 'sql',
    sql: `SELECT * FROM Auth.Users WHERE id = "${session[0]?.userId}"`
  });

  if ( !user || !user[0] ) return;

  return { session: session[0], user: user[0] };
},
Here we’re:
- Query for a session by its token
- If it doesn’t exist, return
- If it does exist, query for the user by the session’s user ID
- If the user doesn’t exist return
- If it does exist, return both the session and the user
updateSession
Replace the updateSession function with:
async updateSession(session) {
  const existing = await harperClient({
    operation: 'sql',
    sql: `SELECT * FROM Auth.Sessions WHERE sessionToken = "${session.sessionToken}"`
  });

  if ( !existing || !existing[0] ) {
    throw new Error(`Can not update sessesion ${sessionToken}; Unable to find session.`)
  };

  const result = await harperClient({
    operation: 'update',
    schema: 'Auth',
    table: 'Sessions',
    hash_values: [{
      id: existing.id,
      ...session
    }]
  });

  return session;
},
Here we’re:
- Query for the session by the session’s token
- If it doesn’t exist, throw an error
- If it does exist, update the session using the data
deleteSession
Replace the deleteSession function with:
async deleteSession(sessionToken) {
  const existing = await harperClient({
    operation: 'sql',
    sql: `SELECT * FROM Auth.Sessions WHERE sessionToken = "${sessionToken}"`
  });

  await harperClient({
    operation: 'delete',
    schema: 'Auth',
    table: 'Sessions',
    hash_values: [existing.id]
  });
},
Here we’re:
- Query for the session by the session’s token
- If it doesn’t exist, throw an error
- If it does exist, delete the session record
Testing it out…
That was a lot! But we’re ready to start testing out our auth.
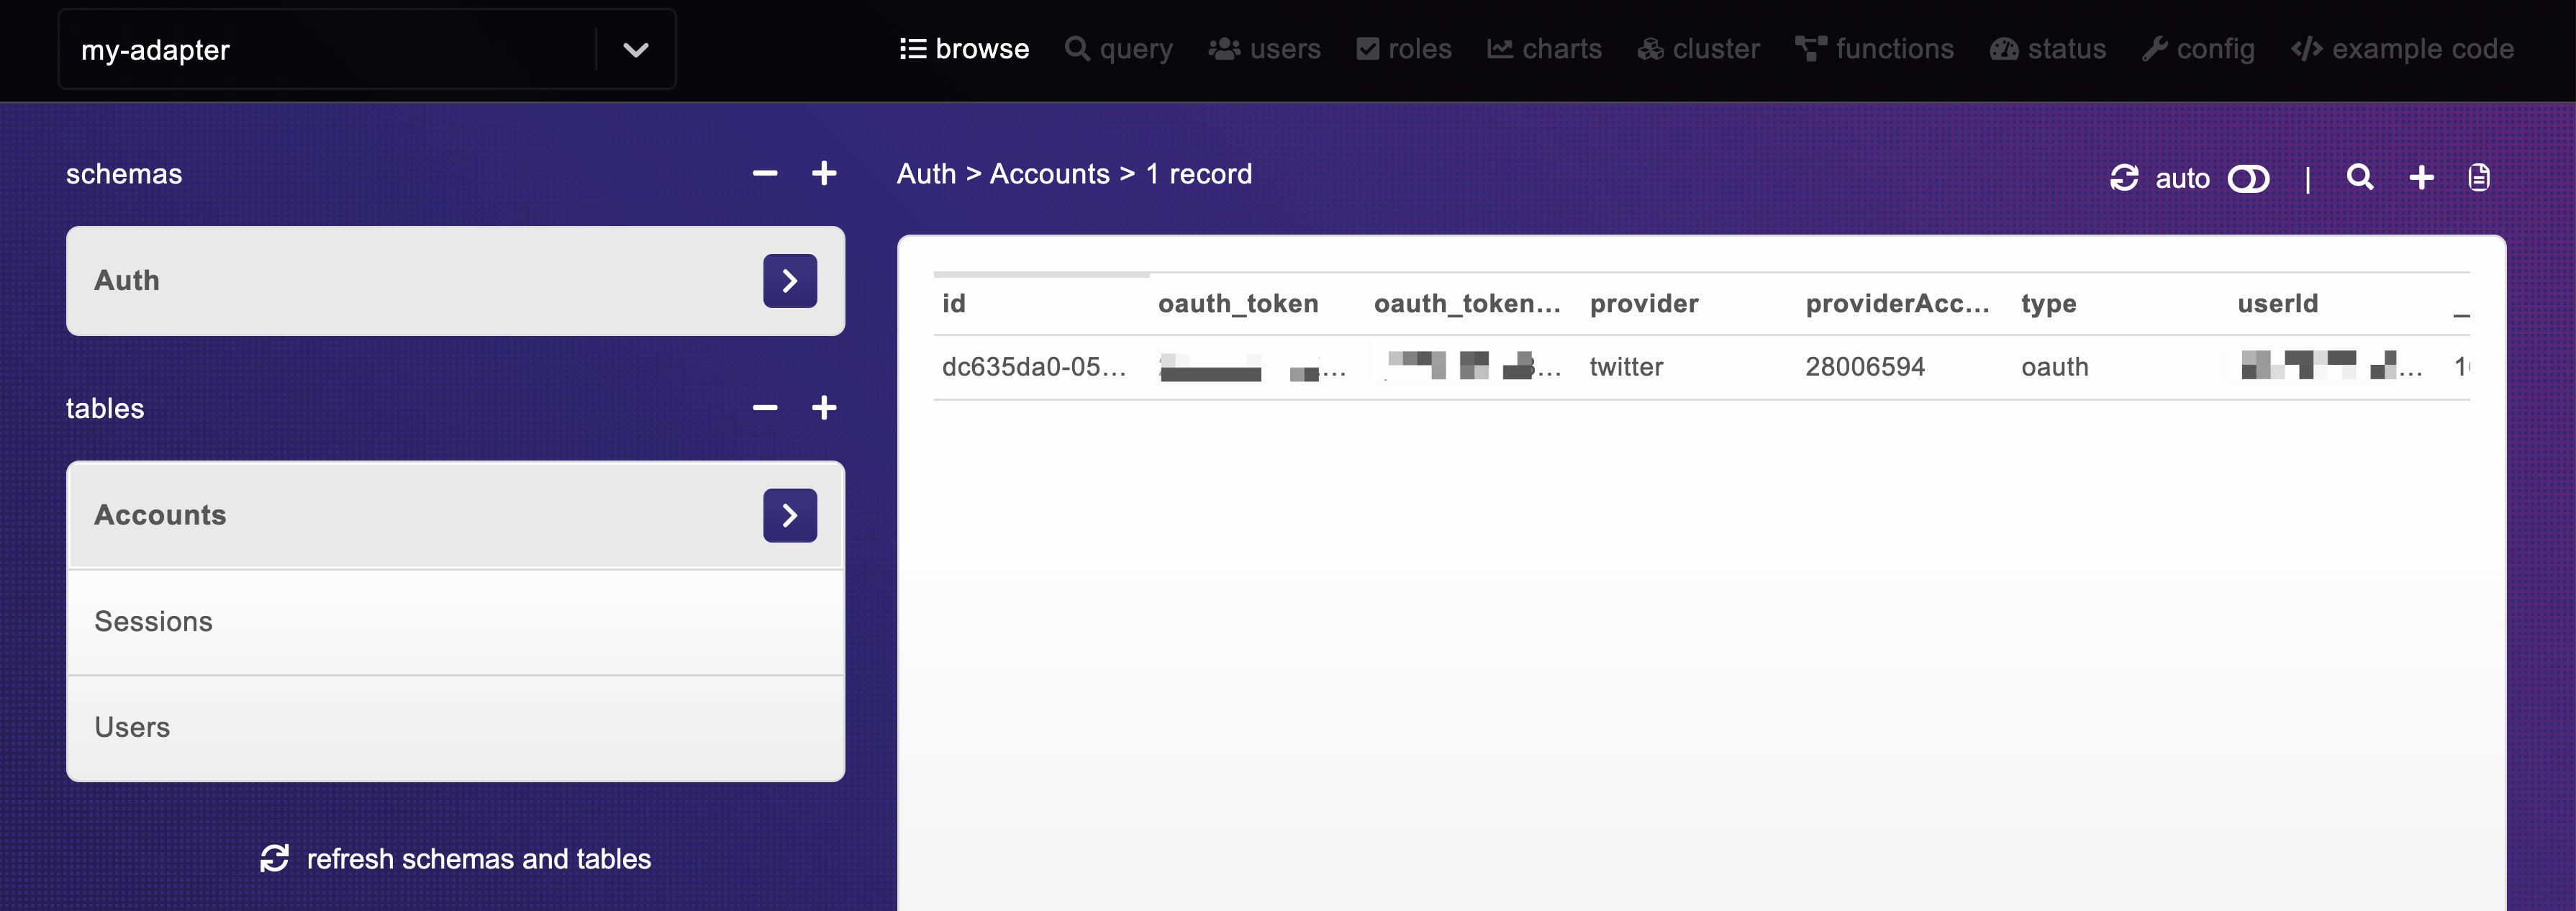
Head back over to your application where now if you trigger the Sign In flow for NextAuth and follow through, you should land back in your application just like before, but now your session data should be persisted to your database!
Tip: Having errors? Remember my code snippets used specific Schema and Table names, if you didn’t follow along, that may be one area for error.
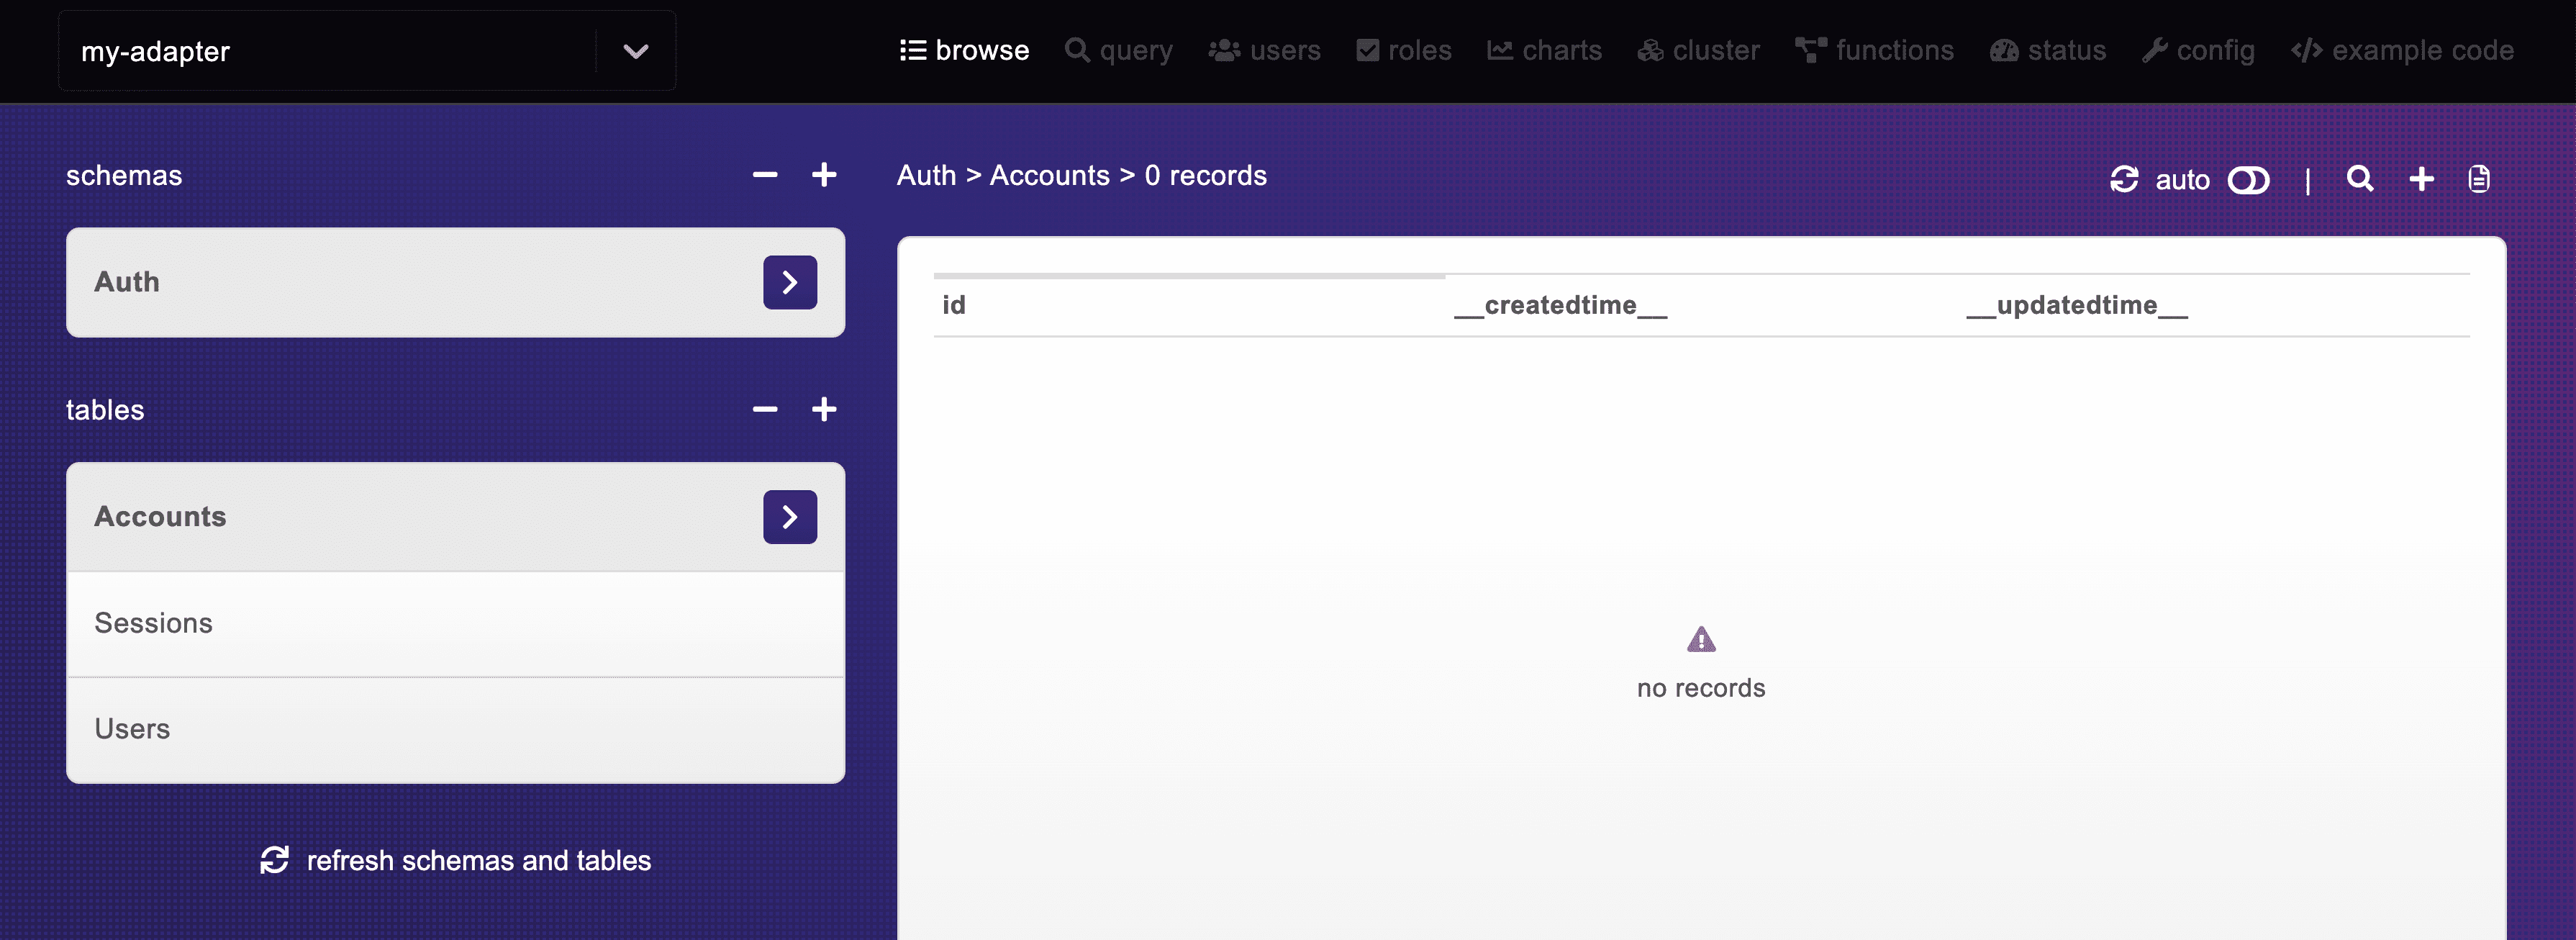
If we look inside of our HarperDB studio at our Tables, we should be able to see that beautiful data from us logging into our account.

That’s awesome! But what does that mean?
We’re now persisting our user sessions in a database, where before we were just persisting it locally.
Because we have this relationship, we can now extend this capability and store additional data that we may want to use in our application!
What else can we do?
Abstract the Adapter logic into reusable functions
When working through the NextAuth.js methods, you might have noticed a lot of repeated code, such as getting a user by their email or ID.
We can abstract this into small requests functions that we can store in a file like lib/harperdb.js and reuse them between the different methods.
Publish your own Custom Adapter for others to use
Once you have your Custom Adapter ready to use, why not publish it for anyone to use?
Throw it on GitHub, write some good docs, and publish it on npm for someone to import into their own project.
Just remember to set up some nice configuration in the Adapter function so someone can configure it to their own project.

