

What is authentication?
Authentication is the process of identifying a person or entity and making sure they are who they claim to be. While this is typically a person, it can also be something like a bot account or an organization.
This is commonly seen as a login form when visiting a website or application, where you provide your credentials to a service, and that service verifies they’re correct.
What are the challenges of authentication with Next.js?
The challenges of authentication aren’t inherent to Next.js, but rather the technology, of being able to provide a way to securely and accurately verify people’s identifies.
There are a lot of implications around this, as incorrectly identifying someone can allow people to access others’ accounts and poor security can lead to leaks of sensitive data.
In terms of a JavaScript application, implementing a solution has it’s challenges as well. You want something that will be able to communicate across different services (like a client, API, or server) while remaining secure.
It’s a little simpler when those requests are serverside, as you can hide sensitive data in the request, but you still want to provide a dynamic experience in the browser.
What is NextAuth.js?
That’s where NextAuth.js comes in as an all-in-one solution that provides a variety of authentication layers for Next.js apps.
At the core of it, NextAuth.js takes advantage of Next.js serverless functions to provide an authentication API. To persist sessions and user authentication state, it stores a JWT as an HttpOnly cookie which is then able to make the authenticated requests until it expires or is refreshed.
The cool thing is it comes packed with a variety of authentication providers out of the box, including popular ones like Twitter, Google, and GitHub, where all you need to do is provide your API keys, and people can start logging in.
You can even provide your own database through adapters if you’d like to manage more complex session state than what’s out of the box.
To interface with NextAuth, they provide a easy-to-use API that can work both on the client, inside of getServerSideProps, as well as inside other serverless functions, making it it a super flexible way to manage and access session state.
What are we going to build?
We’re going to take advantage of the NextAuth.js API to add Twitter login to our Next.js app.
We’ll start off from scratch using Create Next App, learn how to install NextAuth.js, set up and configure a Twitter app, and use Twitter as a Provider for authenticating visitors to our app.
To start, we’ll set up the app to fetch the user session clientside, but also see how we can move it into getServerSideProps along with the tradeoffs between the two options.
Step 0: Creating a new Next.js app with Create Next App
We’re going to start off with a new Next.js app using Create Next App.
Inside of your terminal, run:
yarn create next-app my-auth-app
# or
npx create-next-app my-auth-app
Note: feel free to use a different value than
my-auth-appas your project name!
Once installation has finished, you can navigate to that directory and start up your development server:
cd my-auth-app
yarn dev
# or
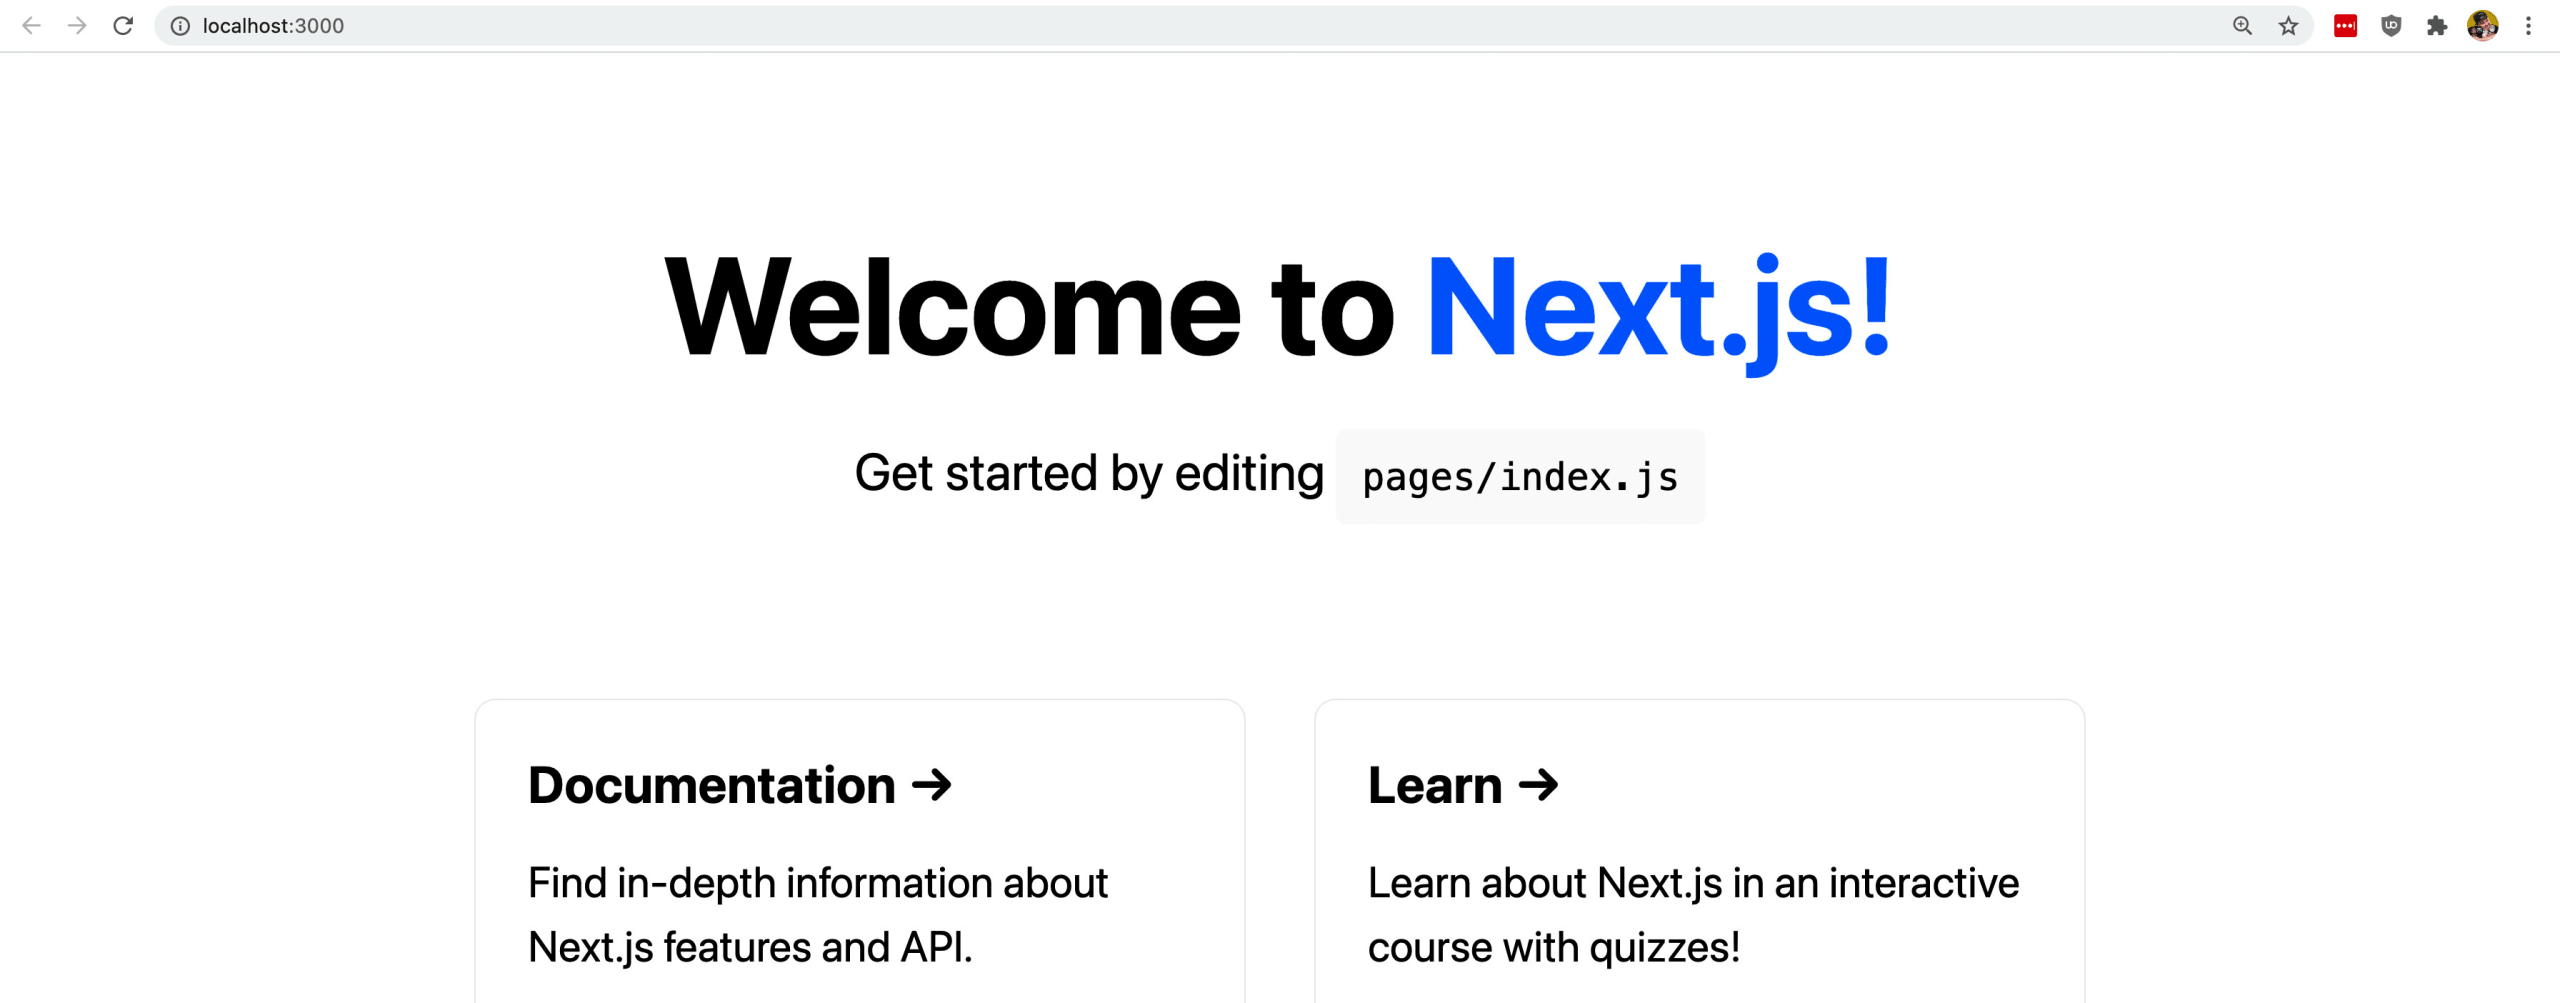
npm run devAnd once loaded, you should now be able to open up your new app at http://localhost:3000!
Step 1: Installing and configuring NextAuth.js
Getting started with NextAuth.js, we’ll first want to install it as a dependency to our project:
yarn add next-auth
# or
npm install next-auth --save
If you remember from earlier, NextAuth.js leans on serverless functions to provide authentication functionality. So the first thing we need to do is create a new function.
Create a new folder called auth inside of pages/api, and inside create a new file called […nextauth].js.
Tip: the brackets
[define our API route as a parameter (or variable) and the...tells Next.js that there can be more than one parameter, or as Next.js calls it, a catch-all route. This means we’ll be able to hit both/api/auth/sessionand/api/auth/callback/twitterand both endpoints will resolve to that function.
Inside pages/api/auth/[…nextauth].js, add:
import NextAuth from 'next-auth';
import Providers from 'next-auth/providers';

export default NextAuth({
  providers: [
    Providers.Twitter({
      clientId: process.env.TWITTER_CONSUMER_KEY,
      clientSecret: process.env.TWITTER_CONSUMER_SECRET
    })
  ]
});
Here’s a breakdown of what’s happening:
- We’re importing the main NextAuth module as well as a Providers module that will allow us to set up an authentication provider
- We export a default invocation of NextAuth which will scaffold all of the API code and configuration we need to support our various authentication API routes
- Inside of NextAuth we add a configuration, where we’re creating a new array of providers, particularly passing in a Twitter provider
- That Twitter Provider takes 2 configuration properties, a
clientIdandclientSecret, which point to environment variables we’ll se up next
If we try to load the app, nothing will happen at this point, as we’re not trying to hit that endpoint, but even if we were, we haven’t configured Twitter.
So next, let’s define our environment variables. These will allow us to store sensitive values, such as API keys, that will be injected into the environment at run time. It helps prevent those values from being stored in public locations that could compromise them.
Create a new file at the root of the project called .env.local and inside add:
TWITTER_CONSUMER_KEY="key"
TWITTER_CONSUMER_SECRET="secret"
NEXTAUTH_URL="http://localhost:3000/"
Here were defining 2 Twitter environment variables and a URL that we’ll use for NextAuth. We’ll get the Twitter environment variables in the next step, but the NextAuth URL will ultimately be where your authentication service will connect to, where in our case, we’re working locally, so we can use our test environment.
When we spin up our Next.js server, we’ll have access to those values through process.env where like we saw earlier, we can use it like:
process.env.TWITTER_CONSUMER_KEYBut similar to earlier, if you try to load the app, nothing will happen. Next we’ll walk through creating a Twitter app, grabbing the credentials, configuring them in our environment, then finally using NextAuth to log in.
Step 2: Creating a Twitter app and configuring Consumer and Client keys
In order to allow people to log in with Twitter, we have to create and register an application with Twitter.
Head over to developer.twitter.com where you can sign in to the Developer Portal with a new or existing Twitter account, which we’ll use to create our app.
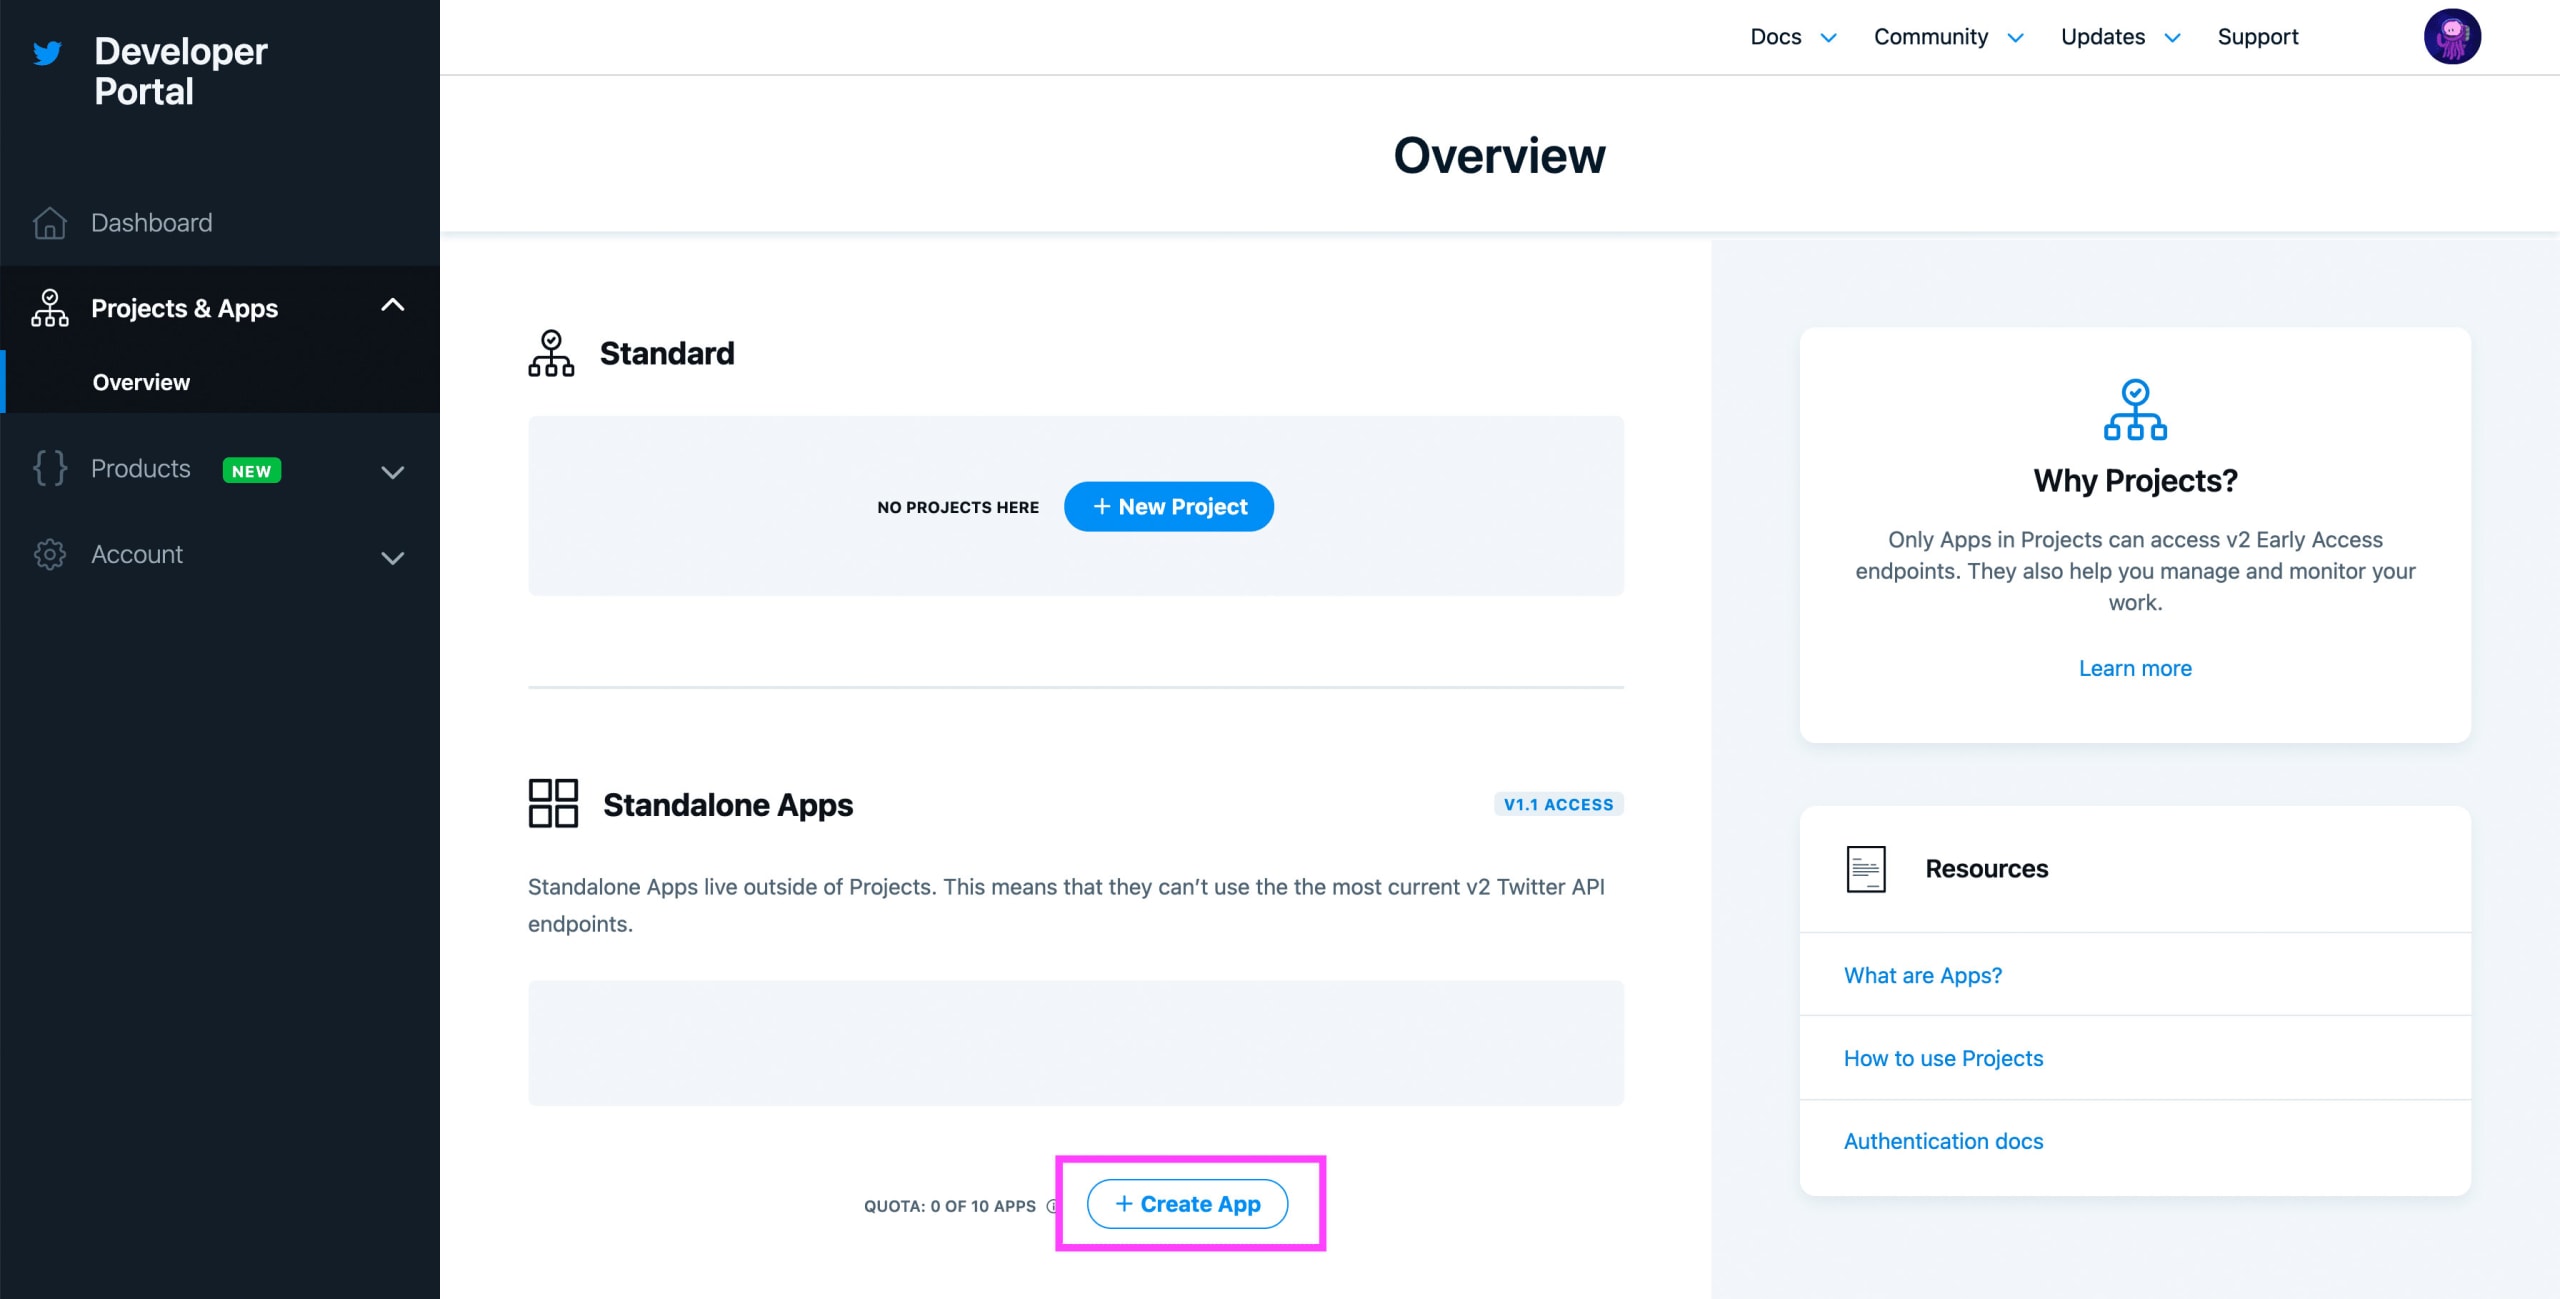
Once inside, we want to create a new Standalone App. to do that, navigate to Projects & Apps, then Overview, and once there, click the Create App button.
Next, Twitter will ask you to give your app a name. This can be anything, but it needs to be unique. I’m going to use “Space Jelly App”.
On the next screen, Twitter will provide you with your API keys. These are sensitive values that shouldn’t be shared with anyone unless you’re working with a team. Make sure to save them in a safe place, as we’ll use them shortly in our application.
Note: you won’t be able to see these keys again, but if you happen to lose them, you can regenerate them under Keys & Tokens. Regenerating them however will invalidate the previous keys, requiring you to update them anywhere they were used.
Once you have your keys saved, hit App Settings, where we’re now in our App’s dashboard. Feel free to update the name, description, or even add an icon, but those aren’t important to our walkthrough.
We instead need to update two things, the app permissions and authentication settings.
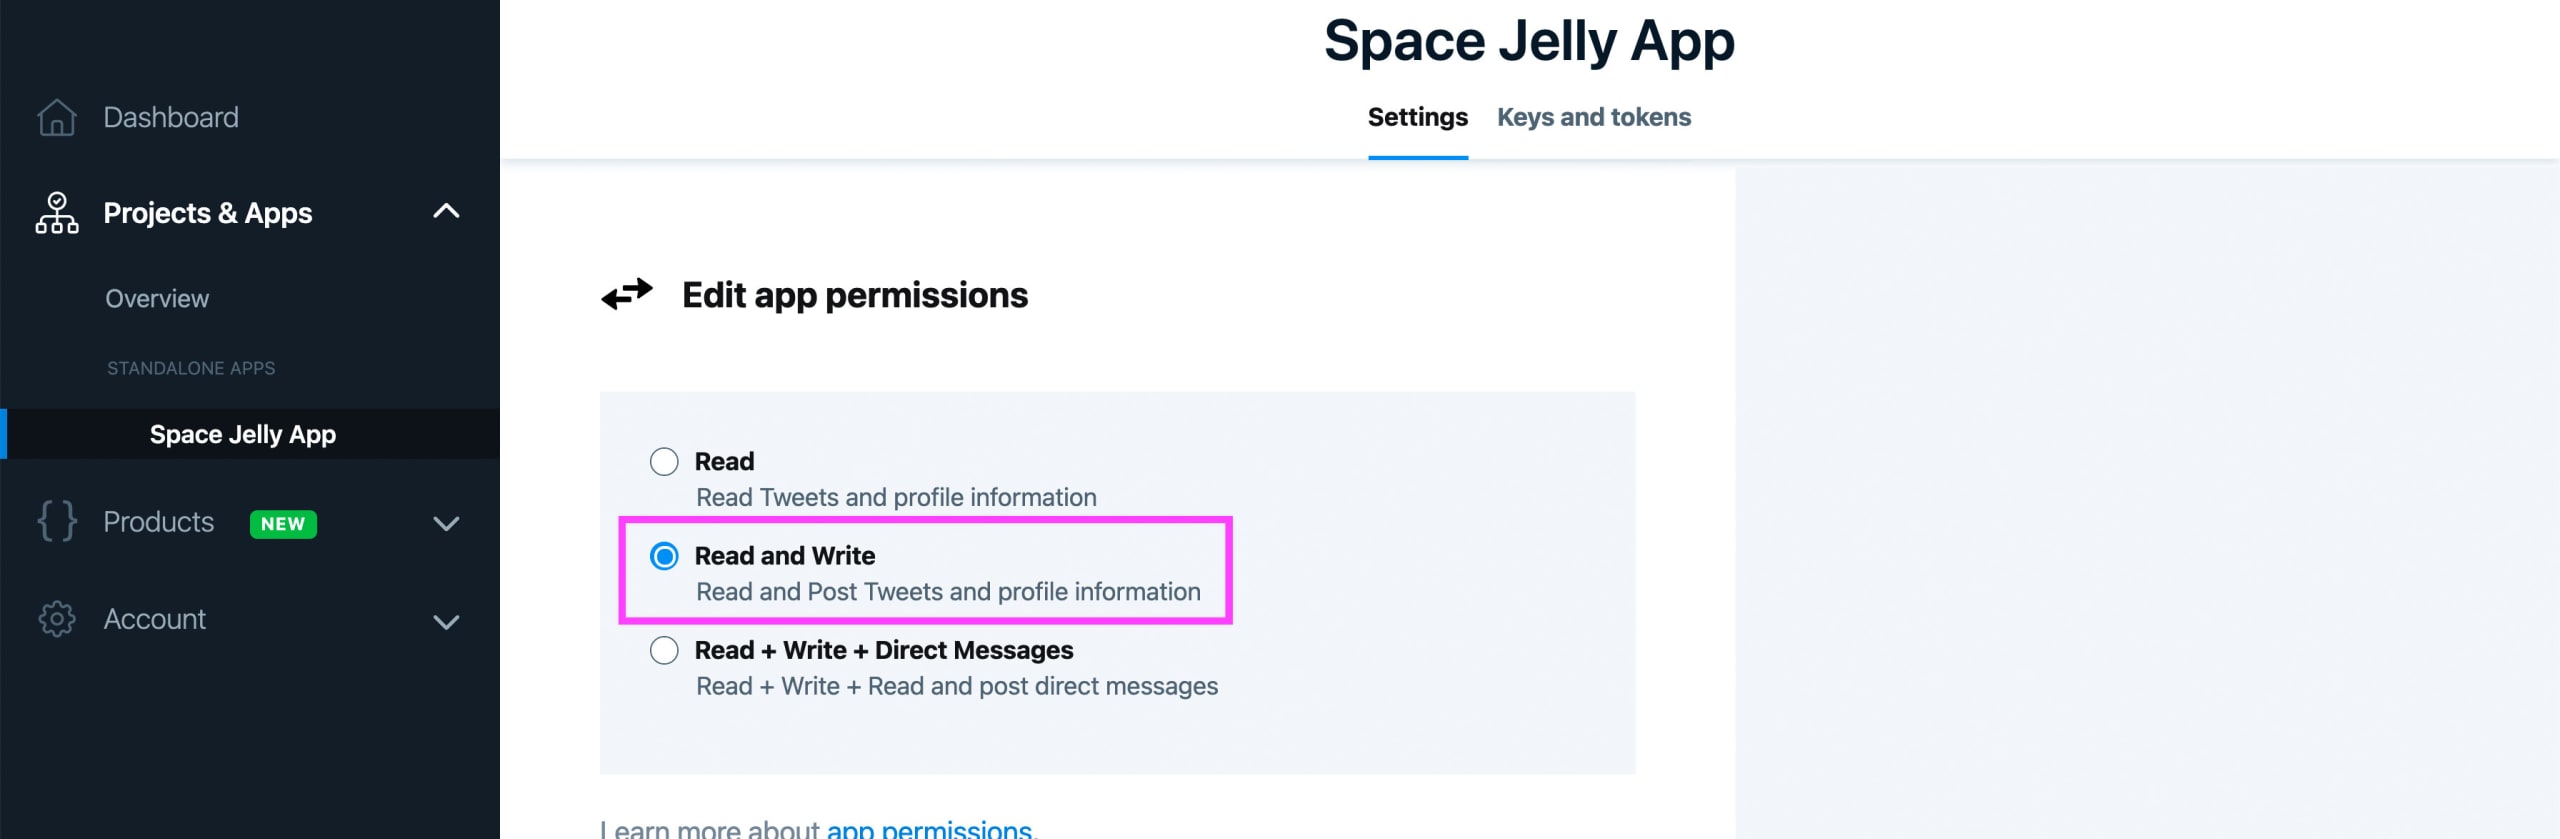
Under App permissions select Edit, where we want to change the available permissions to Read and Write. Then click Save.
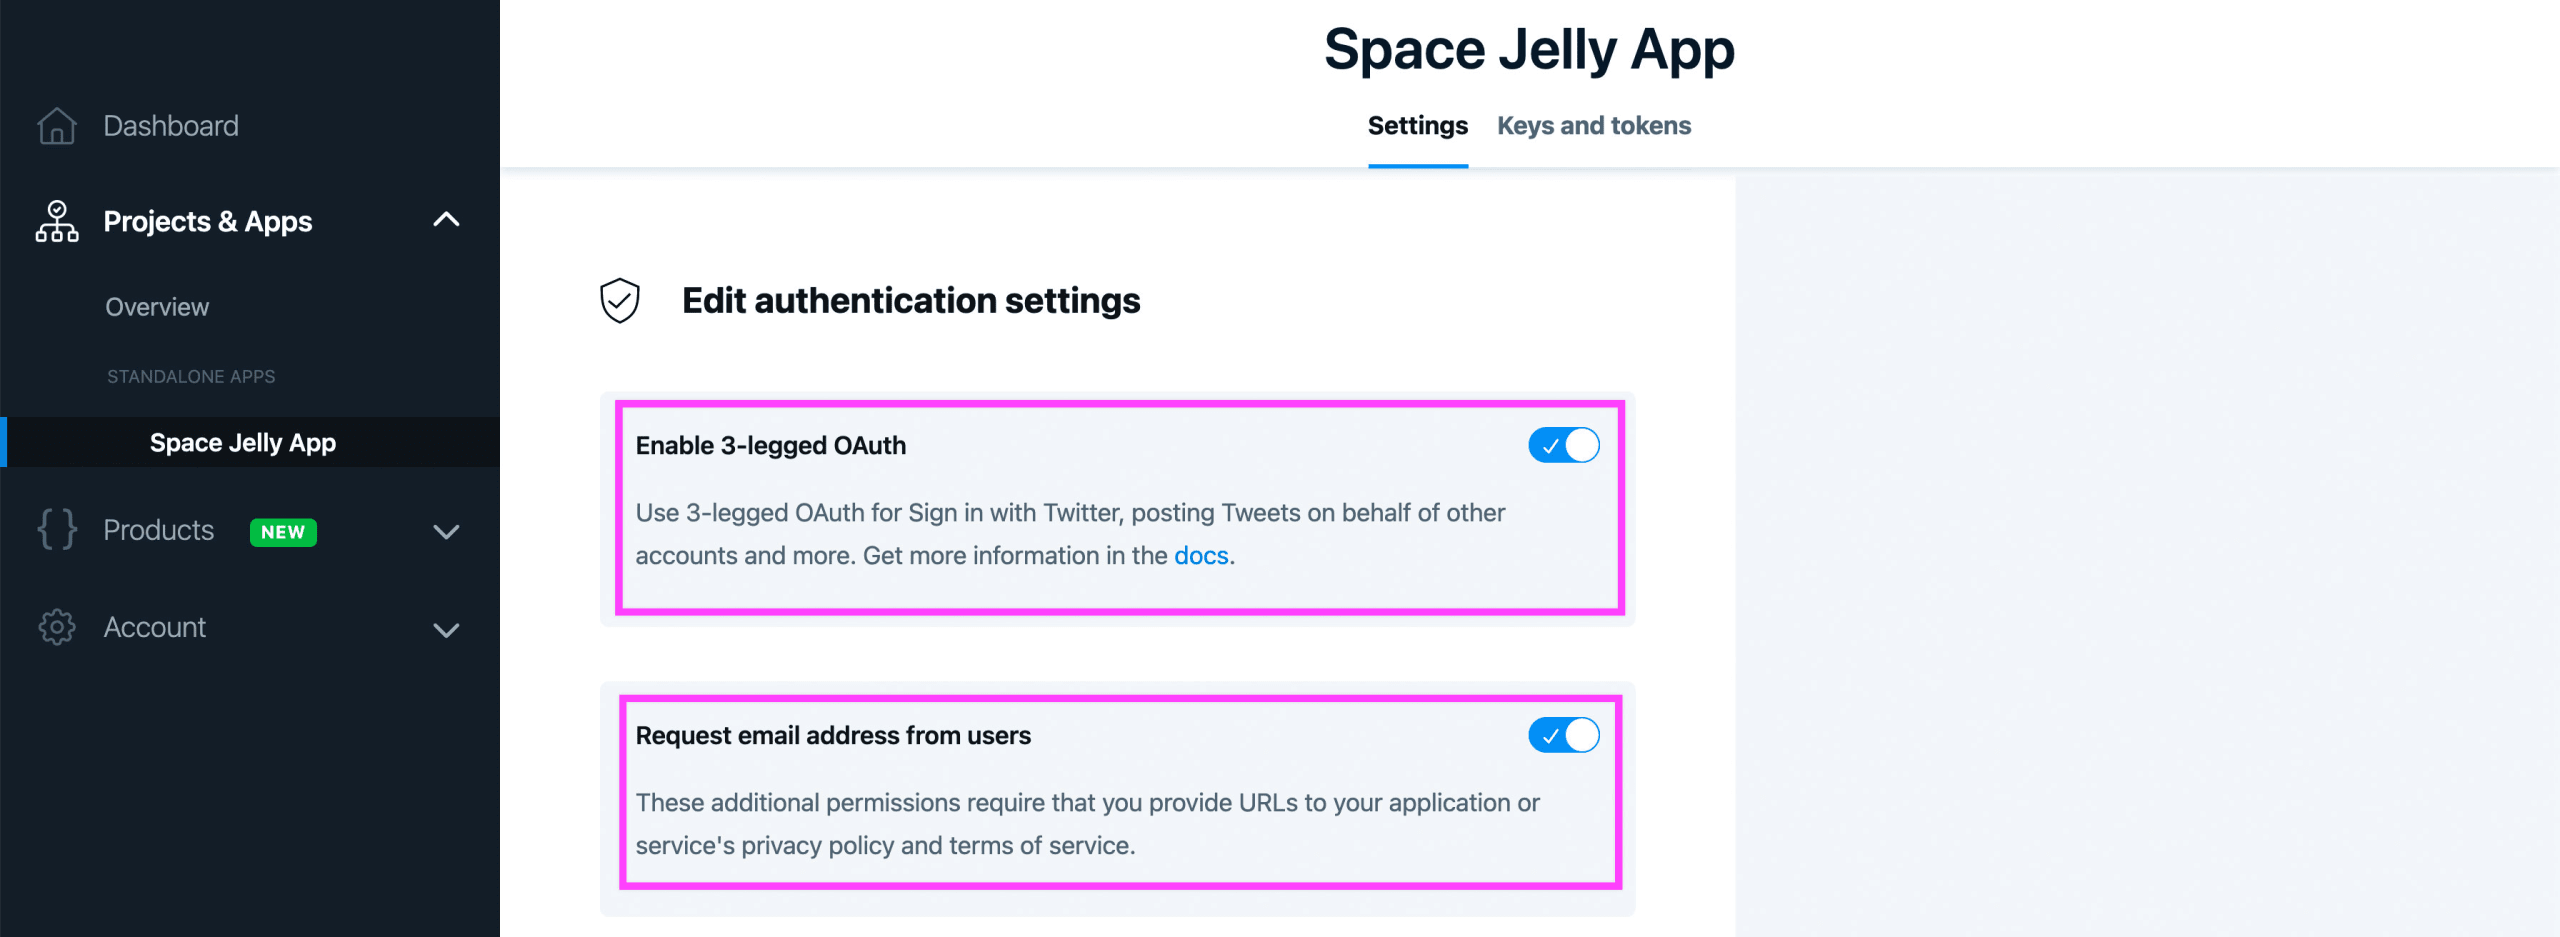
We also want to navigate to Authentication settings back on our App dashboard, where here, we want to do a few things.
First, we want to enable both 3-legged OAuth and Request email address from users.
We also want to configure a few URLs for our application.
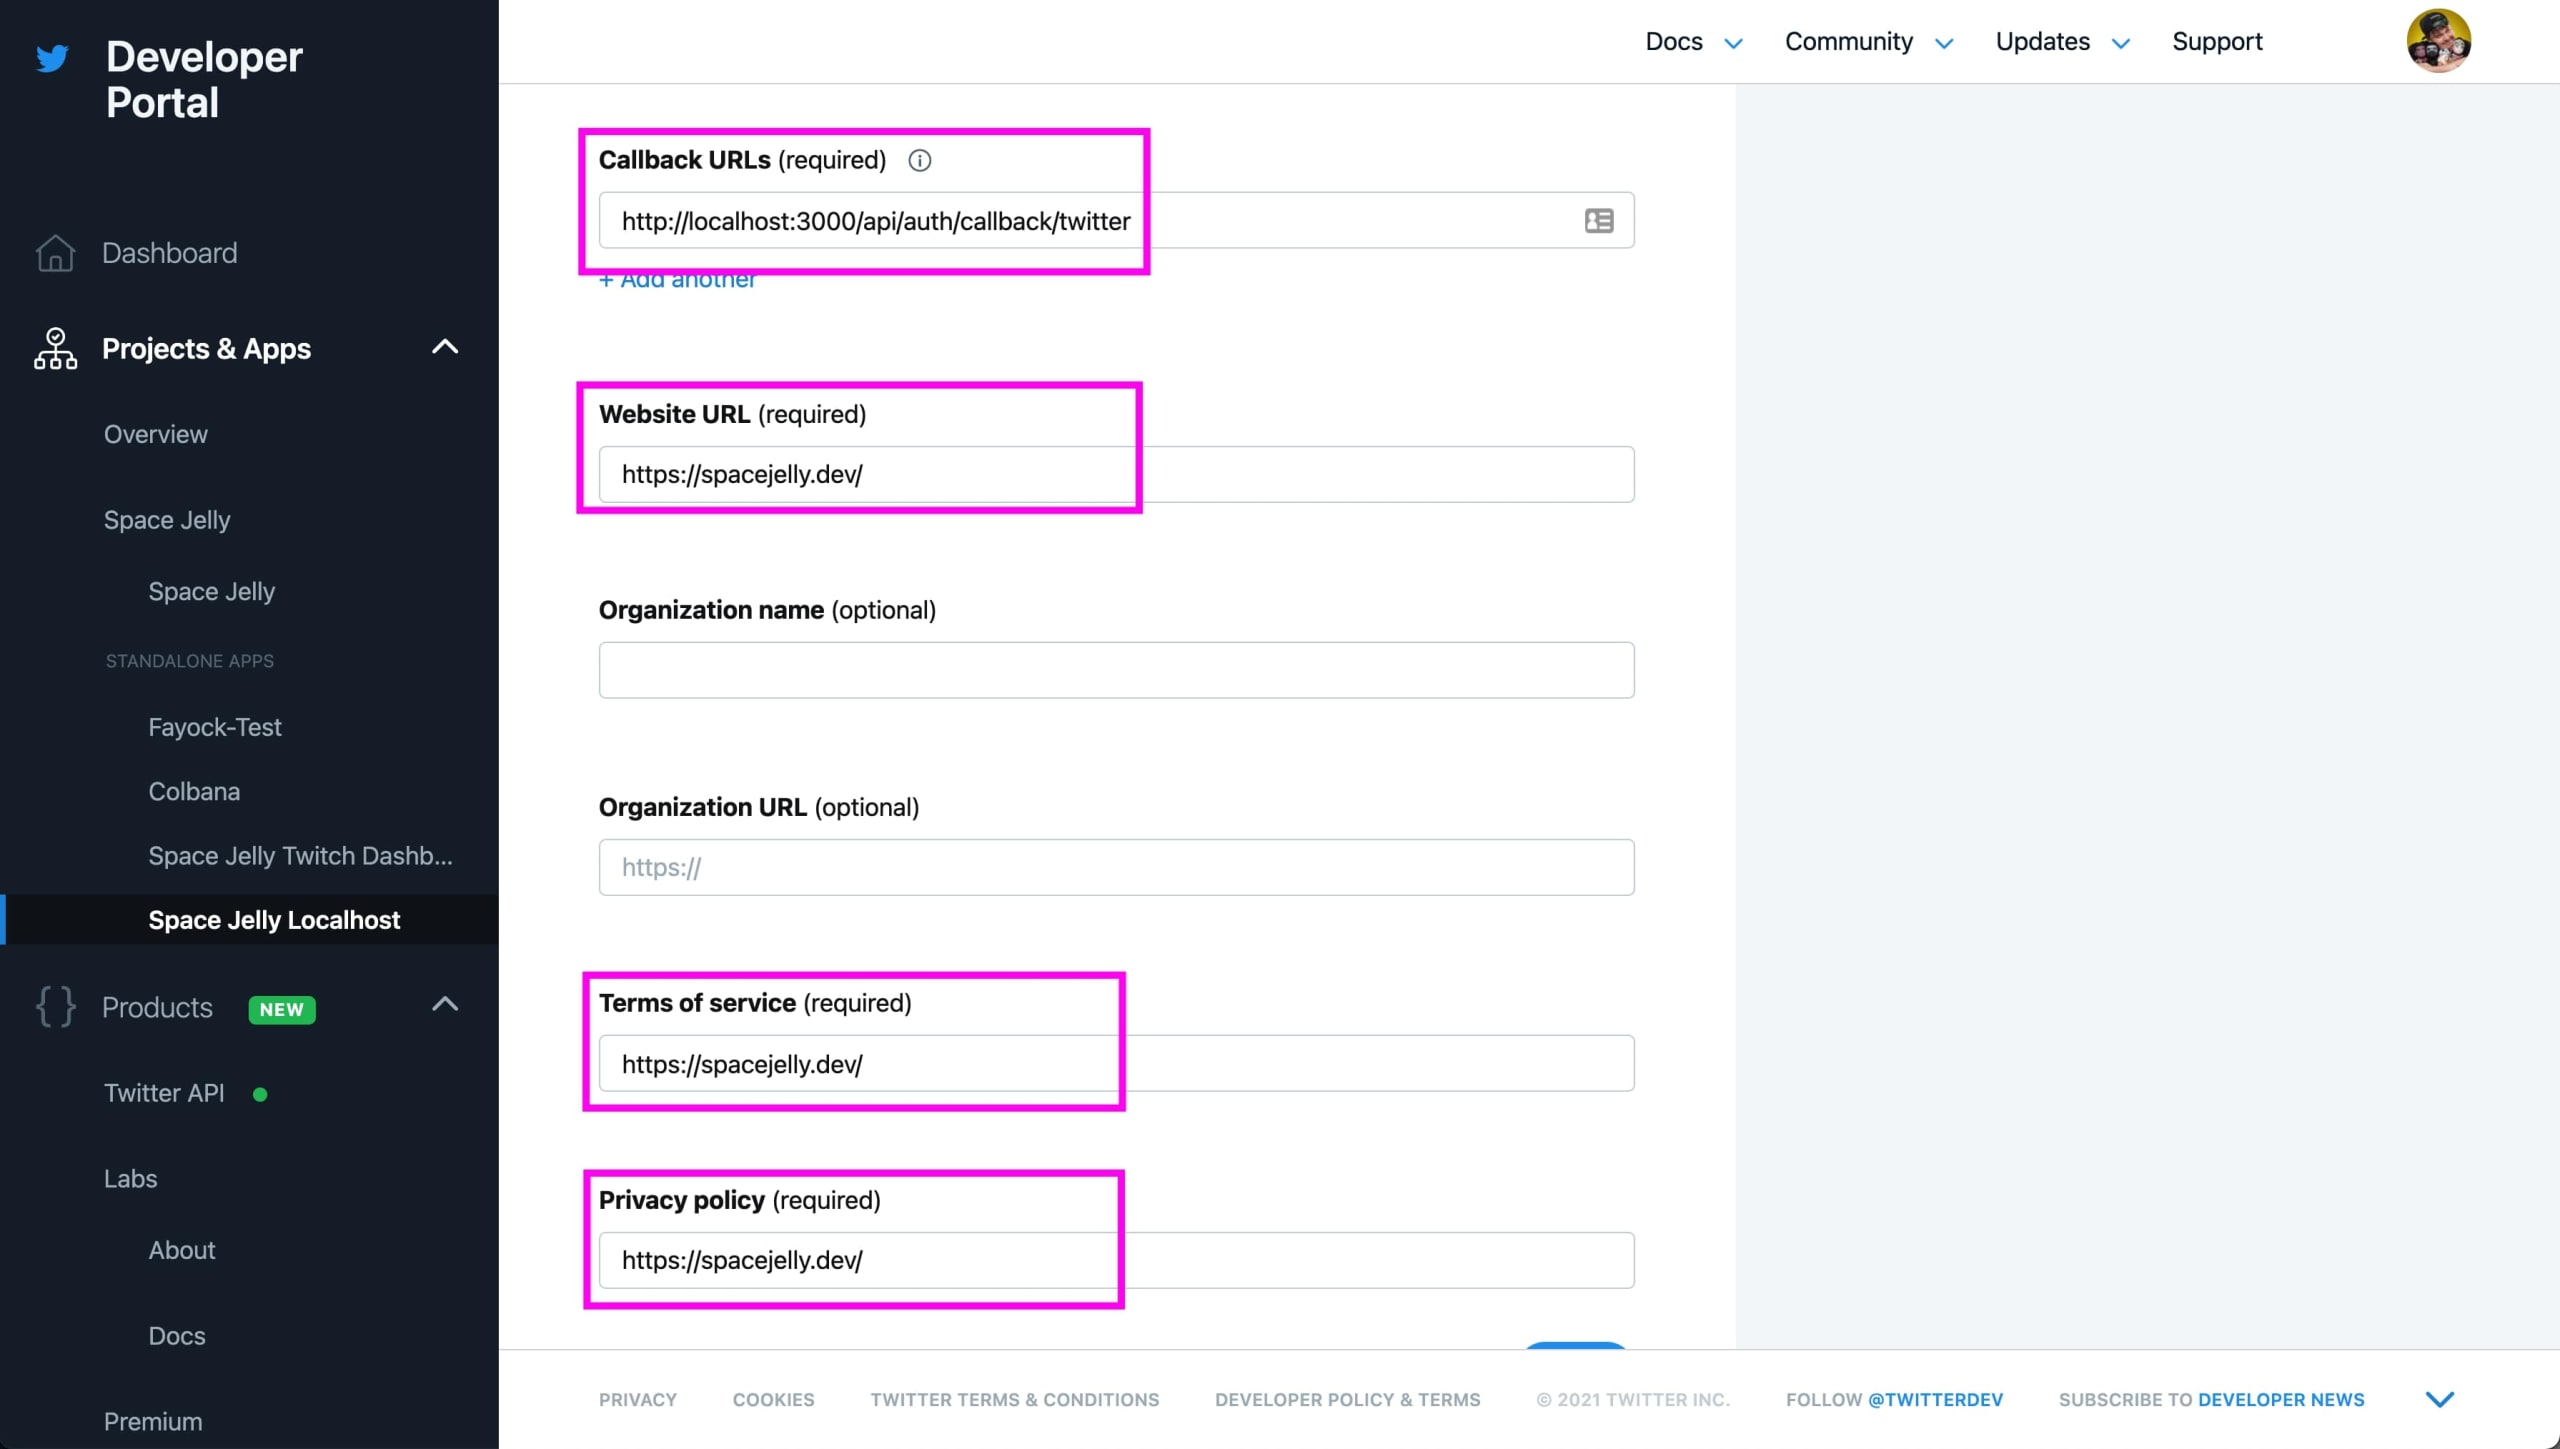
Here’s a breakdown of what we need:
- Callback URLs: this will be what our auth service will use to communicate with Twitter when authenticating. When developing locally, it should be the address of your server. When on production, it should be your public-facing URL (Ex: http://localhost:3000/api/auth/callback/twitter)
- Website URL: this should be the website where your application will ultimately live
- Terms of Service, Privacy Policy: these 2 pages should live on your website, or somewhere public, that gives your application users information about what you will do with their information for your app
Once those are all filled out and saved, we’re ready to get back to our app.
Now that we have our API keys, we want to add them to our application.
Back inside of our .env.local file, update the values of the following API keys:
TWITTER_CONSUMER_KEY– API Key (or Consumer Key)TWITTER_CONSUMER_SECRET– API Secret (or Consumer Secret)
At this point, we’re ready to start integrating authentication into our app!
Step 3: Adding clientside Twitter login to Next.js with NextAuth.js
There’s two main components of integrating NextAuth into our application:
- The NextAuth
Providerwhich allows our application to globally access the session via React Context - The NextAuth client API including
signIn,signOut, anduseSessionwhich will allow us to perform the actions they describe as well as gain access to the information of our user’s session
To start, let’s add our NextAuth Provider. Inside of pages/_app.js first import the Provider:
import { Provider } from 'next-auth/client';Then we need to wrap our existing <Component. Update the MyApp component to the following:
function MyApp({ Component, pageProps }) {
  return (
    <Provider session={pageProps.session}>
      <Component {...pageProps} />
    </Provider>
  );
}
Here we’re wrapping our Component and we’re additionally passing our session as a prop to that provider.
With NextAuth globally set up, we can now use the client API.
Inside of pages/index.js first import the following:
import { signIn, signOut, useSession, } from 'next-auth/client';Then we can use the useSession hook to grab our session data:
export default function Home() {
  const [session] = useSession();
Before we can check on a user’s session though, we need to be able to give someone the ability to log in.
Still inside pages/index.js let’s replace the description paragraph at the top of the main content with:
{!session && <>
Not signed in <br/>
<button onClick={() => signIn()}>Sign in</button>
</>}
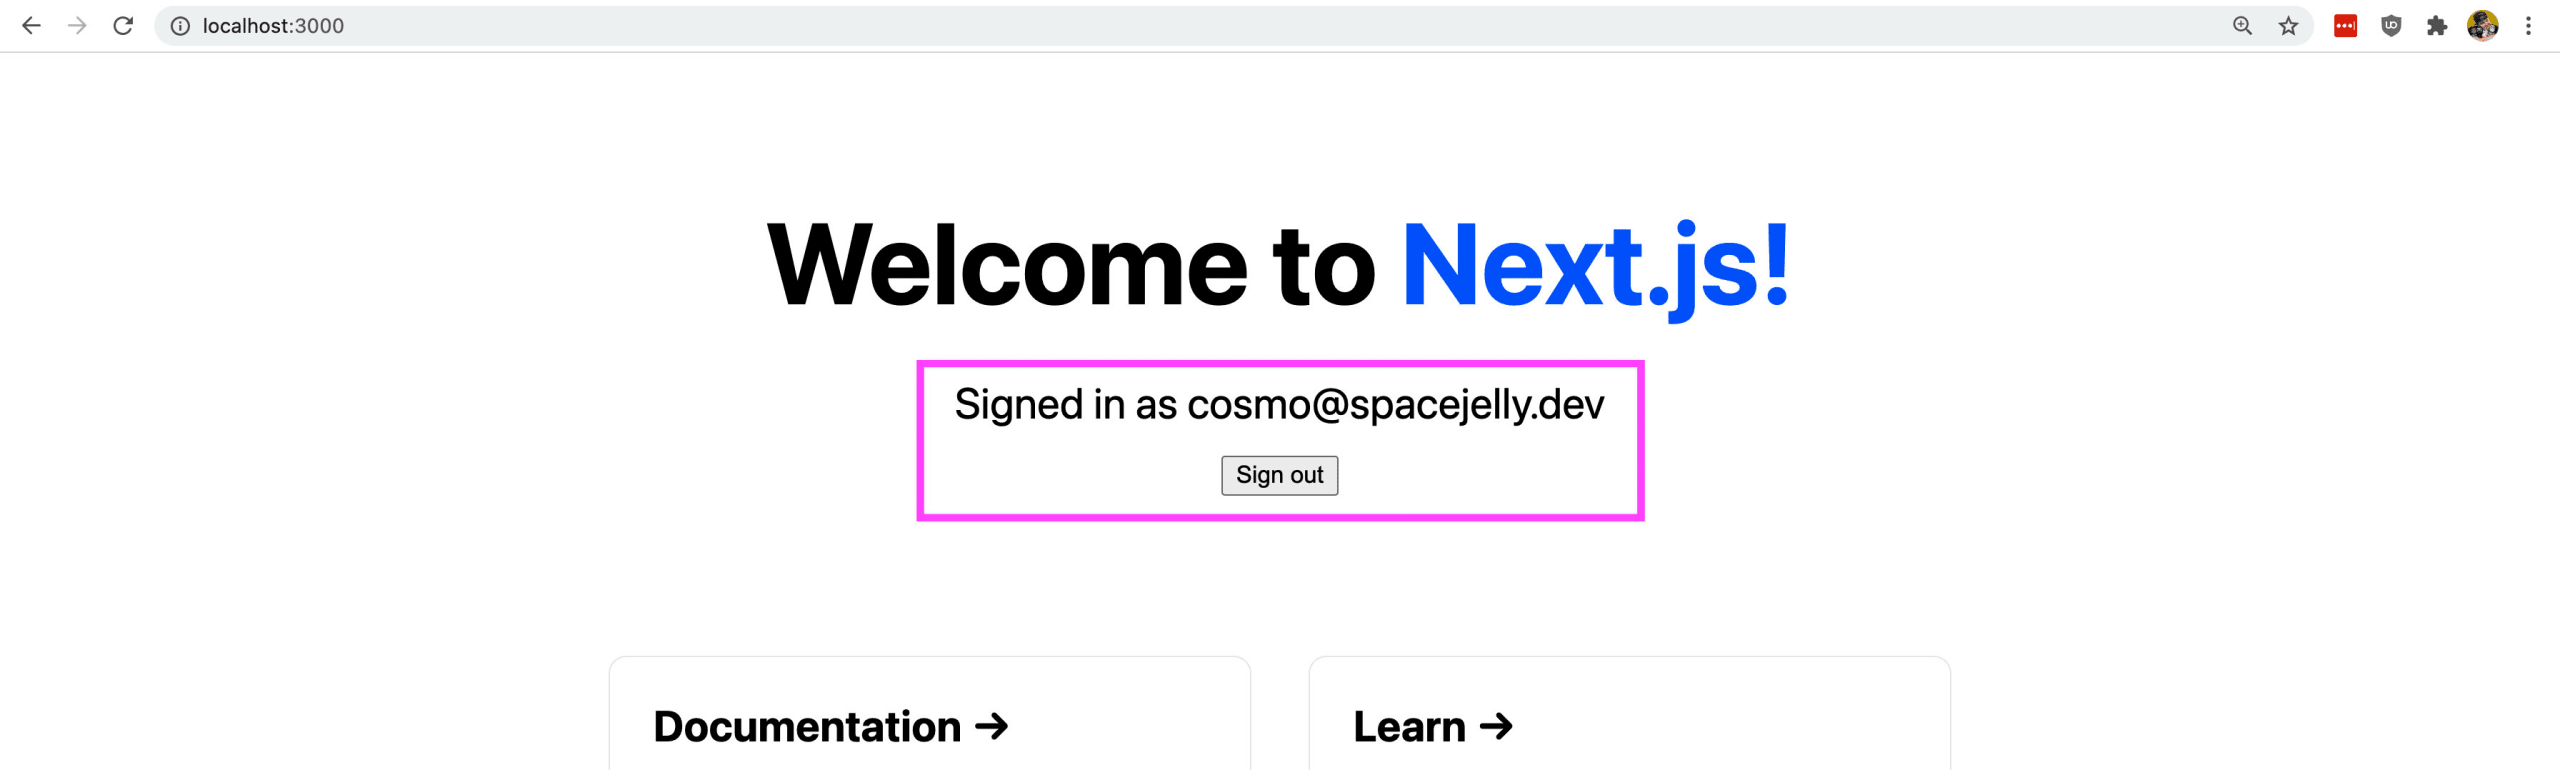
{session && <>
Signed in as {session.user.email} <br/>
<button onClick={() => signOut()}>Sign out</button>
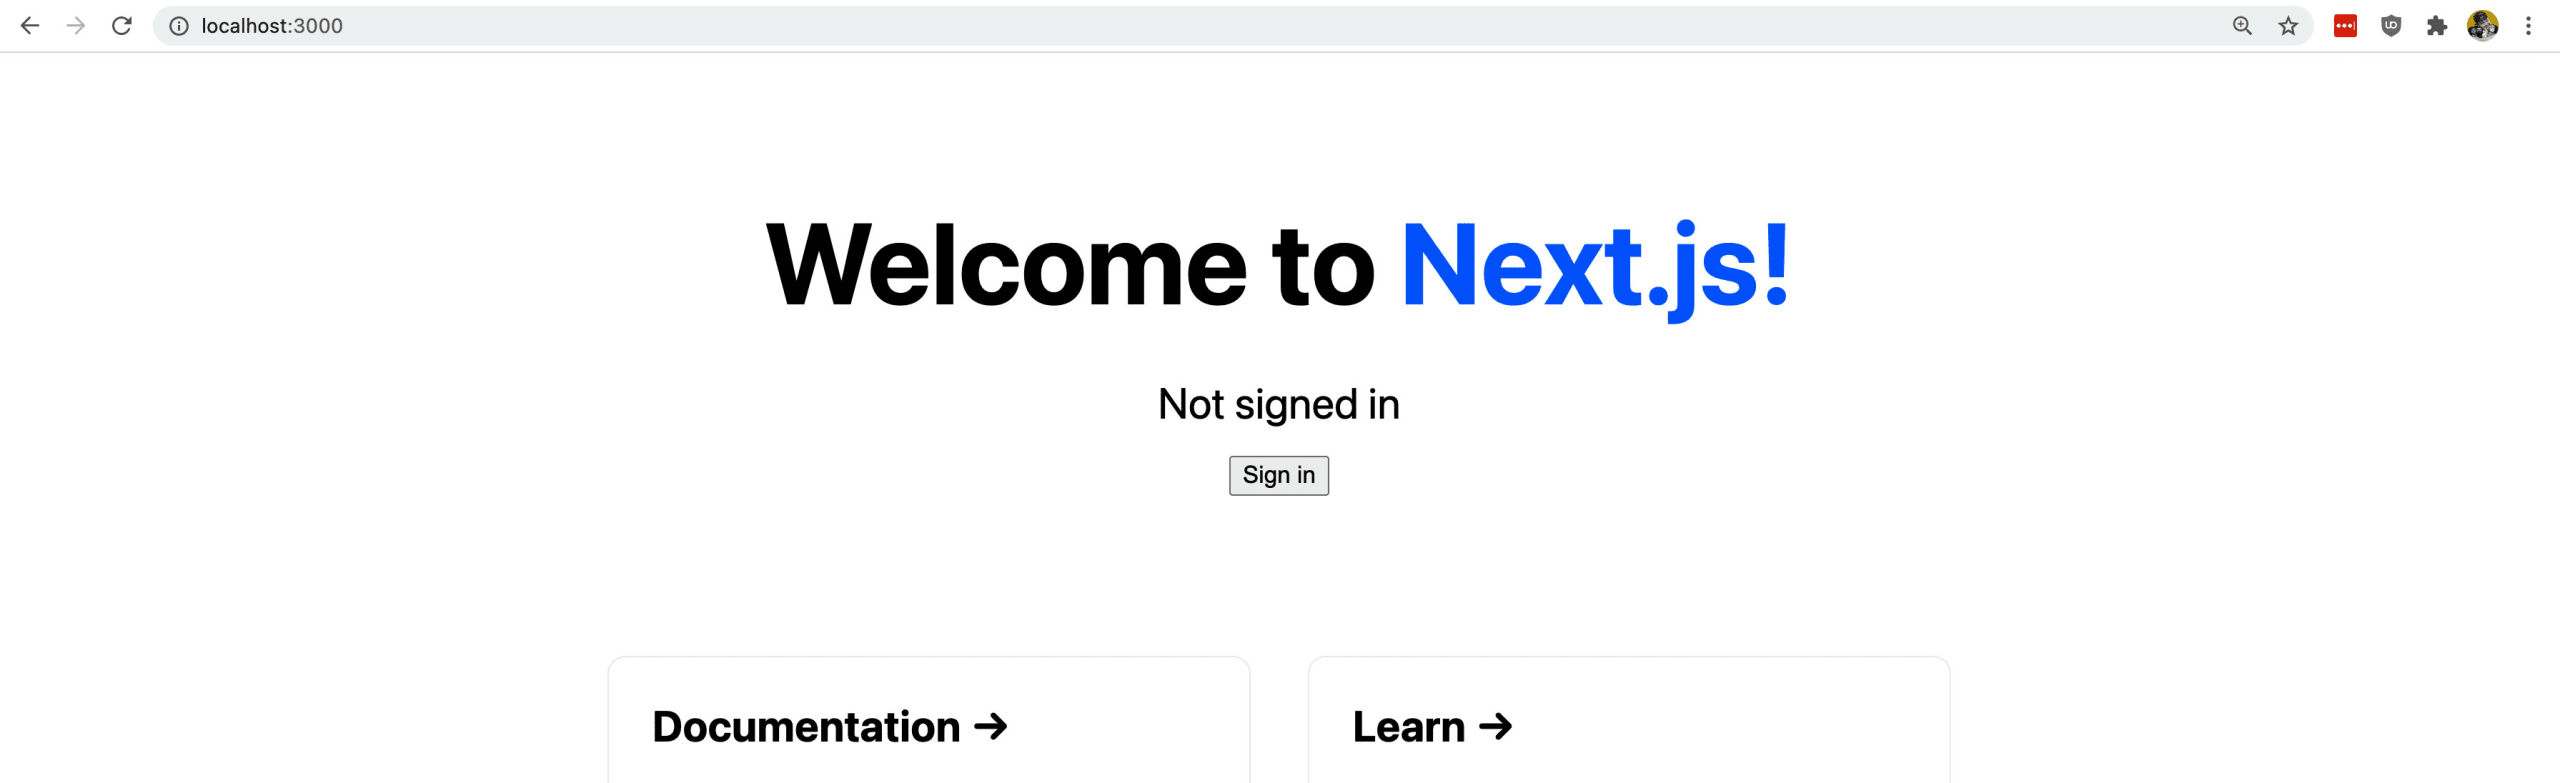
</>}And now if we open and reload our app in the browser, we can see that see that we’re not logged in, but we have a Sign In button.
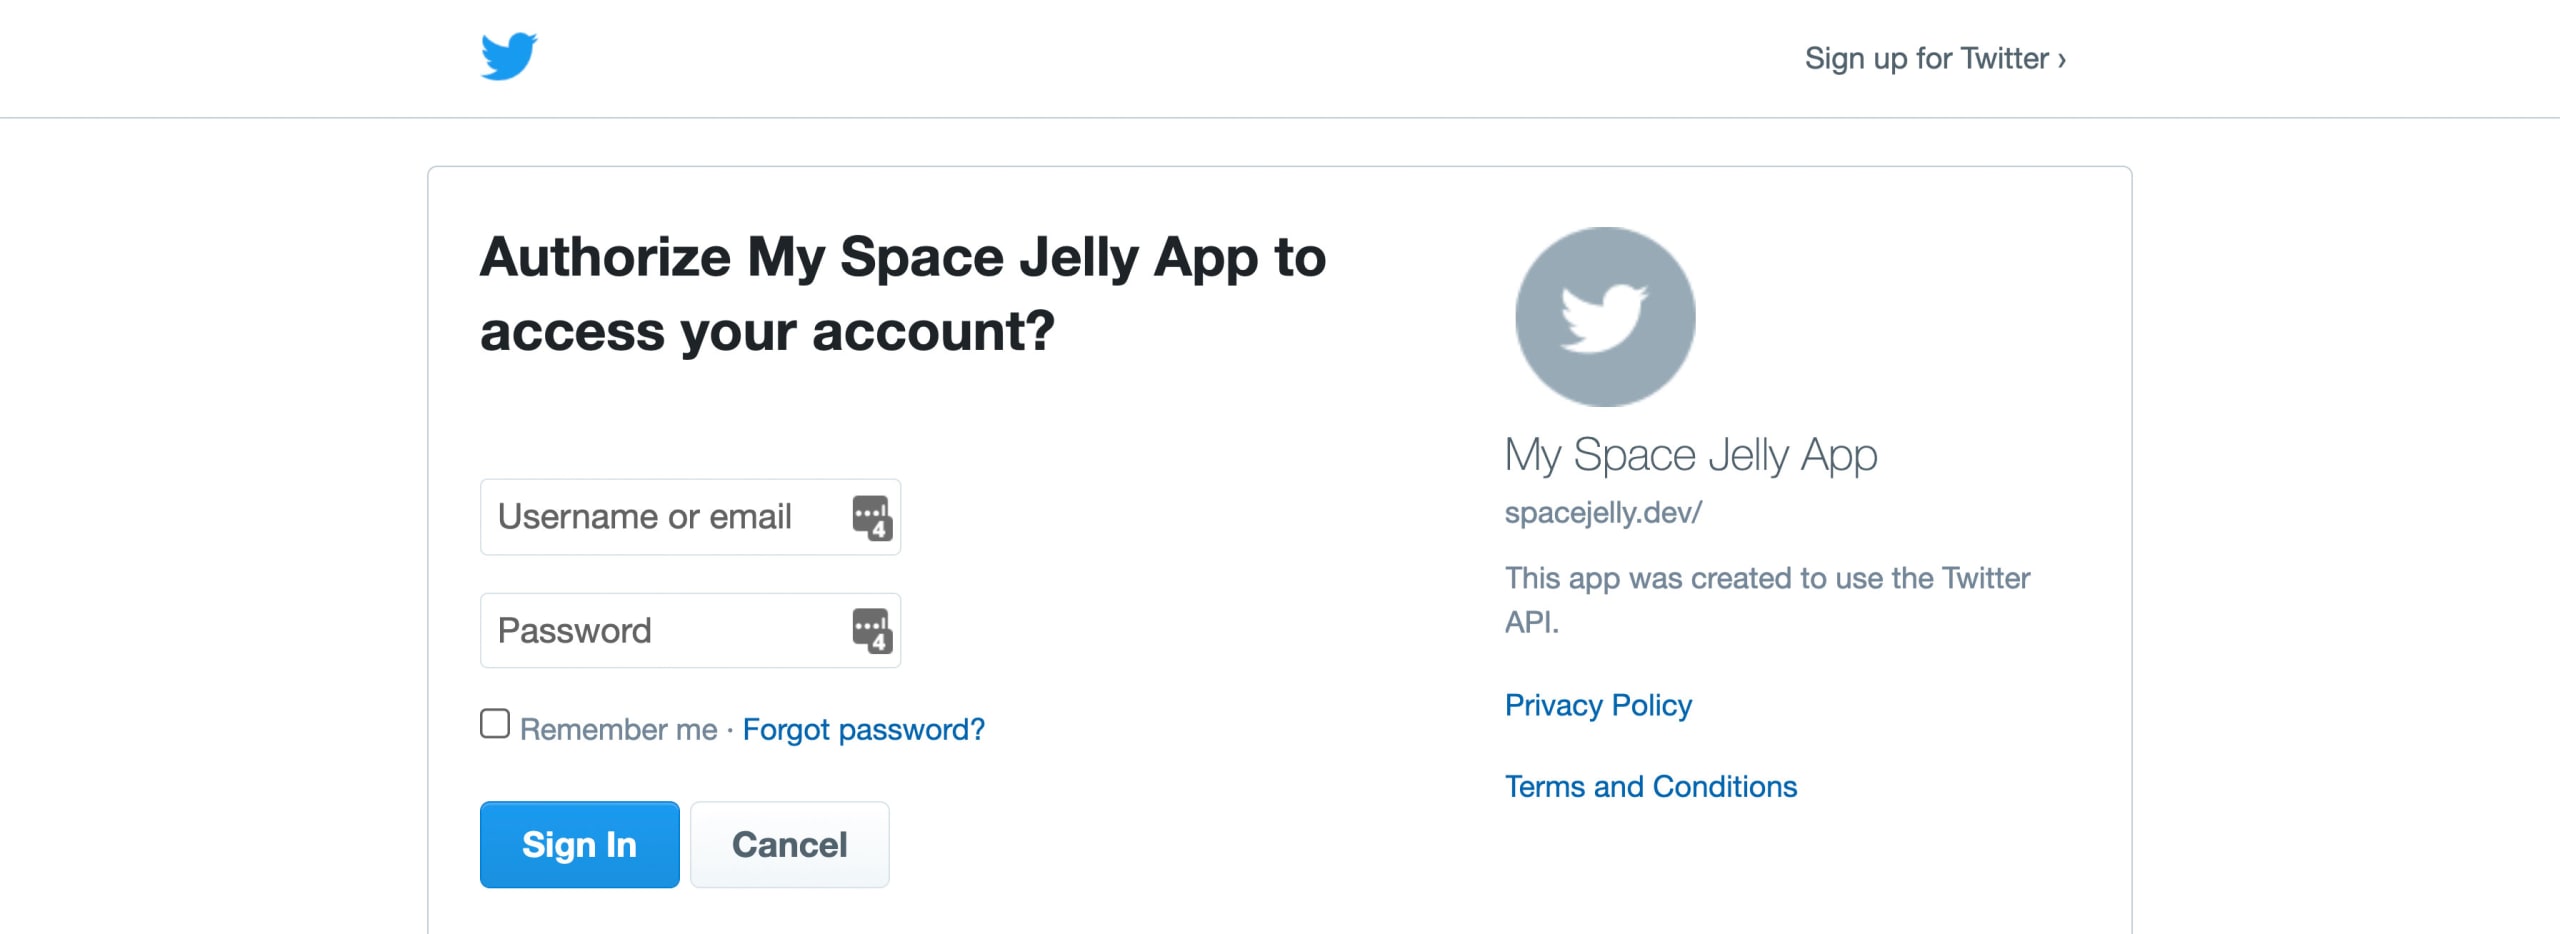
If we go ahead and click that button, we get taken to a screen that includes another button, where we’ll now be able to log in with our provider, in our case Twitter.
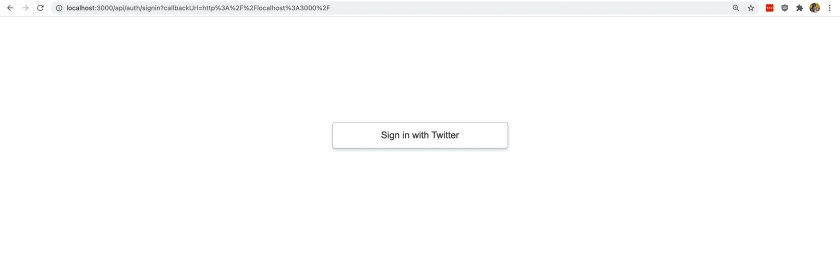
Once you do, you’ll be taken to a new screen that will allow you to sign in and authorize your Twitter Account with the app you created in Step 2.
One you do, you’ll be taken back to your Next.js application, where you should now see your Twitter account’s email stating that it’s “Signed in”!
To see how this is working, let’s look inside of the session variable. Right below our useSession hook, let’s add a console.log:
const [session] = useSession();
console.log('session', session)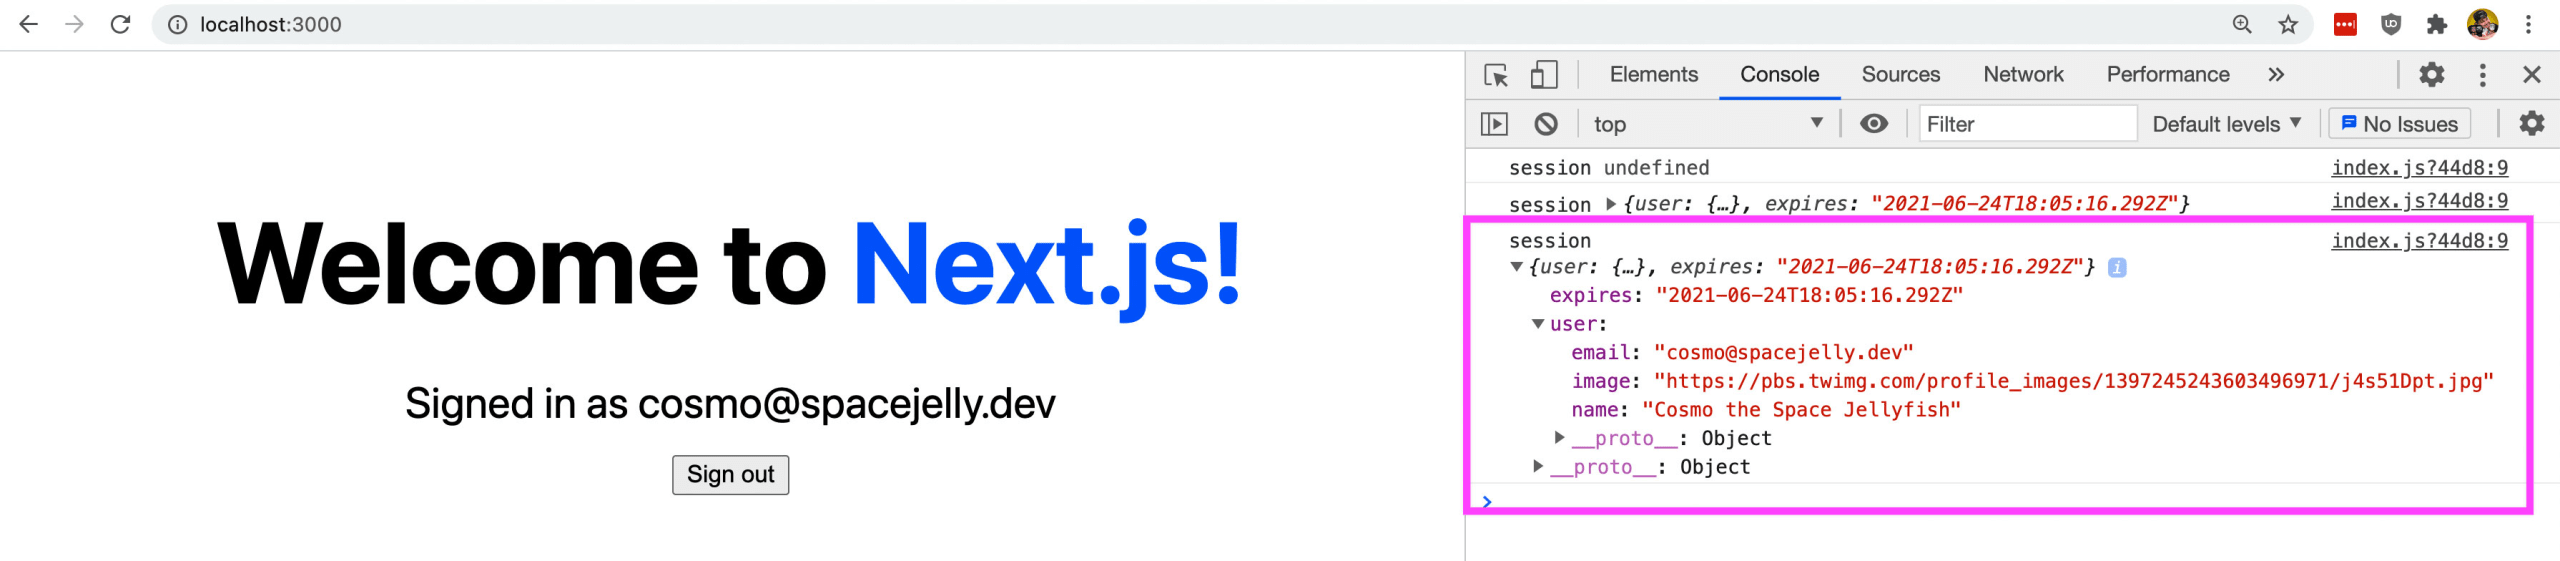
We can see that we have access to our Twitter account’s name, email, and even the avatar.
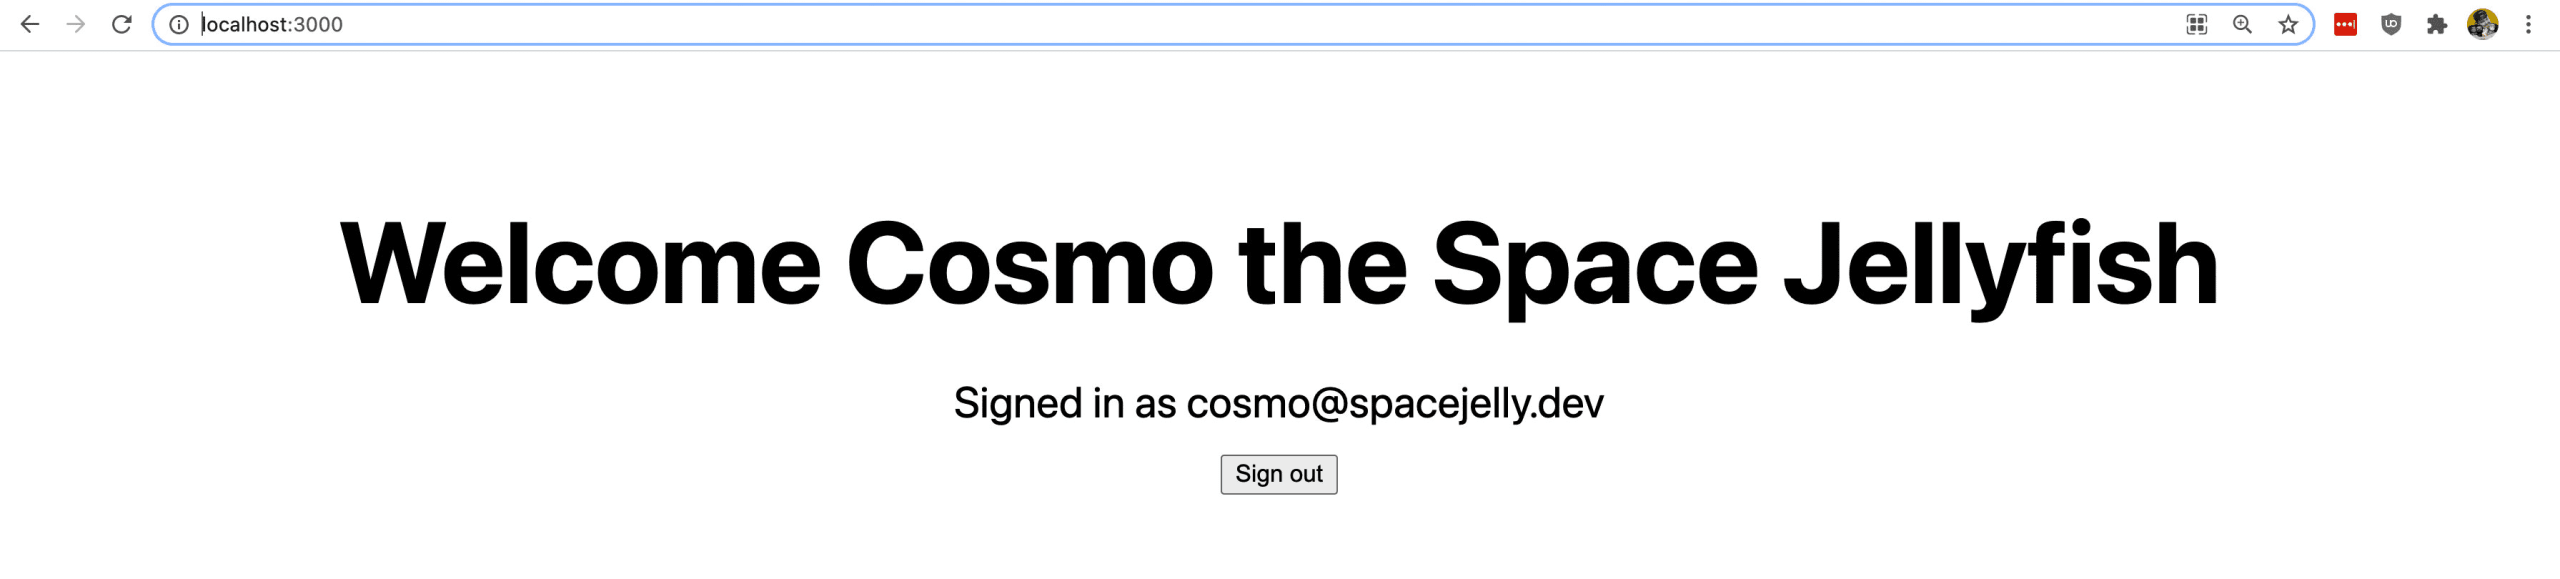
That means, we can update our UI to welcome the Twitter account instead of to Next.js, like:
<h1 className={styles.title}>
  Welcome { session ? session.user.name : 'to Next.js' }
</h1>
And if we look in the browser, we can now see our welcome message!
Step 4: Accessing a user’s session serverside in getServerSideProps with NextAuth
Finally, Step 3 shows us how to access that information clientside, which means we make a request to the API in the browser to access our session data.
Loading information like that clientside has its advantages, where you can export the application completely static rather than requiring server rendering, but it also has it’s disadvantages, like the flicker on first load where it shows the unauthenticated information first.
What if we wanted to load that information on the server?
The great thing about NextAuth is we have access to that same information right inside of the Next.js getServerSideProps function.
To see how this works, first let’s first add getSession to our import statement in pages/index.js:
import { signIn, signOut, useSession, getSession } from 'next-auth/client';Then at the bottom of the page, add:
export async function getServerSideProps(context) {
  const session = await getSession(context);
  return {
    props: {
      session
    }
  }
}
In the above, we’re:
- Creating a nsesew async
getServerSidePropsfunction - We’re using our
getSessionfunction to make a request for our session - We pass that function our app
contextwhich comes as an argument fromgetServerSideProps - Then we finally return that session information as a new prop
Now that we have our new prop, we need to define that prop in our home component.
export default function Home({ session }) {
  // const [session] = useSession();
Here, we’re adding session as a prop and we’re additionally commenting out our useSession hook because we’re already getting our session information serverside.
But now if we reload the page, we should see exactly what we saw after Step 3, where we now see our logged in user information from Twitter, which was all loaded serverside!

What’s next?
Deploy the app to production!
Deploying the application should be pretty straightforward whether you’re using Vercel or Netlify.
Both options work with Next.js out of the box, allowing you to deploy the serverless functions.
There will be two things you’ll need to do to make it work in production though:
- Add the environment variables from
.env.localto your environment - Update the callback URL in your Twitter developer portal to your production URL
Once those things are set up you should be ready to log in live on the web!
Using a database to store user information related to the app
Part of the benefit of building an application with login capabilities is the ability to store account information to personalize someone’s experience.
Maybe you’re creating a course or some sort of profile, regardless, setting up a database with the NextAuth adapters allow you to easily interface and store that information.
Adding more authentication providers like GitHub and Google
The great thing with NextAuth is it gives you the ability to work with a lot of auth providers out of the box.
Check out the full list over at NextAuth.