What are GitHub Actions?
GitHub Actions are a tool from popular Git provider GitHub that provides CI / CD (Continuous Integration / Continuous Deployment) features right inside of your repository.
Using a YAML file, you create a new environment on GitHub’s servers and run code tasks that can help you automate your workflow.
For instance, if you wanted to simply install the packages of your npm project and run a suite of tests, you can add:
name: Tests

on:
  push:
    branches: [ master ]
  pull_request:
    branches: [ master ]

jobs:
  test:
    runs-on: ubuntu-latest
    steps:
    - uses: actions/checkout@v2
    - uses: actions/setup-node@v2
      with:
        node-version: '12'
    - run: npm ci
    - run: npm test
This would first install your packages using npm ci (which installs based on your package-lock.json file then run the tests that you have set up in your project.
While using existing actions with a YAML file is fun and powerful, we’re going to dig into how you can create your own GitHub Action letting you run your own custom scripts.
Why would you want to create a custom GitHub Action?
More often than not, you probably wouldn’t want to go out and create your own custom Action. There’s a huge marketplace that has a ton of integrations already created, requiring less code and maintenance for your project.

But whether you’re building your own tool, working with custom infrastructure, or simply can’t find something that fits your needs, being able to create your own custom GitHub Action gives you another level of power to hook right into GitHub and level up your repo.
What’s an example of a Custom GitHub Action?
As part of my role as a Developer Advocate for Applitools, I concentrate on working with the developer community and experimenting with integrations that could help make developer’s lives easier when integrating the tool.
When getting set up with Applitools, you need to add a test runner if you don’t already have one set up then add the Applitools SDK on top. If you’re already set up with testing, this is pretty painless! But I wanted create an “out-of-the-box” Action that someone could add to their repo and, with an account, get instant Visual Testing coverage on their website or application.
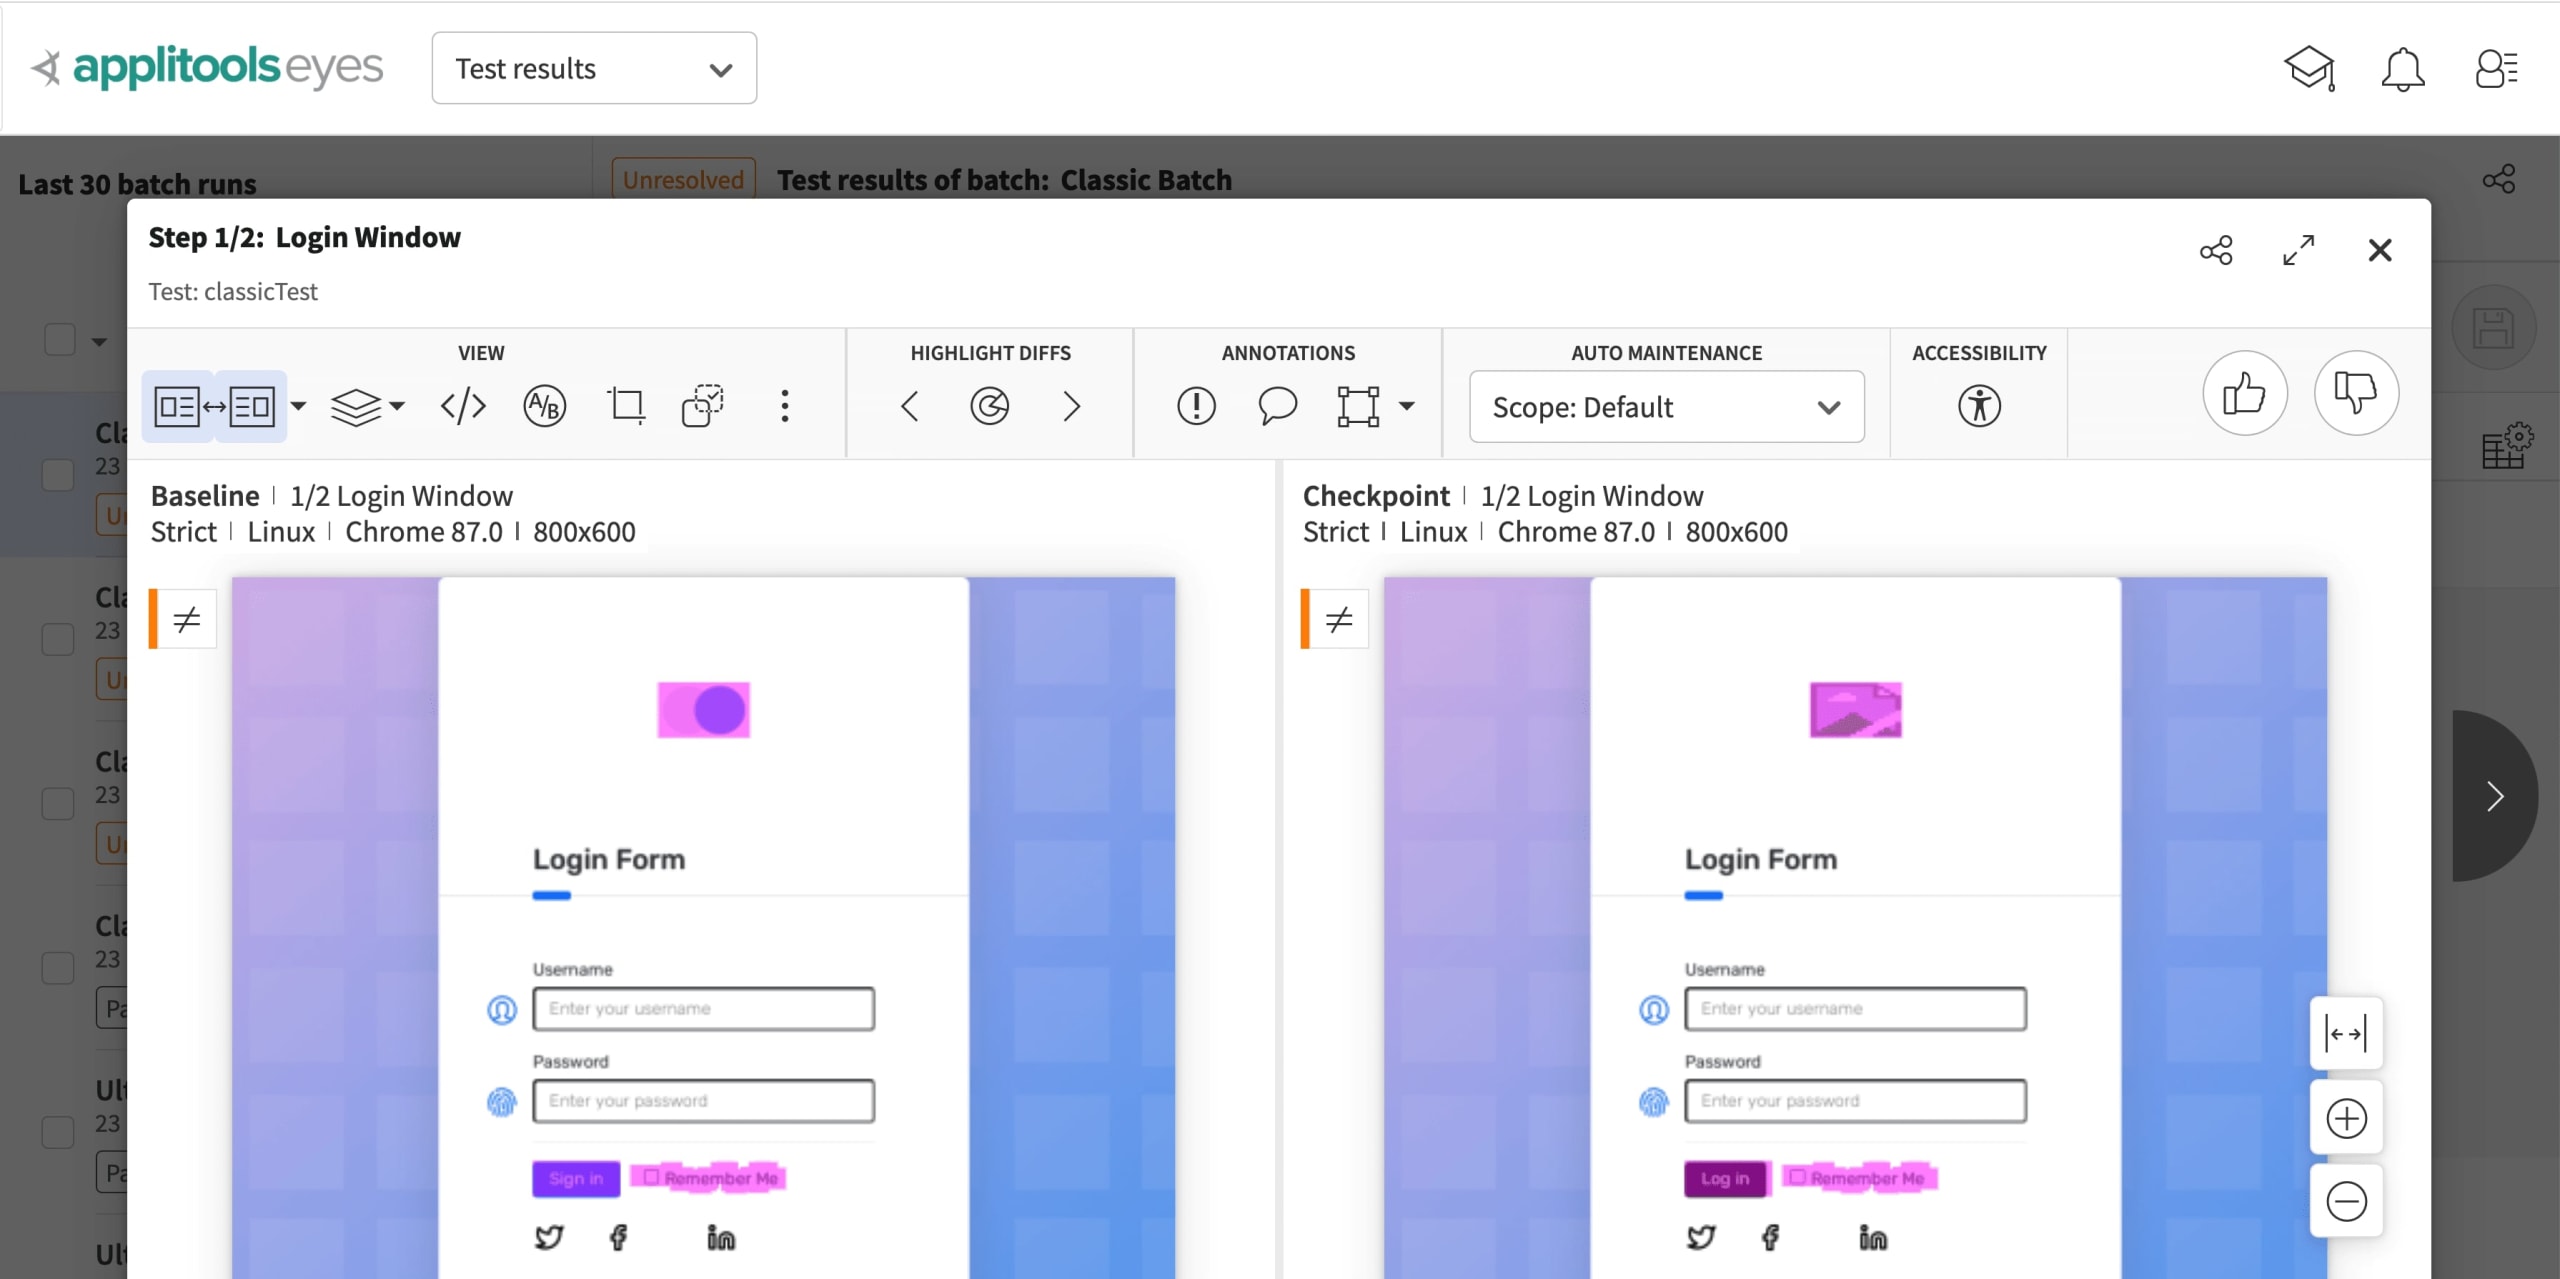
So with my custom GitHub Action, I use Docker to create a new environment with the test runner Cypress and the browser Chrome already installed. Once that environment’s available, I install the Applitools SDK, crawl the input site, and run test coverage on those results.
While I probably could have achieved this all within a long, single YML file, that action is now available for others to use on their own projects. If you’re curious, the Action is all open source on GitHub.
What are we going to build?
For our custom GitHub Action, we’re going to use node and JavaScript to add a new comment on every Pull Request created saying “Thank you!” to the person who created the request along with a GIF from the Tenor API to make it a little extra fun.
Using the GitHub Action should be pretty simple. Whenever someone wants to add this to their GitHub project, they would reference the Action like:
- uses: '[Action ID]'
  with:
    GITHUB_TOKEN: ${{ secrets.GITHUB_TOKEN }}
    TENOR_TOKEN: ${{ secrets.TENOR_TOKEN }}
We’ll need those two environment variables (GITHUB_TOKEN, TENOR_TOKEN) in order to allow our Action to successfully post a comment to the Pull Request and to use Tenor’s API.
So let’s get started!
Step 0: Creating a new GitHub respository
Before we get started with our actual code, we need a respository to work out of.
To do this, we’re going to start by creating our repository first, as it just make it a little bit easier to set the project up and immediately get productive.
Navigate over to github.com and once you’re logged in, create a new repository (can be public if you’d like).

Next, clone your new repository locally on your environment.
git clone git@github.com:[your-username]/[your-repository-name].gitAnd once it’s finished, it should be empty, but now you can open up that new folder in your favorite code editor and we’ll be ready to go!
Step 1: Creating a new GitHub Action
Getting started with our new Action will involve some scaffolding of our repository. Mainly, we’ll need to initialize a new npm project and add a few configuration files so that GitHub can actually recognize our project as an Action.
This will be the longer step of the tutorial as we’ll need our initial setup before moving on to building the functionality into the Action.
Initializing a new npm project
Starting with npm, let’s initialize a new npm project:
npm initWhen you run this, it will ask you a few questions like what you want the name of the package to be, the starting version, and the author (your name). Feel free to hit enter for all questions and use the default (empty for most) as we won’t need that for now.
You should now be able to see a new package.json file at the root of your project!
Note: you can always update the values for your npm project inside of your
package.jsonfile!
Registering a new GitHub Action
Next, let’s create a new file called action.yml and inside it, add the following:
name: 'Thank You Action'
description: 'Say "Thank You" to new pull requests'
author: '[Your Name]'

inputs:
  GITHUB_TOKEN:
    description: 'GitHub token'
    required: true
  TENOR_TOKEN:
    description: 'Tenor API token'
    required: true

runs:
  using: 'node12'
  main: 'dist/index.js'
In the above, we’re doing the following:
- Defining a new action called “Thank You Action” along with some metadata
- Adding 2 inputs,
GITHUB_TOKENandTENOR_TOKENwhich we’ll use in order to use the GitHub and Tenor APIs in our action - Configuring our action to “run” node.js version 12
- Setting our “main” entry point to our script at
dist/index.js
We won’t really see this file do much in practice, but GitHub is able to see this file and recognize it, allowing our Action to actually work.
Creating a new script for our Action’s entrypoint
To make our Action actually run, we’ll need a script. For Step 1, we’re going to set up a basic script so we can see something work.
Inside of the root of your project, create a new folder called src with a new file inside called action.js (src/action.js).
Inside of that file, let’s add our new script:
async function run() {
  console.log('Hello, world!');
}

run();
All we’re doing here is creating a new asynchronous function that logs “Hello, world!” to the console and immediately fire that function.
We can even try this out by running this script inside of our terminal:
node src/action.jsSince we have node installed locally and the script isn’t doing anything fancy yet, we can test it out and see it log our message.

Building the Action script with Vercel’s ncc
While we’re not yet doing anything inside of our Action that requires anything more than node to run, we’re going to set up our Action to build and compile into a dist folder which is what our Action will use to actually run the code.
Note: If you remember, we set the
mainattribute inside ofaction.ymltodist/index.js!
To start, we can first install ncc from Vercel, which will take our scripts and dependencies and package it all up in one file for us.
In your terminal, install the file with:
yarn add @vercel/ncc -DNote: Using yarn isn’t a strict requirement, so feel free to use npm instead of yarn here and for the rest of the tutorial if you prefer!
We’re installing ncc as a dev dependency because when ncc runs, it will compile it into a folder, and our project won’t actually need it to run.
Next, inside of our package.json file, under the scripts object, let’s add a new script:
...
"scripts": {
  "build": "ncc build src/action.js -o dist"
  ...,
},
...
This sets up a new script so any time we run the build command, it will tell ncc to build our Action script and output it into the dist folder.
We can try it out by running:
yarn buildAnd once it’s finished, you should now see a dist folder at the root of your project with an index.js file inside of it.
If you look inside it, you might notice a bunch of weird-looking code. ncc uses webpack to compile our script so that it’s able to be used as a module, allowing different processes to understand it.
You can even try out the compiled script by running:
node dist/index.jsAnd like before, you should see “Hello, world!”.
Note: the reason we’re compiling our script is when GitHub tries to use our Action from another repository, it doesn’t have all of the dependencies available. Packaging it up in a single file allows our script to work with just that one file!
Adding a workflow to test the custom GitHub Action
To finish up the code of Step 1, we’re going to add a test Action workflow inside of our project, referencing our code, so that any time we change the code, we can actually see it working.
Create a new folder called .github, then inside that create a new folder called workflows, and finally inside that a new file called test.yml (.github/workflows/test.yml).
Inside of our test.yml file add:
name: Test

on:
  pull_request:
    types: [opened]

jobs:
  test:
    runs-on: ubuntu-latest
    steps:
      - uses: actions/checkout@v2
      - uses: ./
What we’re doing here is:
- Creating a new Actions workflow called Test
- Triggering it any time a new Pull Request is opened
- Creating a new job called test
- Telling it to run on the latest version of ubuntu
- Checking out the code of our project
- Use the code inside of that project as a step in our job
And now, we can add and commit all of these files and push them up to our repository to make it available to test in our project!
Note: Consider adding a
.gitignorefile that includesnode_modulesto avoid checking those dependencies in to the repo.
Testing the new GitHub Action with a Pull Request
Finally, let’s test that our new GitHub Action works!
At this point, all of our code should be committed and pushed to our GitHub respository. To test it out, all we need to do is create a new Pull Request.
An easy way to do this is inside of the GitHub UI, add a README or click the Edit button on the README file, add something like “test” at the bottom (don’t worry, we don’t need to save it), and at the bottom, intsead of committing to the main branch, select the option to create a new branch.

It will take you to a new page where you can click Create pull request.
Once the Pull Request is created, in a few seconds GitHub should now show that it’s running a new “check”. After that successfully passes, click the Details link next to the “Test / test (pull_request)” line.

You’ll be taken to the logs of that check, where if you open up the “Run /./“ dropdown, you should now see your message “Hello, world!”!

Which means yay, we just successfully ran our first custom GitHub Action!
Step 2: Commenting “Thank you!” on a new Pull Request
When coming out with the GitHub Actions feature, GitHub also released a variety of utilities that allows developers like us to more easily interface with a repository.
For our purposes, we need to use GitHub’s Octokit, which is provided for us as a package that we can use in our Action at @actions/github on npm as well as their Core utility, which will allow us to get input from workflow files.
Using GitHub toolkit
So the first step is installing our packages:
yarn add @actions/github @actions/core -DOnce those are finished installing, inside of our src/action.js file, we can import the packages:
const core = require('@actions/core');
const github = require('@actions/github');
In order to use Octokit, we need to find our GITHUB_TOKEN. If you remember from our action.yml file, we configured an input to be available for that value.
So first, at the top of our run function, let’s add:
const GITHUB_TOKEN = core.getInput('GITHUB_TOKEN');Next, we need to get an instance of Octokit and find some data from our GitHub context that will let us access the pull request.
Add the following snippet after we get our GITHUB_TOKEN.
const octokit = github.getOctokit(GITHUB_TOKEN);

const { context = {} } = github;
const { pull_request } = context.payload;
In the above, we’re:
- Getting a new instance of Octokit with our GitHub token
- Destructuring the context of our active job
- Finding the pull request from our active context
Commenting on a Pull Request
Now, we can use the createComment method from the Octokit Issues endpoint and create a new comment with our message:
await octokit.issues.createComment({
  ...context.repo,
  issue_number: pull_request.number,
  body: 'Thank you for submitting a pull request! We will try to review this as soon as we can.'
});
Here we’re:
- Using the createComment method to create a new comment
- Passing in the repository context into our function
- Providing the issue number which is our pull request number in this case
- Adding a body which is the message we want to add to each new Pull Request created
Note: At this point you can get rid of the “Hello, world!” log if you’d like
That should be all the code we need to post a message. Now that we’re finished with our changes, we need to build our script.
In your terminal run:
yarn buildBefore we push any of this code to GitHub, we need to add our GITHUB_TOKEN to our test workflow file to make it available to our Action.
Inside .github/workflows/test.yml, update the uses: ./ step to:
- uses: ./
  with:
    GITHUB_TOKEN: ${{secrets.GITHUB_TOKEN}}
Finally, commit the code to your repository, push it to GitHub, and create a new Pull Request with any change (like our README before).
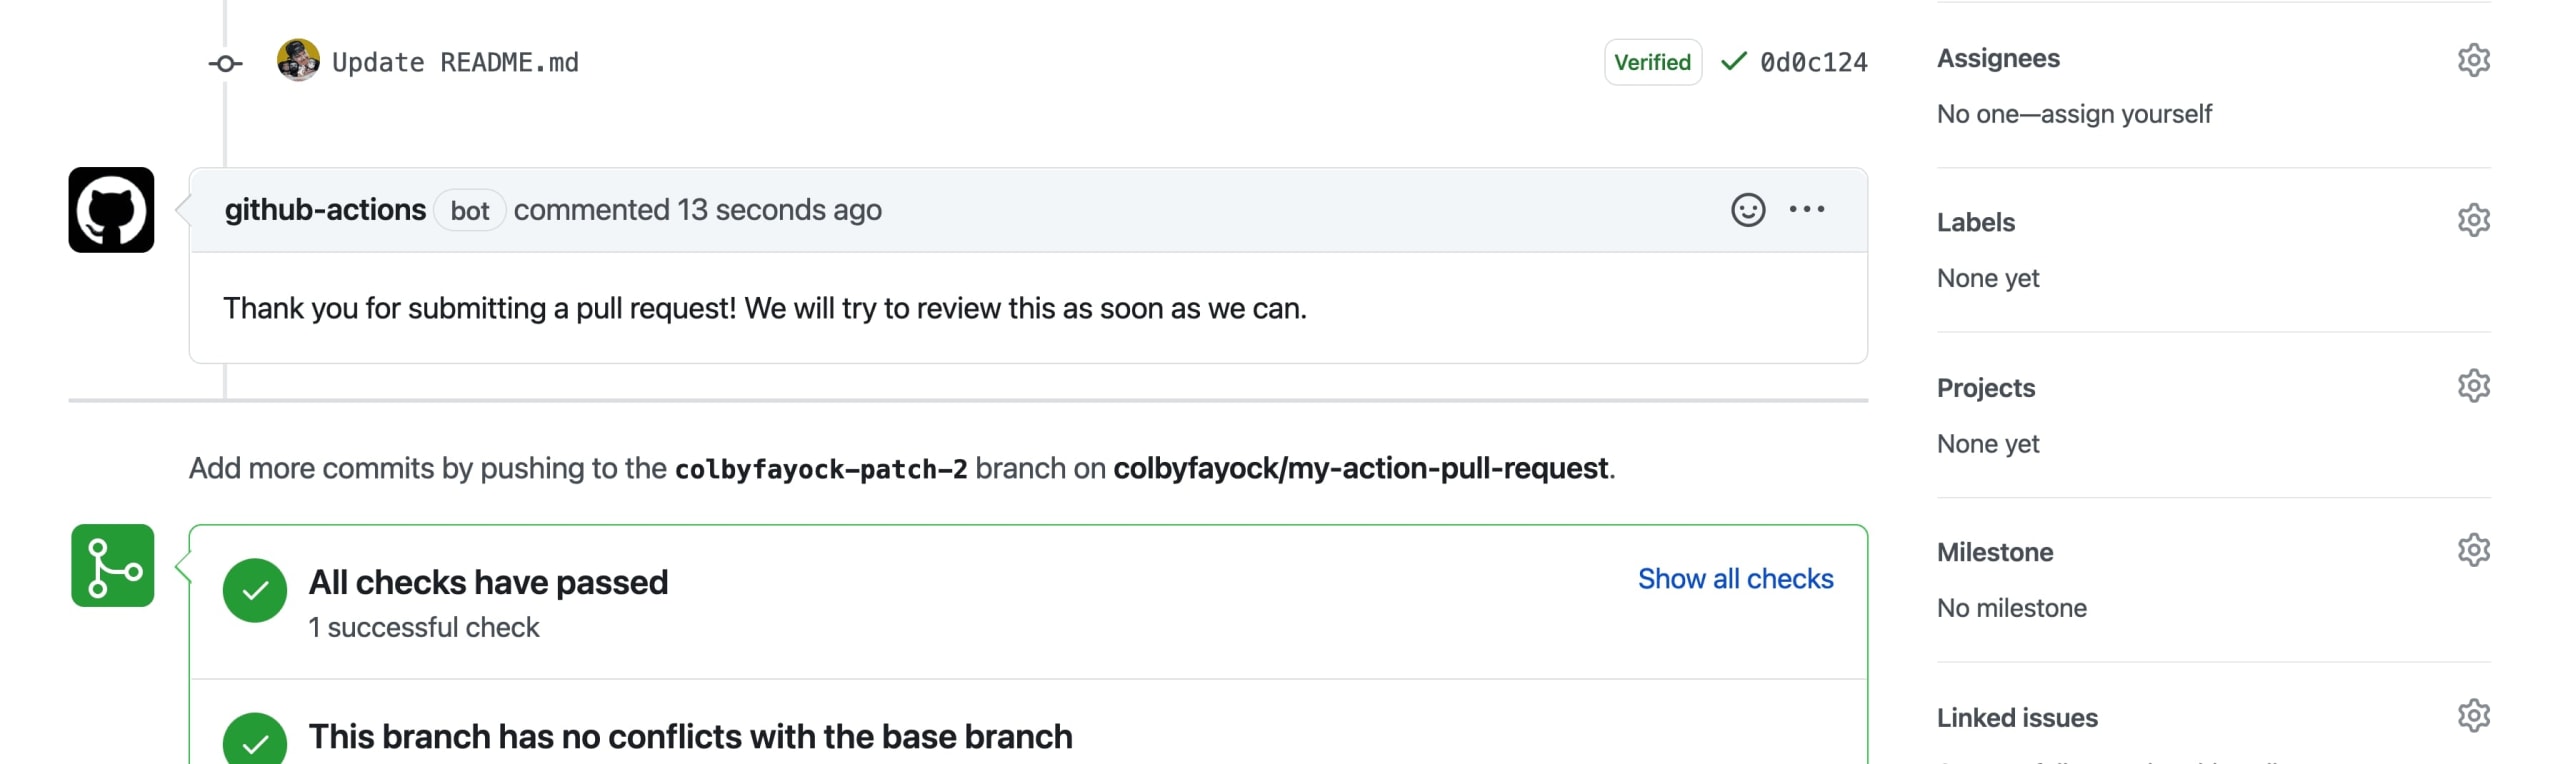
And once our checks successfully finish, we can see that our GitHub Actions bot adds a “Thank You” comment to our Pull Request!
Step 3: Adding a gif using the Tenor API to a Pull Request comment
With our Action generally set up, at this point, we can really add any kind of message we want. So let’s add a GIF, because who doesn’t like a good GIF?
We’ll use the Tenor API in order to make a search request for a random “thank you” GIF.
Searching for a random GIF
To interact with the Tenor API, let’s first install the node-fetch package, which will make the browser’s fetch API available for us inside of node.
yarn add node-fetch -DNext, we can import it at the top of our Action inside src/action.js:
const fetch = require('node-fetch');Before making our request, we need to get our TENOR_TOKEN, which if you remember like our GITHUB_TOKEN, we’ll get as an input.
At the top of the run function add:
const TENOR_TOKEN = core.getInput('TENOR_TOKEN');Now, let’s actually make a request to the Tenor API to fetch a GIF. Inside of the same file, add:
const randomPos = Math.round(Math.random() * 1000);
const url = `https://api.tenor.com/v1/search?q=thank%20you&pos=${randomPos}&limit=1&media_filter=minimal&contentfilter=high&key=${TENOR_TOKEN}`;
const response = await fetch(url);
const { results } = await response.json();
const gifUrl = results[0].media[0].tinygif.url;
The above looks more complicated than it is. What we’re doing is:
- Generating a random number that we’ll use for our API endpoint
- Defining our endpoint URL making a search to Tenor for “thank you”
- Adding a random
pos, which means Tenor will pick a random place to pick a result from so we don’t get the same one each time - Limit it to only 1 GIF since that’s all we need
- Only return the minimal amount of media types
- Setting a high content filter to avoid inappropriate GIFs
- Adding our
TENOR_TOKENfor our key - Making the request, turning it into JSON, and getting the URL of our GIF
With our GIF URL, let’s add it to our message.
Adding a GIF to our commit message
At the end of the body property inside of our createComment method, add the following:
\n\n<img src="${gifUrl}" alt="thank you" />Where now our body should look like:
body: 'Thank you for submitting a pull request! We will try to review this as soon as we can.\n\n<img src="${gifUrl}" alt="thank you" />'We also want to update our body to use template literals instead of single quotes in order to let us use variables inside of the string:
body: `Thank you for submitting a pull request! We will try to review this as soon as we can.\n\n<img src="${gifUrl}" alt="thank you" />`Now finally, we need an API key that we can use to pass in to our Action workflow.
Getting a Tenor API key
In order to grab an API key, head over to Tenor’s developer portal, and sign up for an account.
Note: it looks like at the time of writing this, the Tenor API requires you to sign in with a Google account. If you don’t want to use your Google account to sign in, you may be able to find another GIF service and substitute it in for this step. Alternatively, you could just not include a GIF.
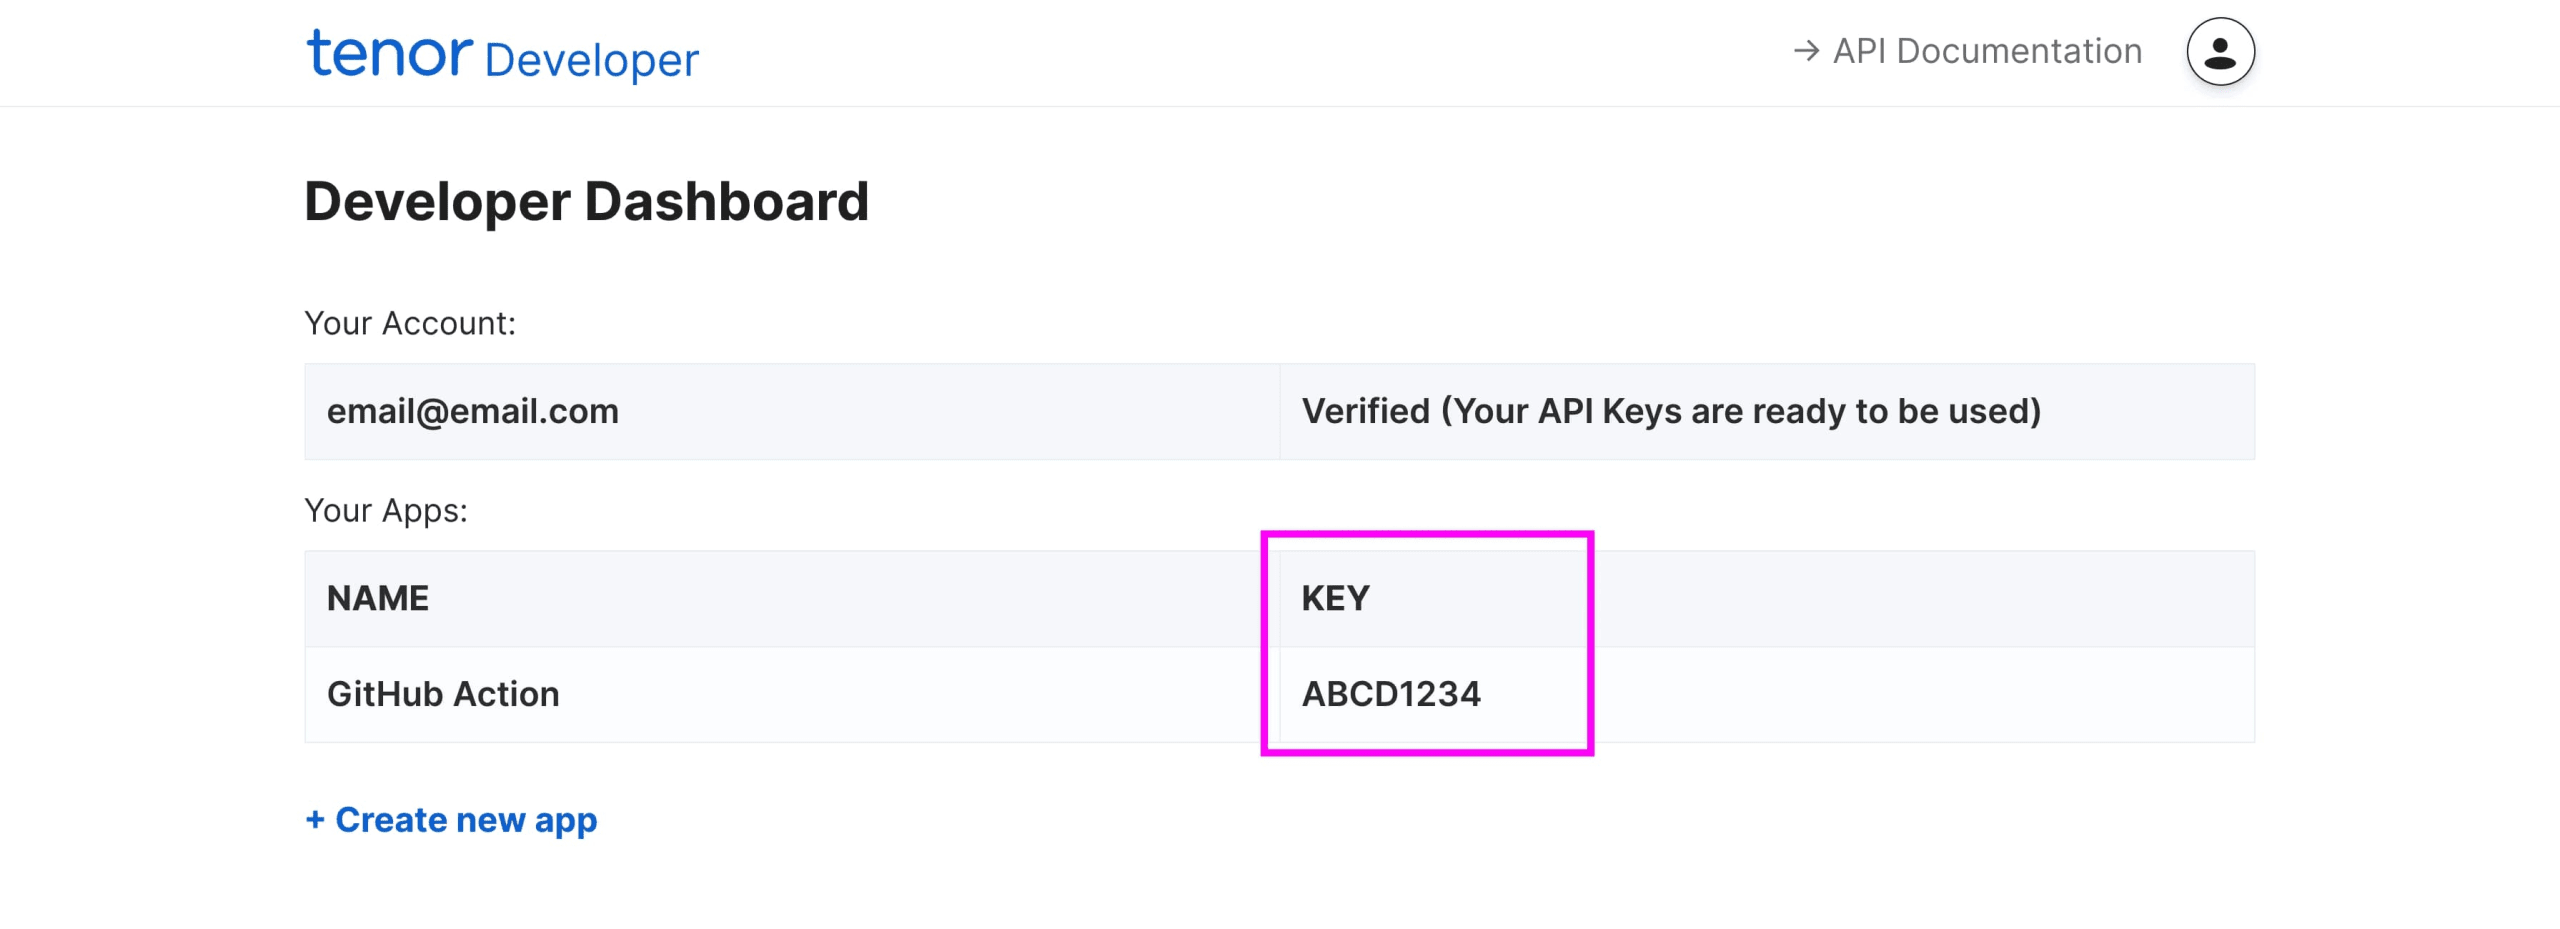
Once inside, you’ll need to start off by creating a new Tenor app.
Click the Create new app link, then name it something you’ll remember (like “GitHub Action”), then Tenor will provide you with an API key.
Setting the Tenor API key
With our API key, we need to make it available to our project.
First, inside of our GitHub repository, we want to add this key as a Secret.
To do this, head over to the Settings tab, then select Secrets in the sidebar, then click New repository secret.

At this point it will ask you to set a Name, which you should add TENOR_TOKEN and a Value, which should be your Tenor API key.
We also want to make this key available to our GitHub Action.
Back inside of our code, open up your test.yml file and inside of it, add another option under width:
with:
  GITHUB_TOKEN: ${{secrets.GITHUB_TOKEN}}
  TENOR_TOKEN: ${{secrets.TENOR_TOKEN}}
Testing the new GIF comment
Finally we can test this out.
First, let’s build our project to get the last changes into our script:
yarn buildCommit the new updates, push it to the repository, and like before, create a new Pull Request.
And once the checks are finished, we should now see our GIF!

A GIF in the Thank You message on the Pull Request
What else can you do with your custom GitHub Action?
Beyond creating a completely new custom GitHub Action to tackle a different problem, here are a few more things you can do to level this one up.
Add customization to the Action
We have a pretty wholesome Action where we can thank every person who tries to help our repository, but what if someone wanted to write their own custom message?
Or maybe they only want “thank you” GIFs from The Office. Or maybe they want to use “clapping” GIFs instead.
Similar to how we use inputs to accept our GITHUB_TOKEN and TENOR_TOKEN, we can add inputs for custom values that we can use to dynamically change how the Action works.
Want the answer? Check out my demo to learn how: https://github.com/colbyfayock/thank-you-action
Handling errors and setting a failed status
Errors are a real concern. What if the GIF fails to load? Or simply, what if you want to know how to debug your Action from a code issue?
First, we can add console.log statements throughout to simply set a trail for how our Action is running, but we can also use try...catch to wrap some of our requests and functionality so that we can catch those errors and do something with them.
Since our run function is also a promise, we can attach a .catch allowing us to take that error and use it to set a failed exit code for our Action.
Want the answer? Check out my demo to learn how: https://github.com/colbyfayock/thank-you-action
Learn how to run GitHub Actions locally
It can be a bit of a pain having to test our Action on GitHub every time.
Fortunately there are tools to help out, such as Act, which is a command line tool that uses Docker to create an environment to test in.
You can use this along with environment variables with dotenv, that can let you configure your project to test locally.
Add a Reaction to the Pull Request
Maybe instead of a message, GIF, or even in addition to, GitHub supports adding Reactions.
Use the API like we did for adding a comment to add a React to the new Pull Request.
Want some more custom GitHub Action resources?
Check out my course on egghead.io: