

Disclaimer: This post is sponsored by Appwrite. Learn more about sponsored content.
Thinking about Content as Data
Whether you’re building a blog or an ecommerce store, you ultimately need to store data. In the case of a blog, that data consists of metadata and the actual post content, along with categories, authors, and anything else that supports that content.
All that data needs a home, so we can use databases where we have an easy mechanism to Create, Update, Read, and Delete that data (CRUD) as well as develop relationships for other sets of data. So needing to post a new blog? Create a new Database entry. Want to list those posts out or get an individual post? You’ll Read your database. And so on.
But databases and application infrastructure can be scary, but they don’t have to be! And that’s where Appwrite comes in.
What is Appwrite?
Appwrite is an open-source app platform that allows developers and teams to easily orchestrate a wide variety of services to build high-scale web and mobile apps.
Their services include core features like databases, storage, and functions, all with the ability to easily intertwine their auth service, which is super compelling for building things that “just work” rather than getting tangled in permissions and configuration trying to integrate different products together.
So we can use Appwrite to set up our blog, giving us a long runway for building more features and scaling it to the world.
What are we going to build?
We’re going to use Astro to build a simple blog where we can share content on our website.
We’ll use Appwrite to store our content, along with some metadata that’s important for displaying our blog posts.
Let’s jump in!
Step 0: Getting Started in Astro
This post is written so that you can follow along with pretty much any standard Astro application, whether you’re using your existing website or starting from scratch.
If you want to start up with a brand new Astro app, you can run:
npm create astro@latest my-appwrite-blogSelect the options you’d like and dive right in!
Step 1: Installing & Configuring Appwrite
Installing the Web SDK
To get started, we’ll first install the Appwrite Web SDK.
In your terminal, run:
npm install appwriteCreating an Appwrite Project
If you don’t an account yet, create a free Appwrite Cloud account over on appwrite.io.
You’ll then want to create a new Project inside of your Appwrite dashboard which will ask for a Project Name and Region.
Setting up an Appwrite Platform
Inside of your Appwrite project, add a new Platform, where in our case, we’ll be using Web.
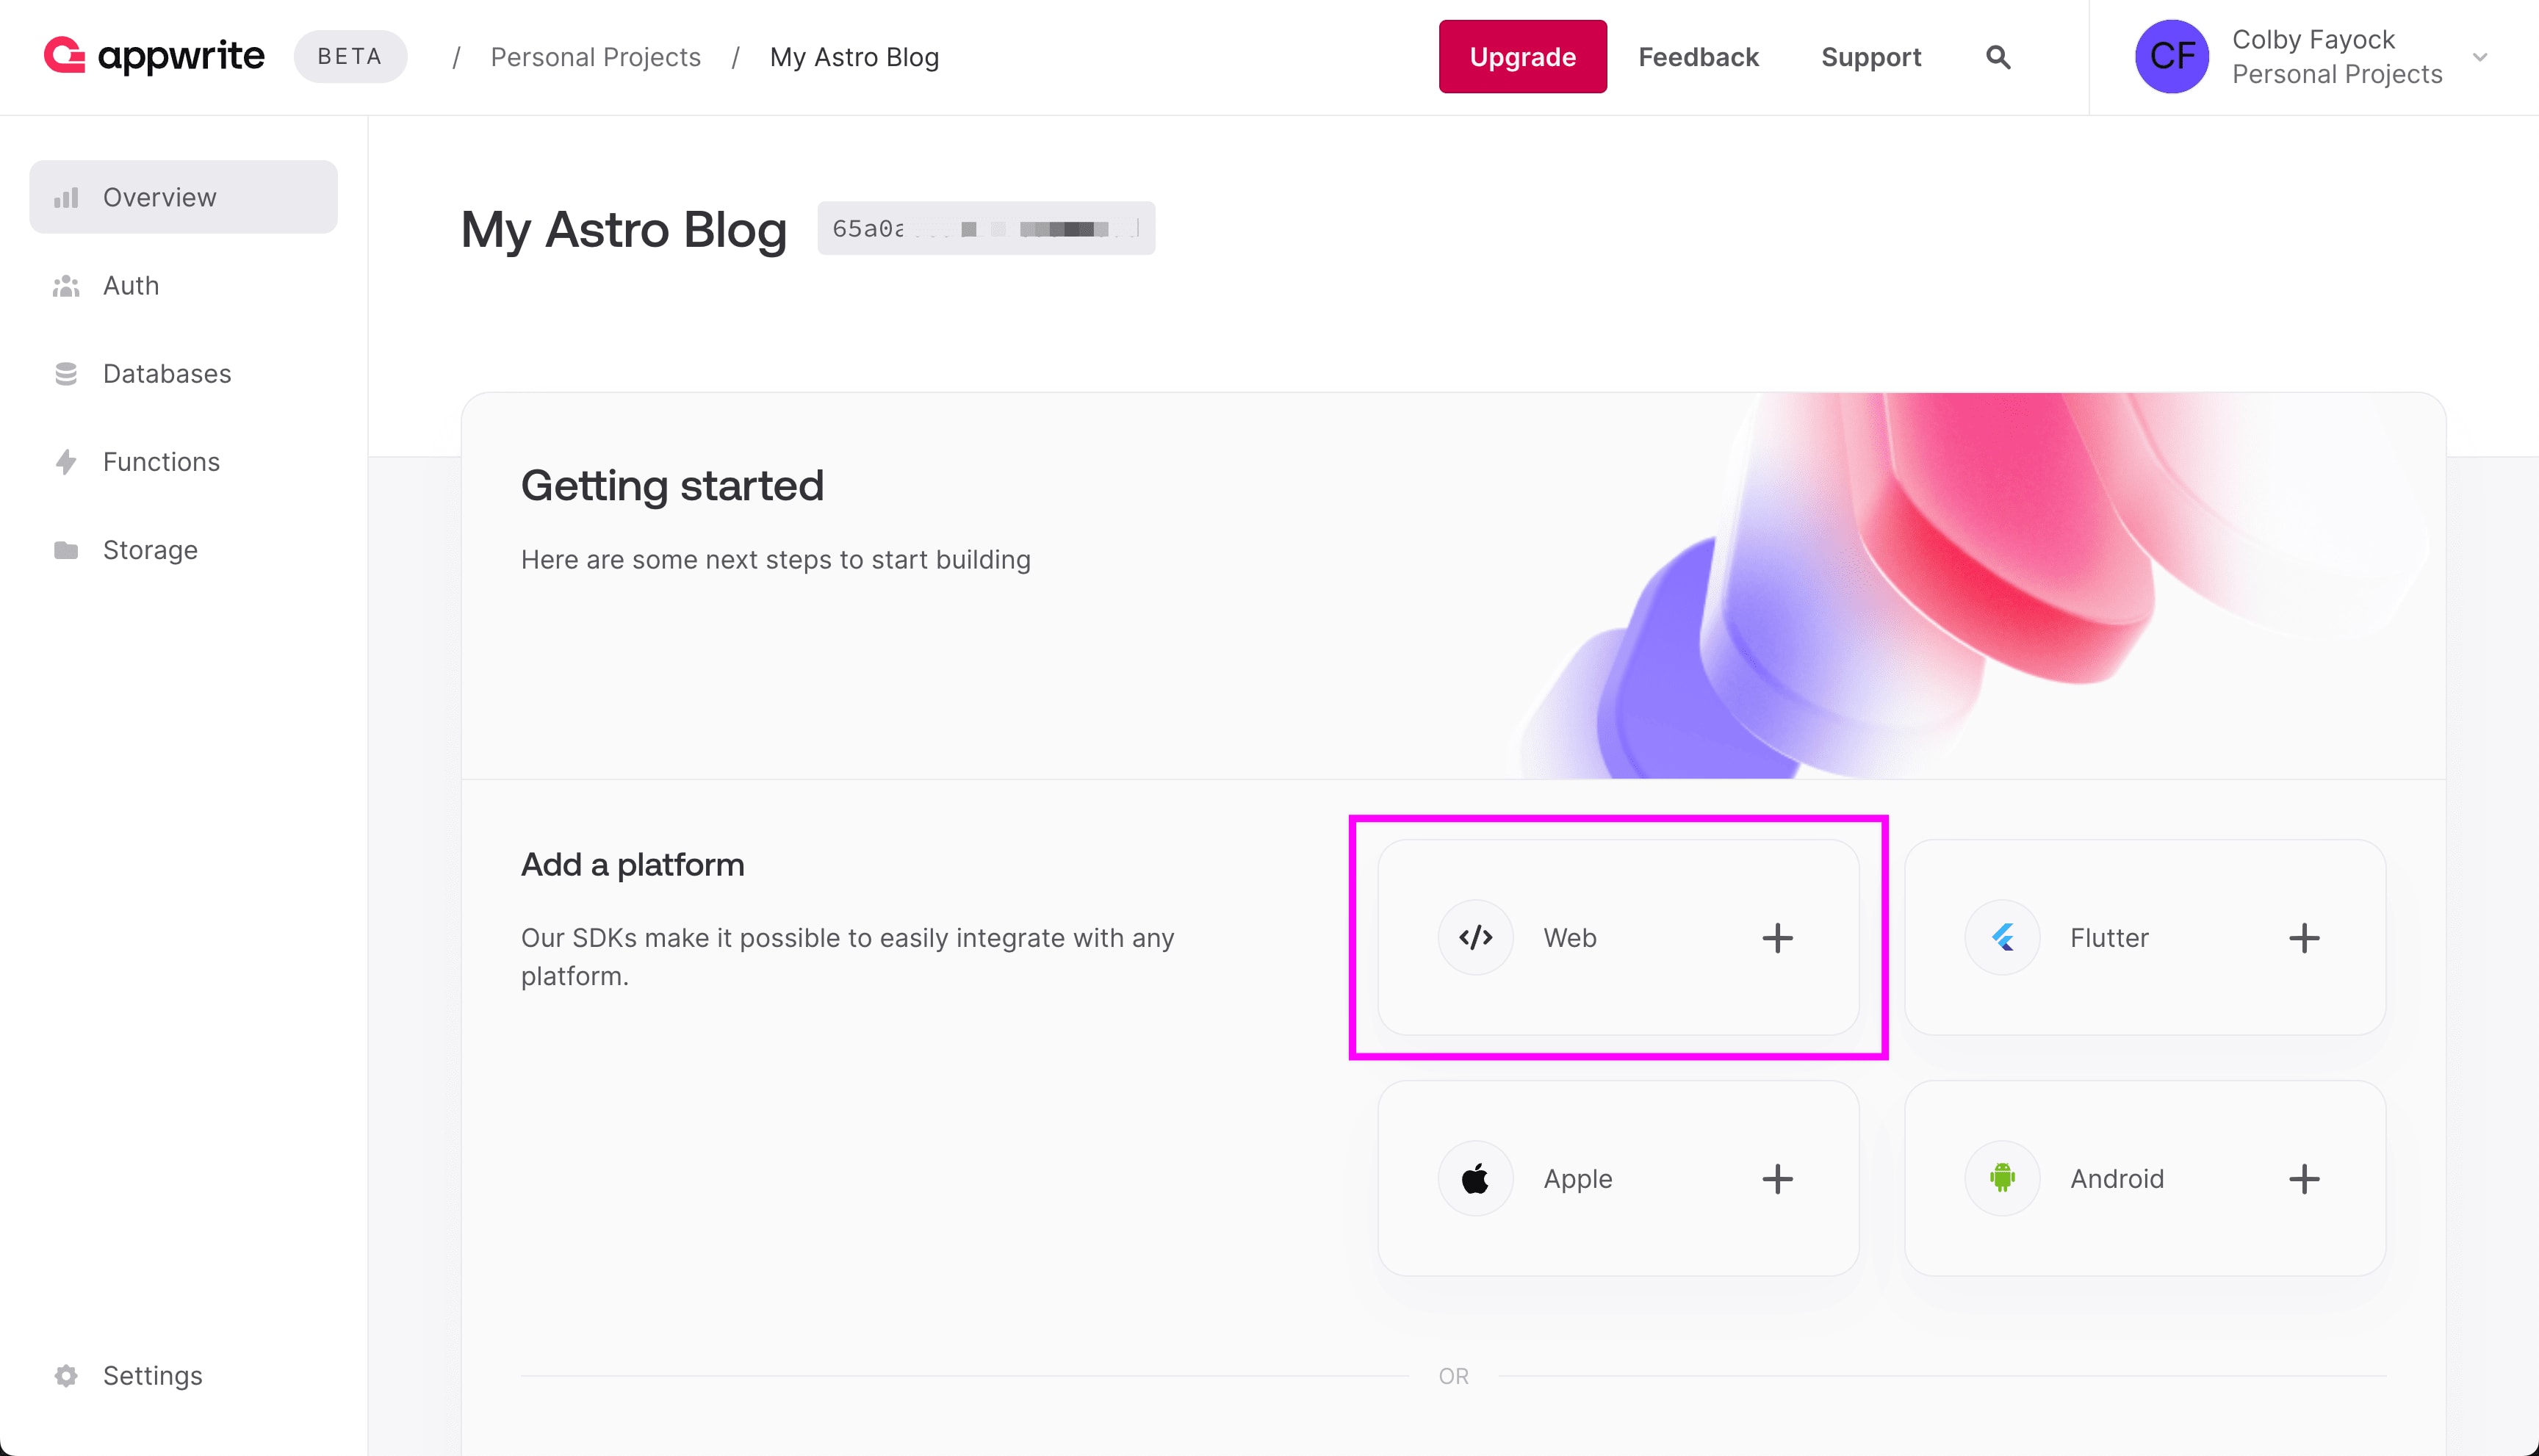
Here you can register where you’ll be deploying your application. If you don’t know that yet, feel free to add localhost, but you don’t actually need to add localhost in order to make it work locally.
Tip: Remember to configure your hostname later once it’s deployed otherwise it won’t work.
You’ll then be prompted with installation instructions, but before we copy those into our project, let’s set up where we’ll paste it.
Configuring the Appwrite Client
Because we’ll be using this client throughout our app, a convenient way to handle this is by setting everything up using a file inside of the lib directory.
Create a new folder lib inside of src.
Inside src/lib create a new file appwrite.ts.
Note: If not using typescript, change the file extensions to
.js.
Then, paste the following inside of src/lib/appwrite.ts:
import { Client } from 'appwrite';

export const client = new Client();

client
  .setEndpoint('<Appwrite Endpoint>')
  .setProject('<Appwrite Project ID>');
Here we’re importing the Appwrite Client and initializing a new instance. We then configure it with our Project Endpoint and Project ID.
This is essentially the snippets from the installation instructions put together. You can find your Endpoint and Project ID in those snippets or you can find them later under your Project Settings page.
And at this point, we’re ready to set up our database!
Step 2: Setting Up a New Database for a Blog
Setting up our database includes three parts: setting up the database itself in the UI, creating a schema, and importing the Databases module from the Appwrite SDK.
Setting up a new Appwrite Database
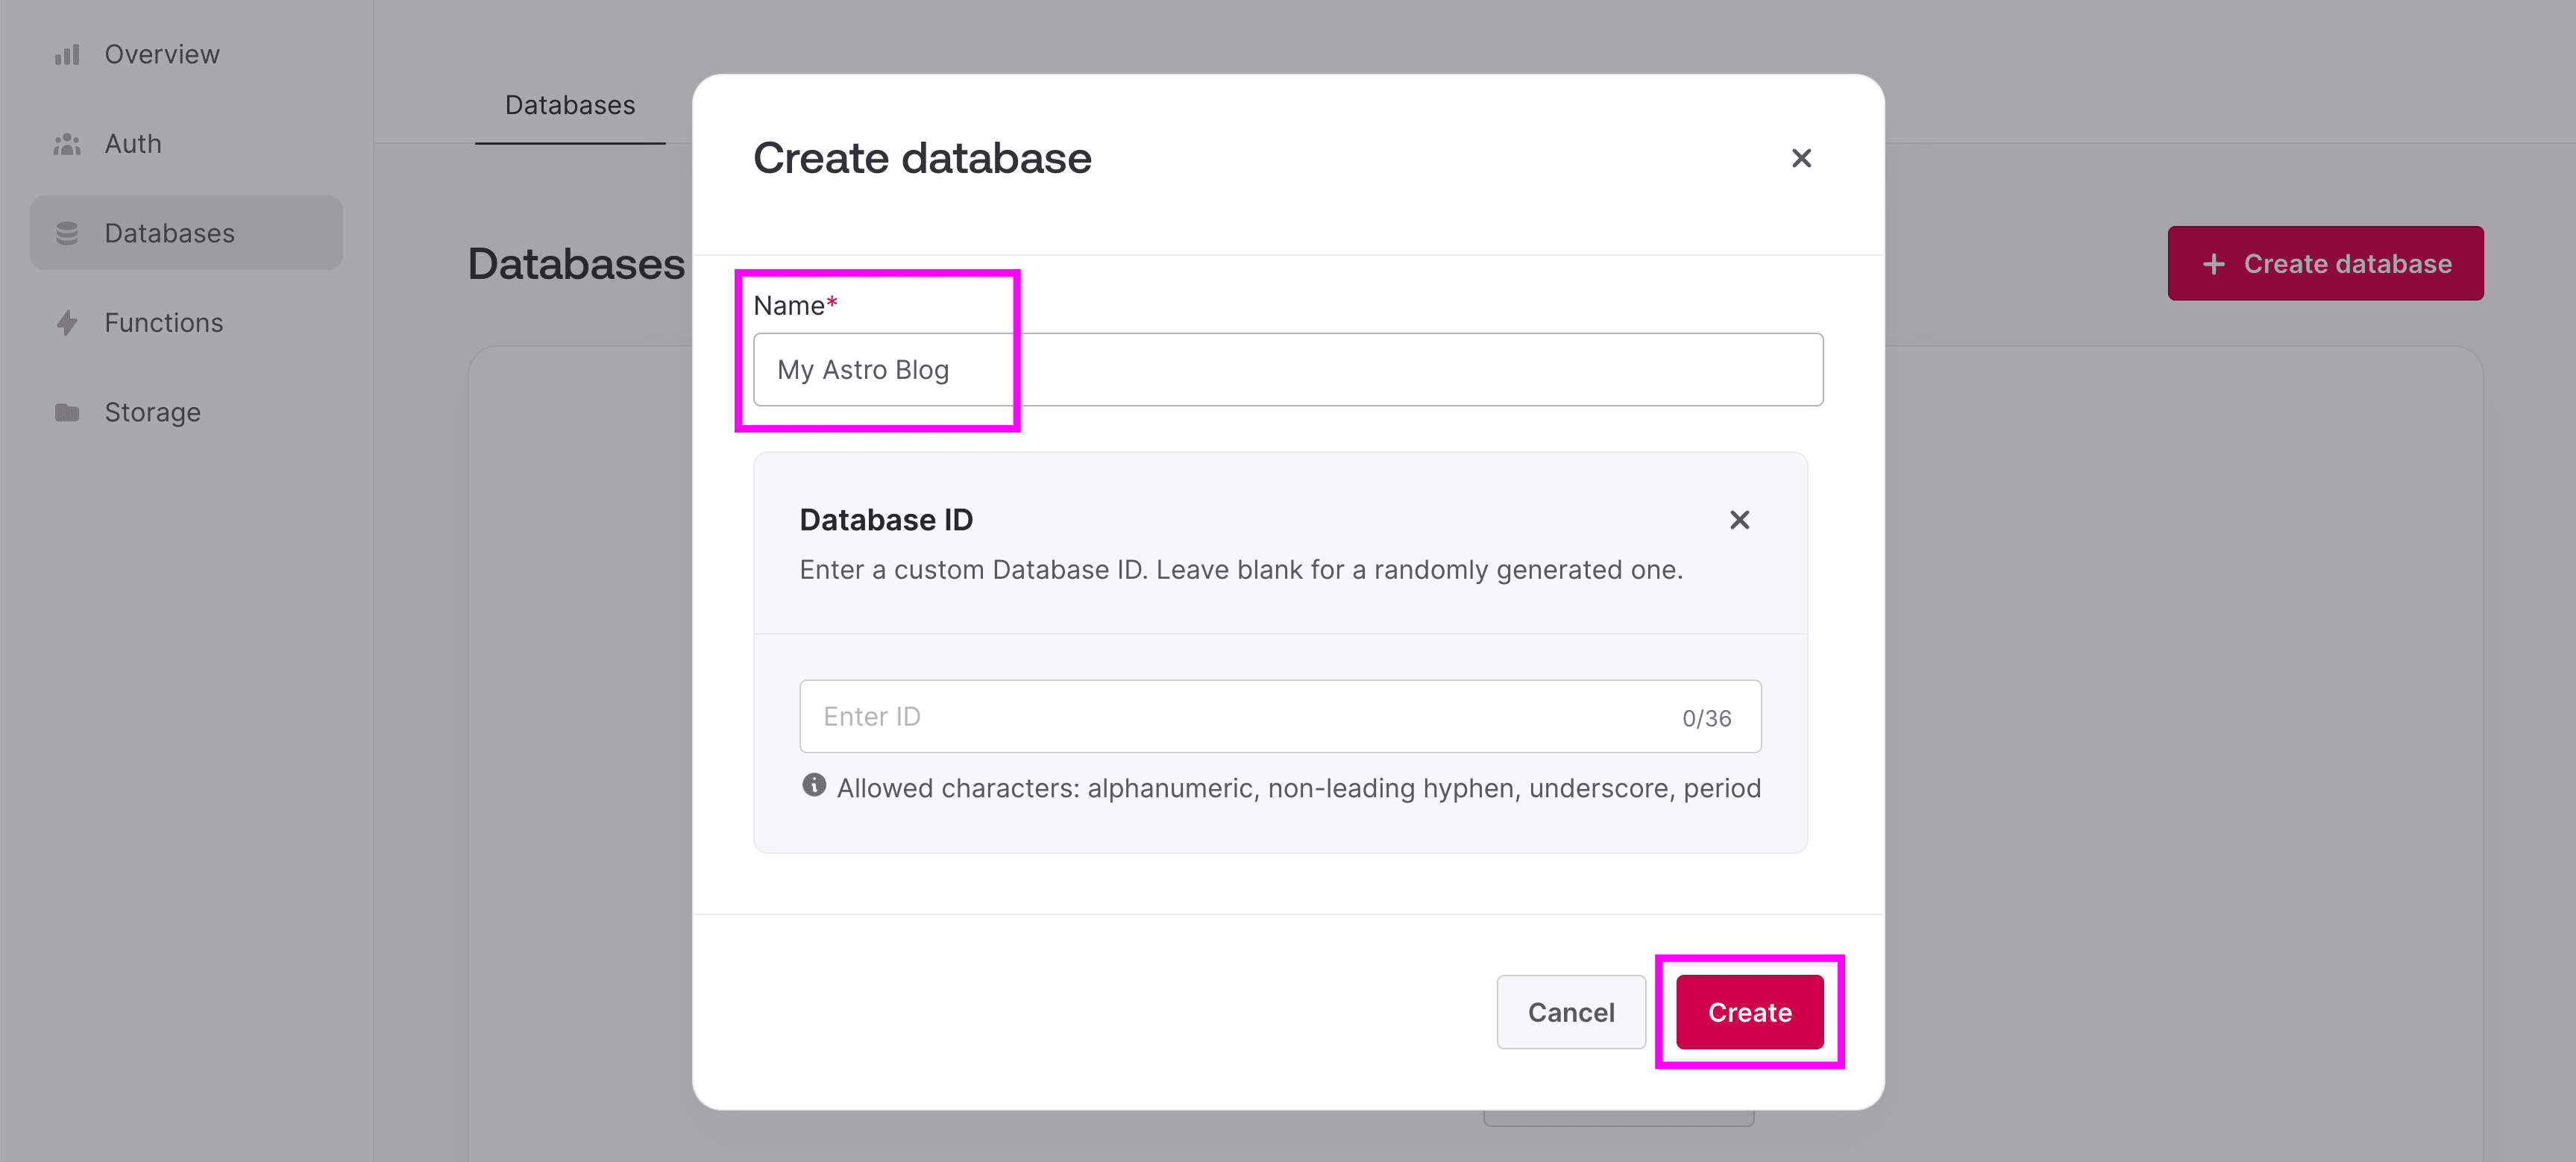
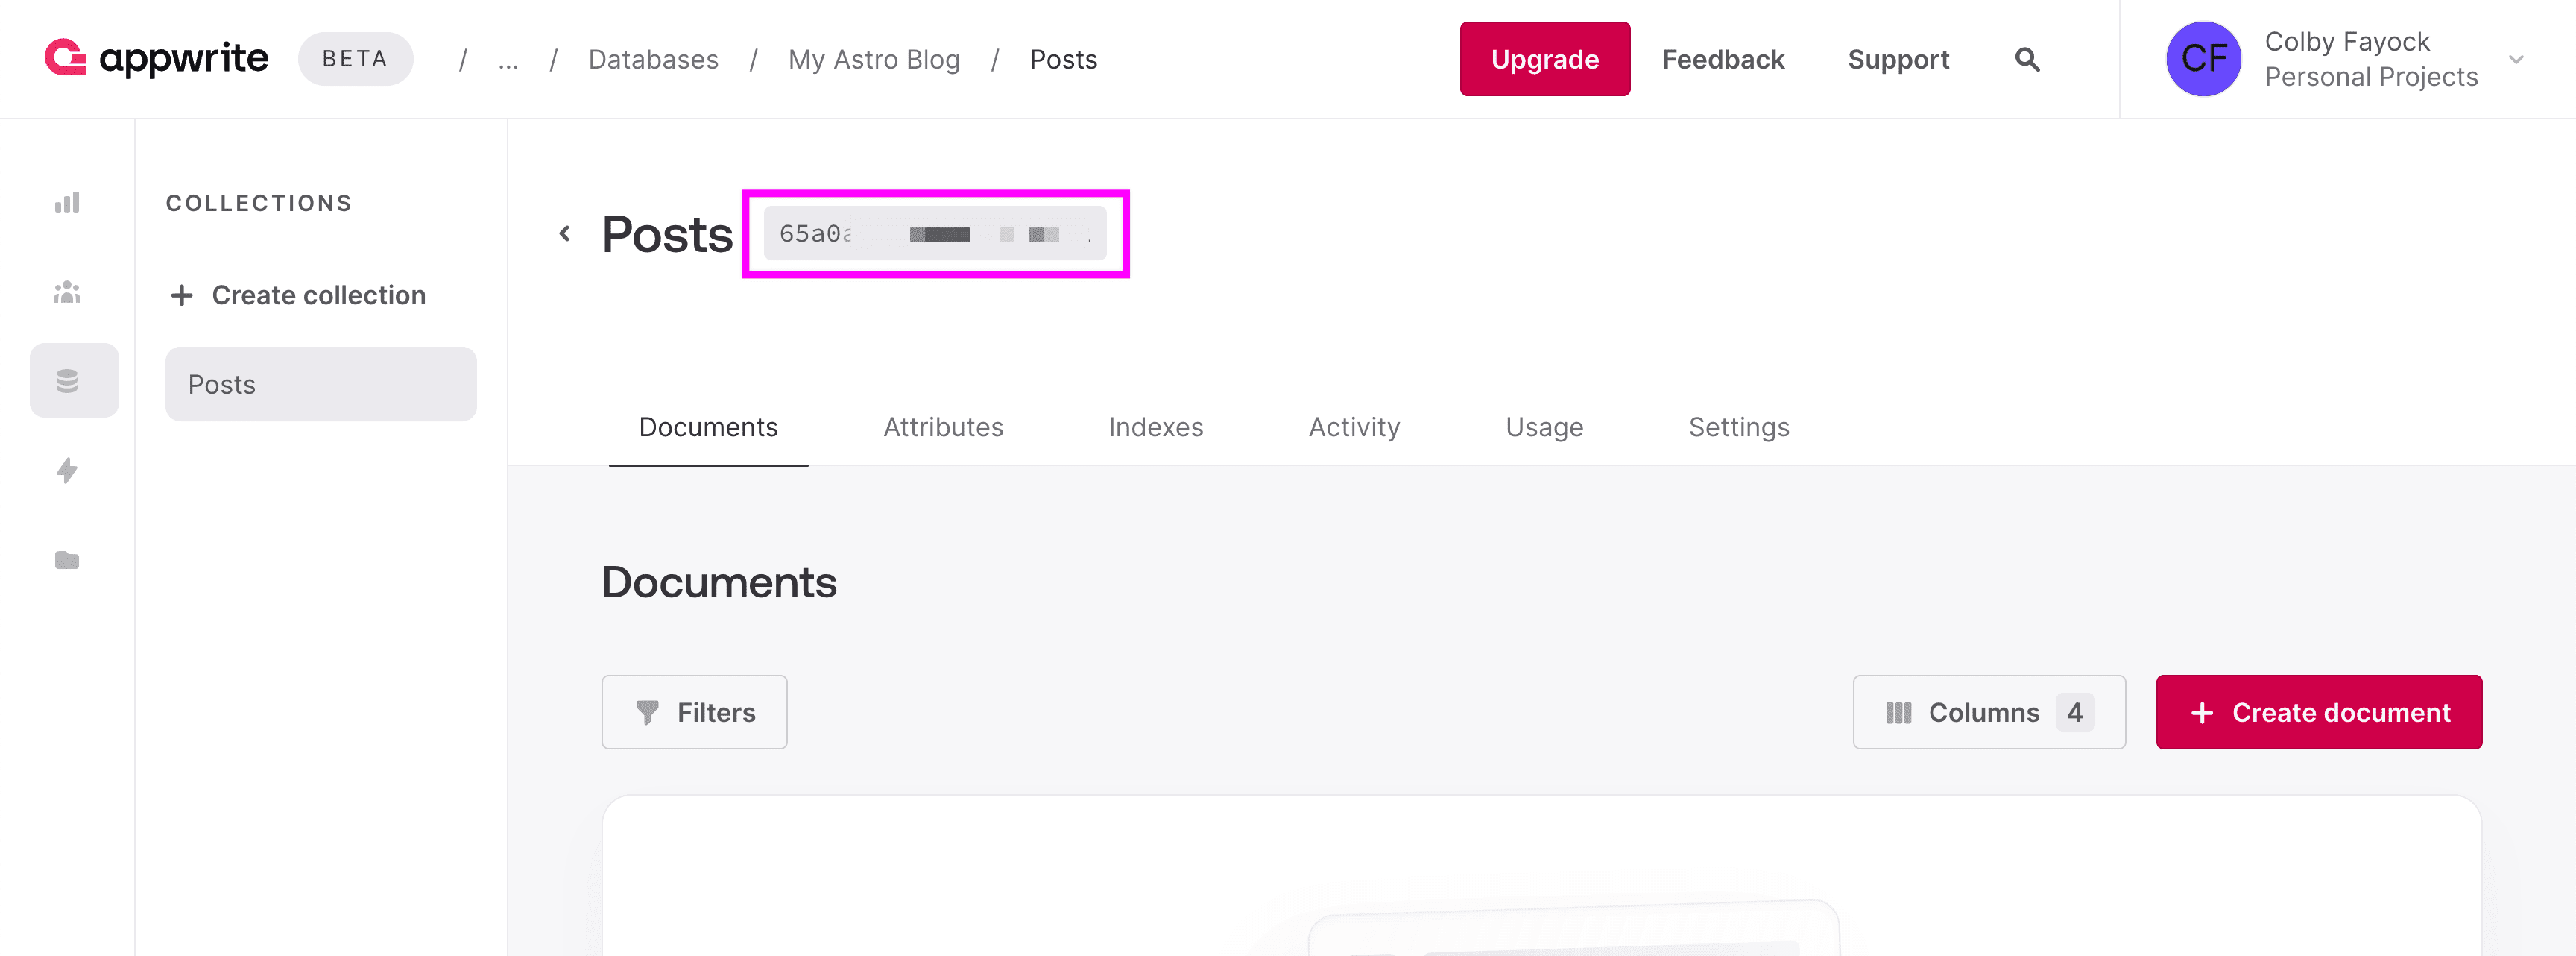
Inside of your Appwrite Project dashboard, navigate to the Databases tab and select Create database.
You’ll be asked to provide a name for your Database as well as optionally an ID, which you can skip to be randomly generated.
Then click Create.
We then need to create a new Collection for our database, so similarly, click Create collection where you’ll again be prompted for a name, where we can use Posts or whatever you would like.
Then click Create.
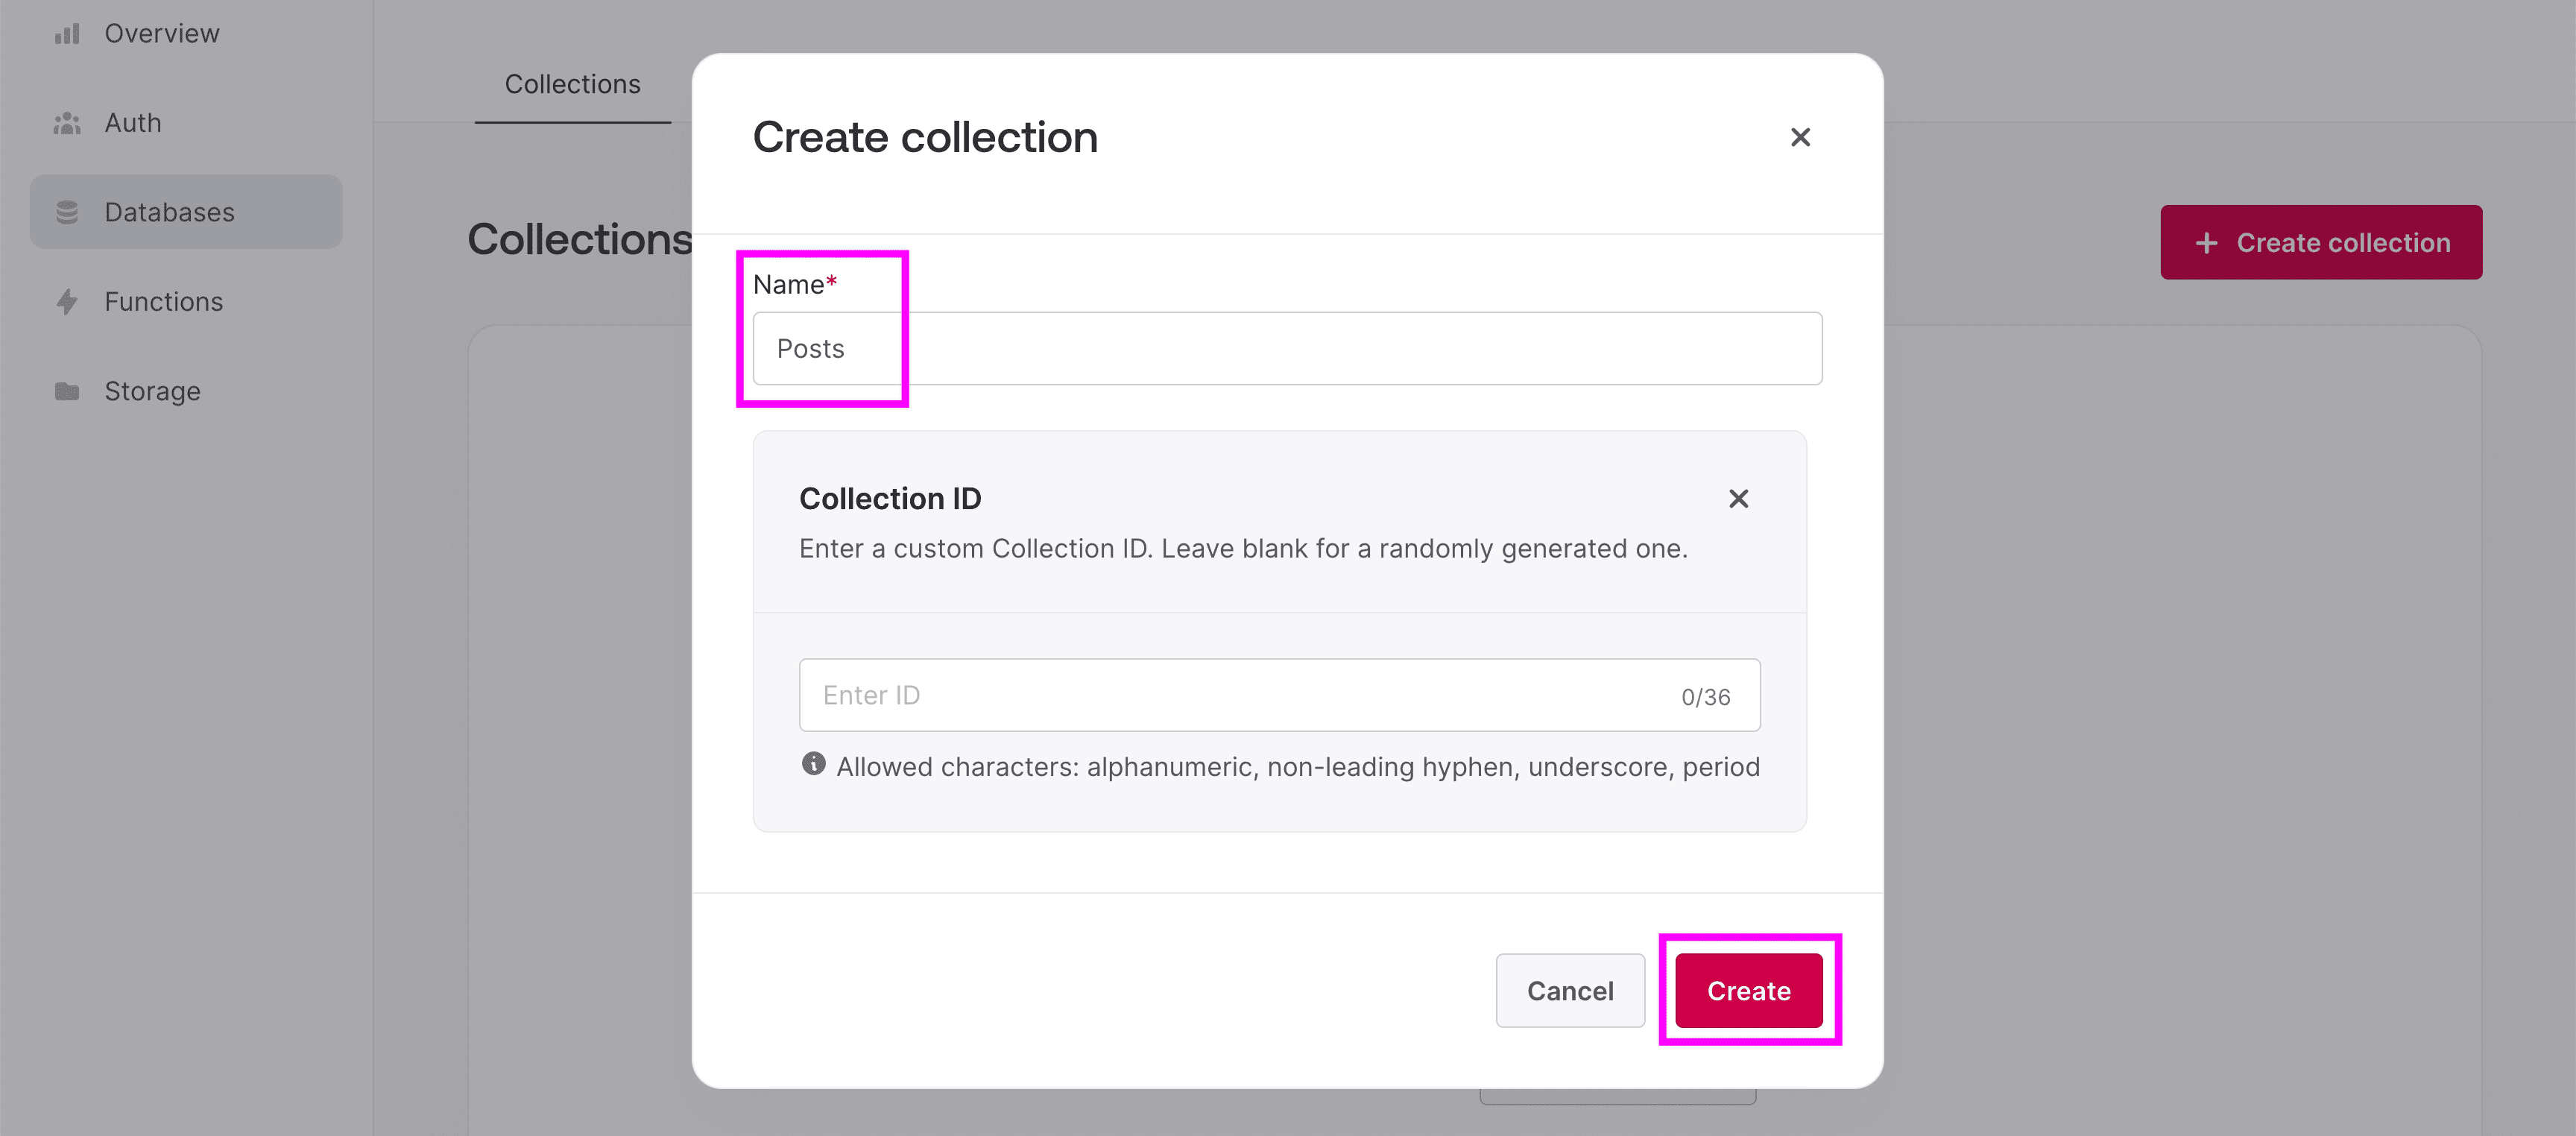
This collection will include Documents which will represent each of our posts.
In order to be able to eventually view our Post Documents, we need to configure permissions.
Under the Settings tab of our new Collection, scroll down to Permissions, where we can click Add role, where we can select Any.
Since we’re not covering Authentication in this tutorial, we’re going to add Create and Read access to Any person who visits our app, so select Create and Read, then click Update.
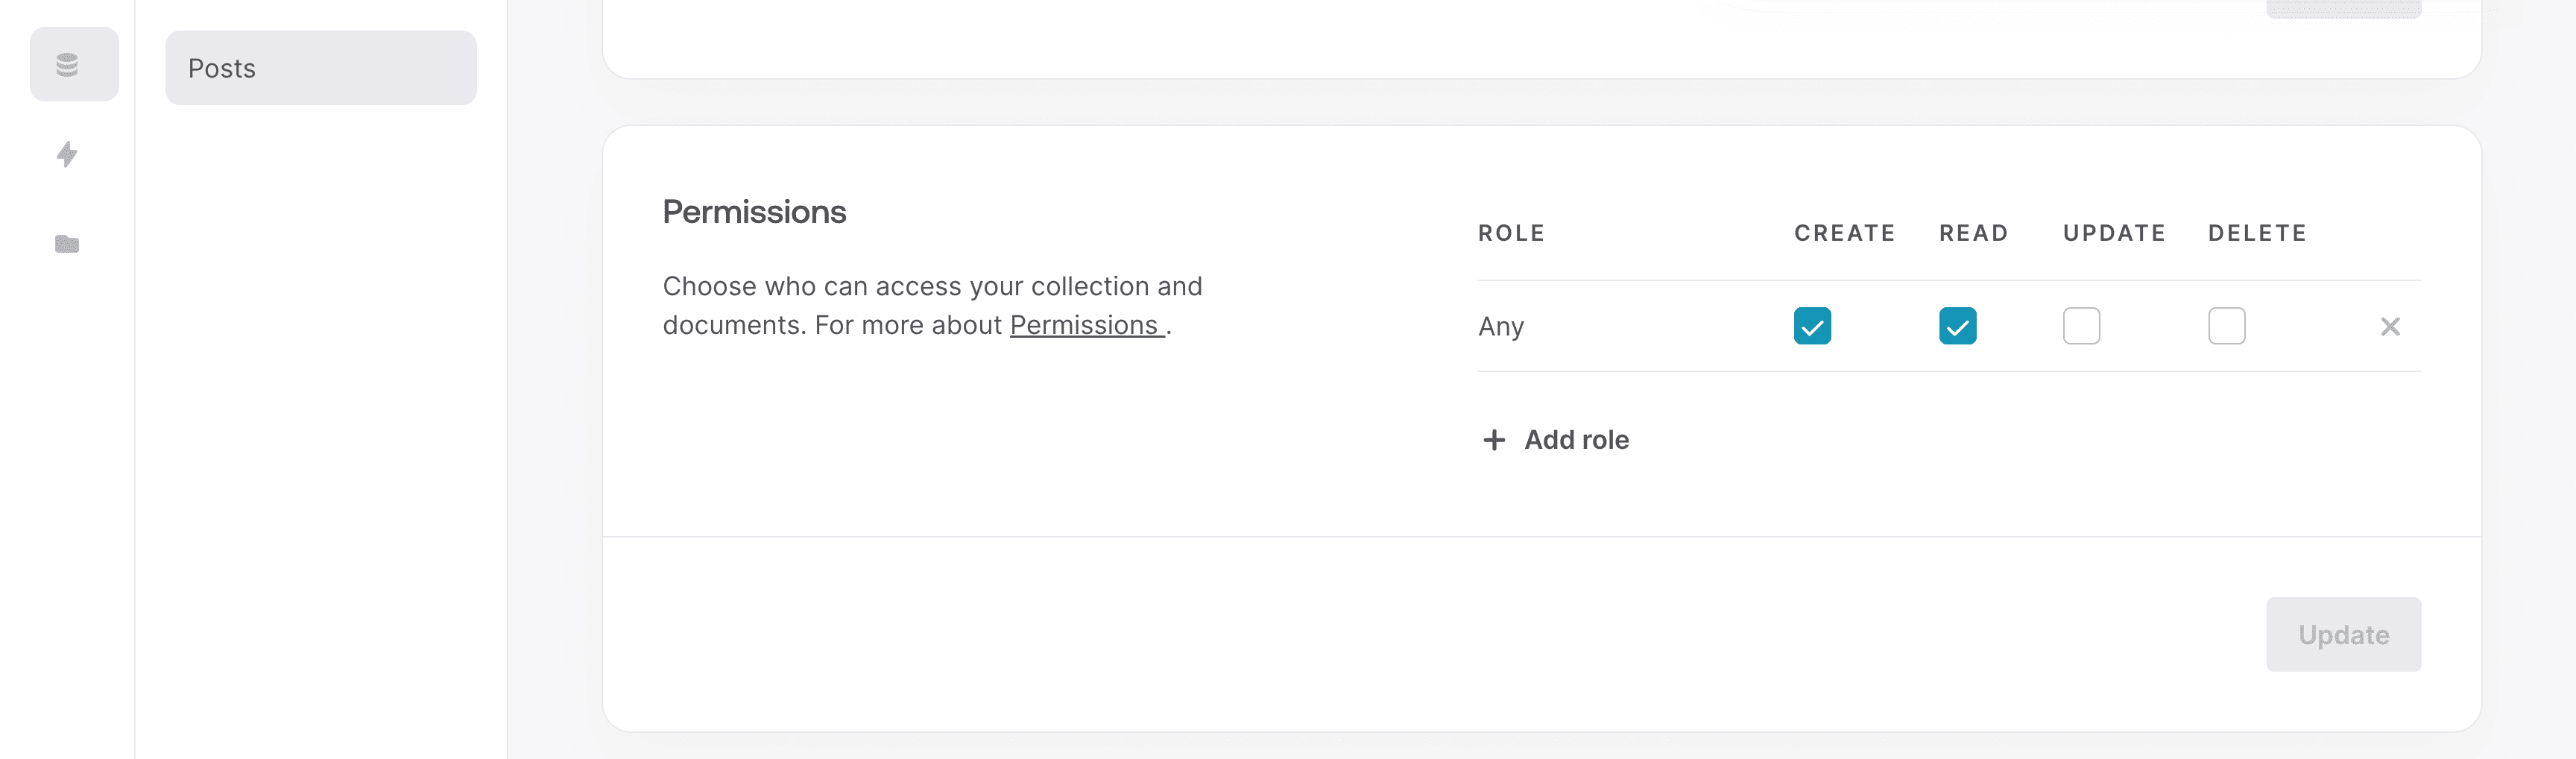
Tip: Be sure to loop back, add authentication, and update these permissions before rolling this out to production!
But for now, let’s move on to our Document Schema where we need to configure the attributes each Document (Post) will have.
Configuring a Database Schema
Inside of the Collections view, select Attributes.
We’re going to start off with 4 required attributes with the following configurations:
- slug: String with a Size of 255
- title: String with a Size of 255
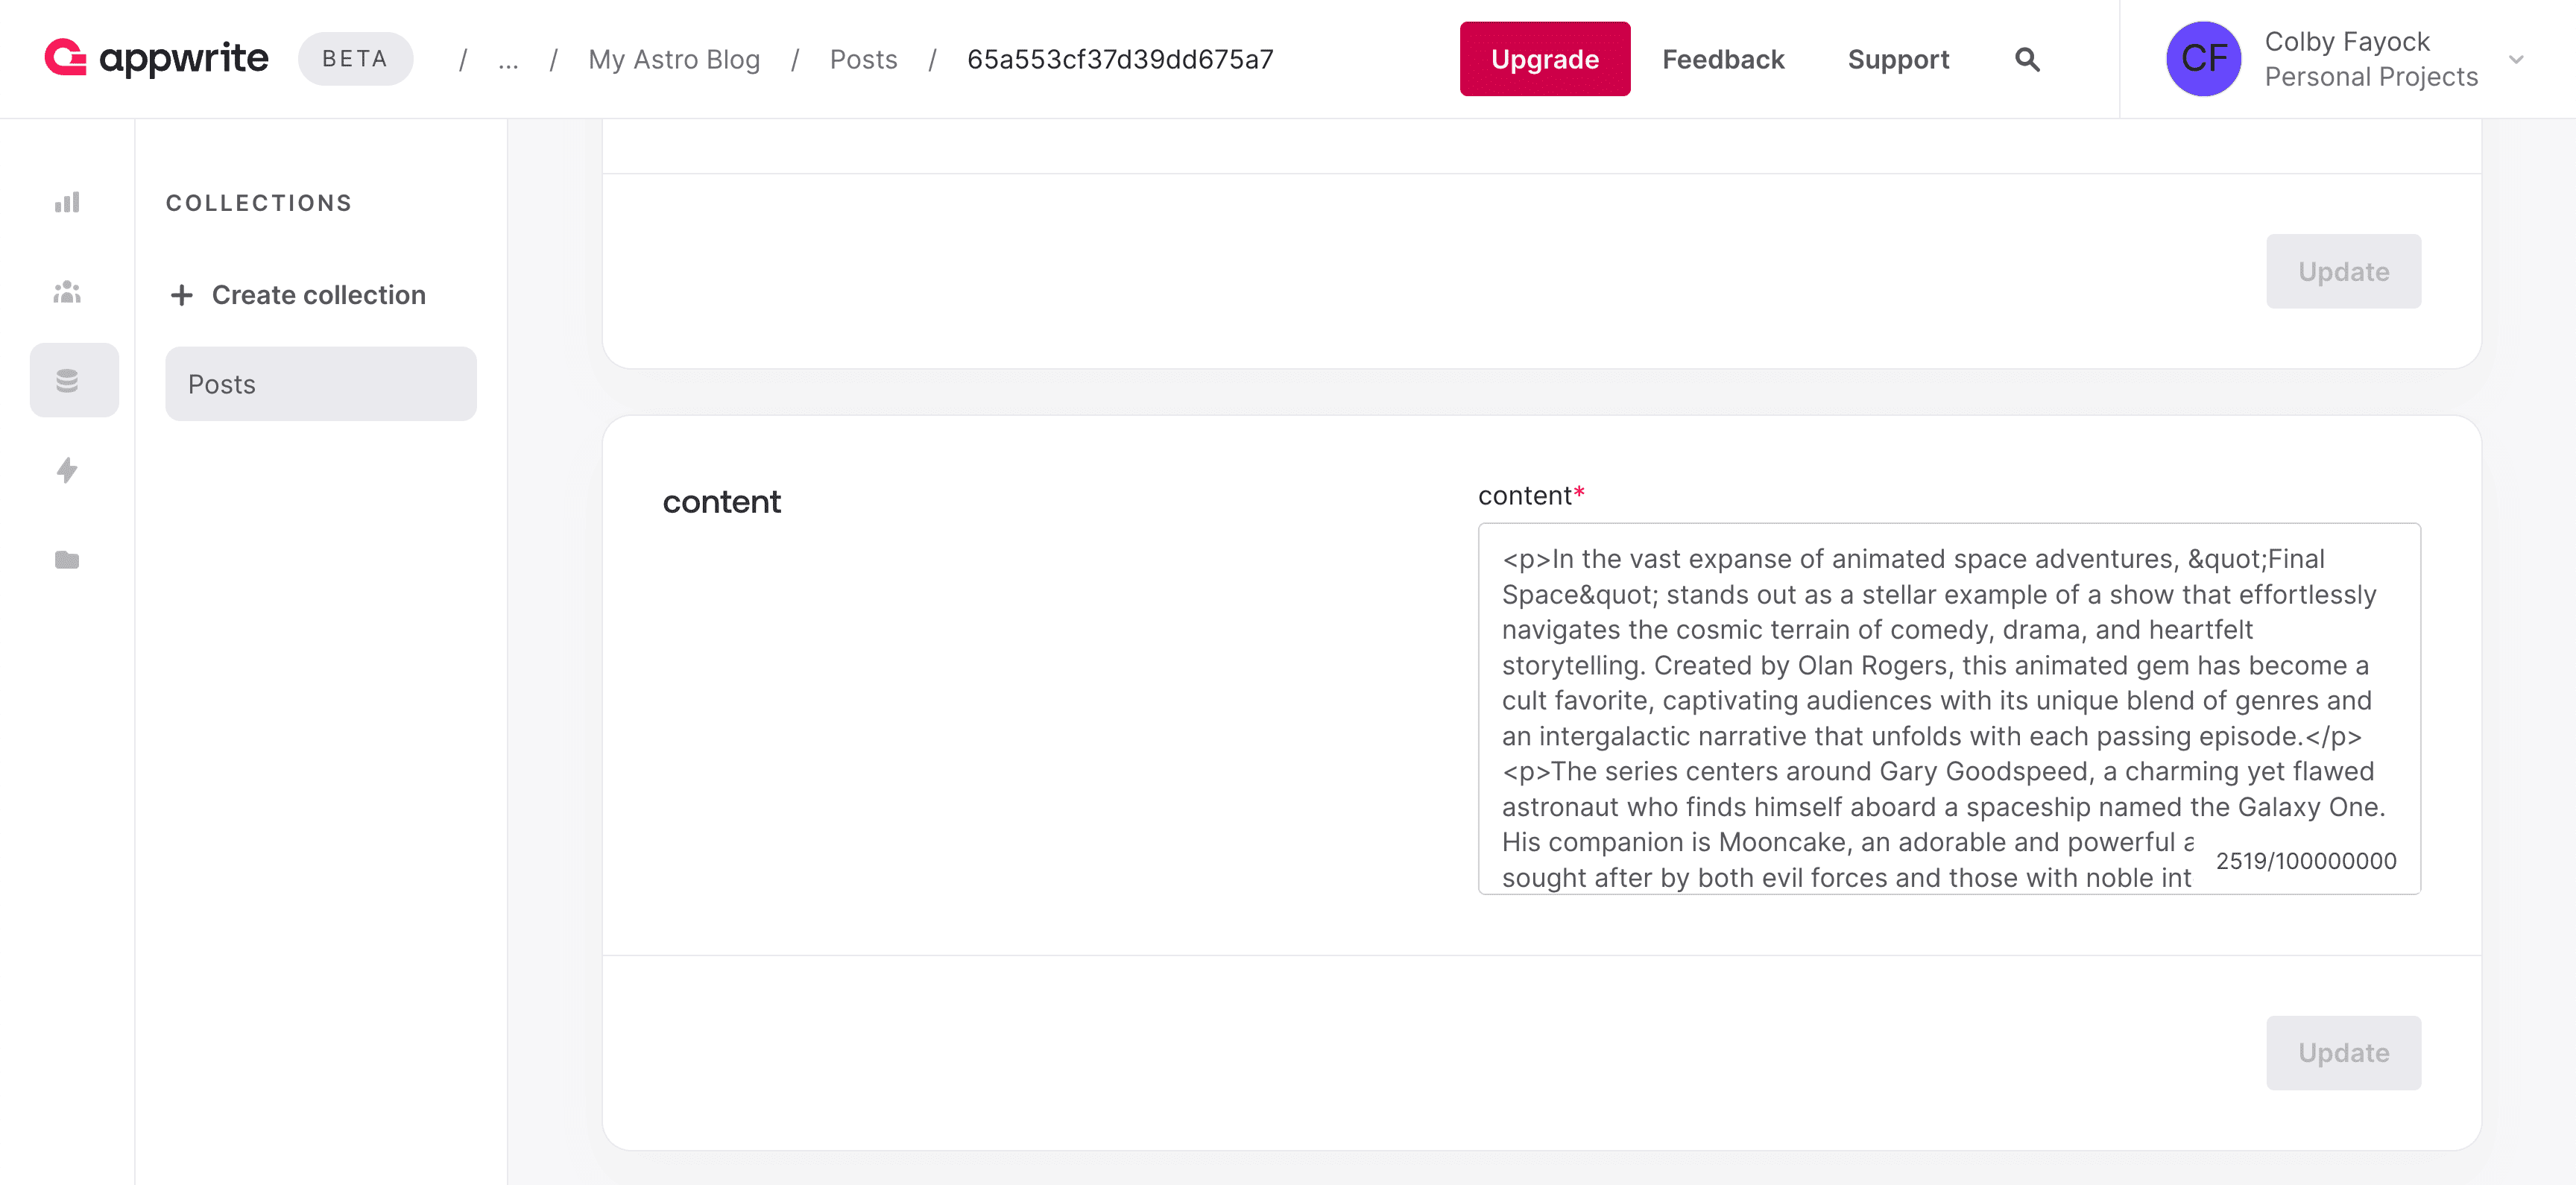
- content: String with a Size of 100000000
- excerpt: String with a Size of 255
Note: Content has a somewhat arbitrary size of 100 million attempting to cover an amount that would suffice for a large blog post. Since we’ll later be using HTML to store our post, that will include both the HTML and the post character count.
Select Create attribute, select String, then enter in the information above or to your liking, using the name as the Attribute Key and the size under the Size input.
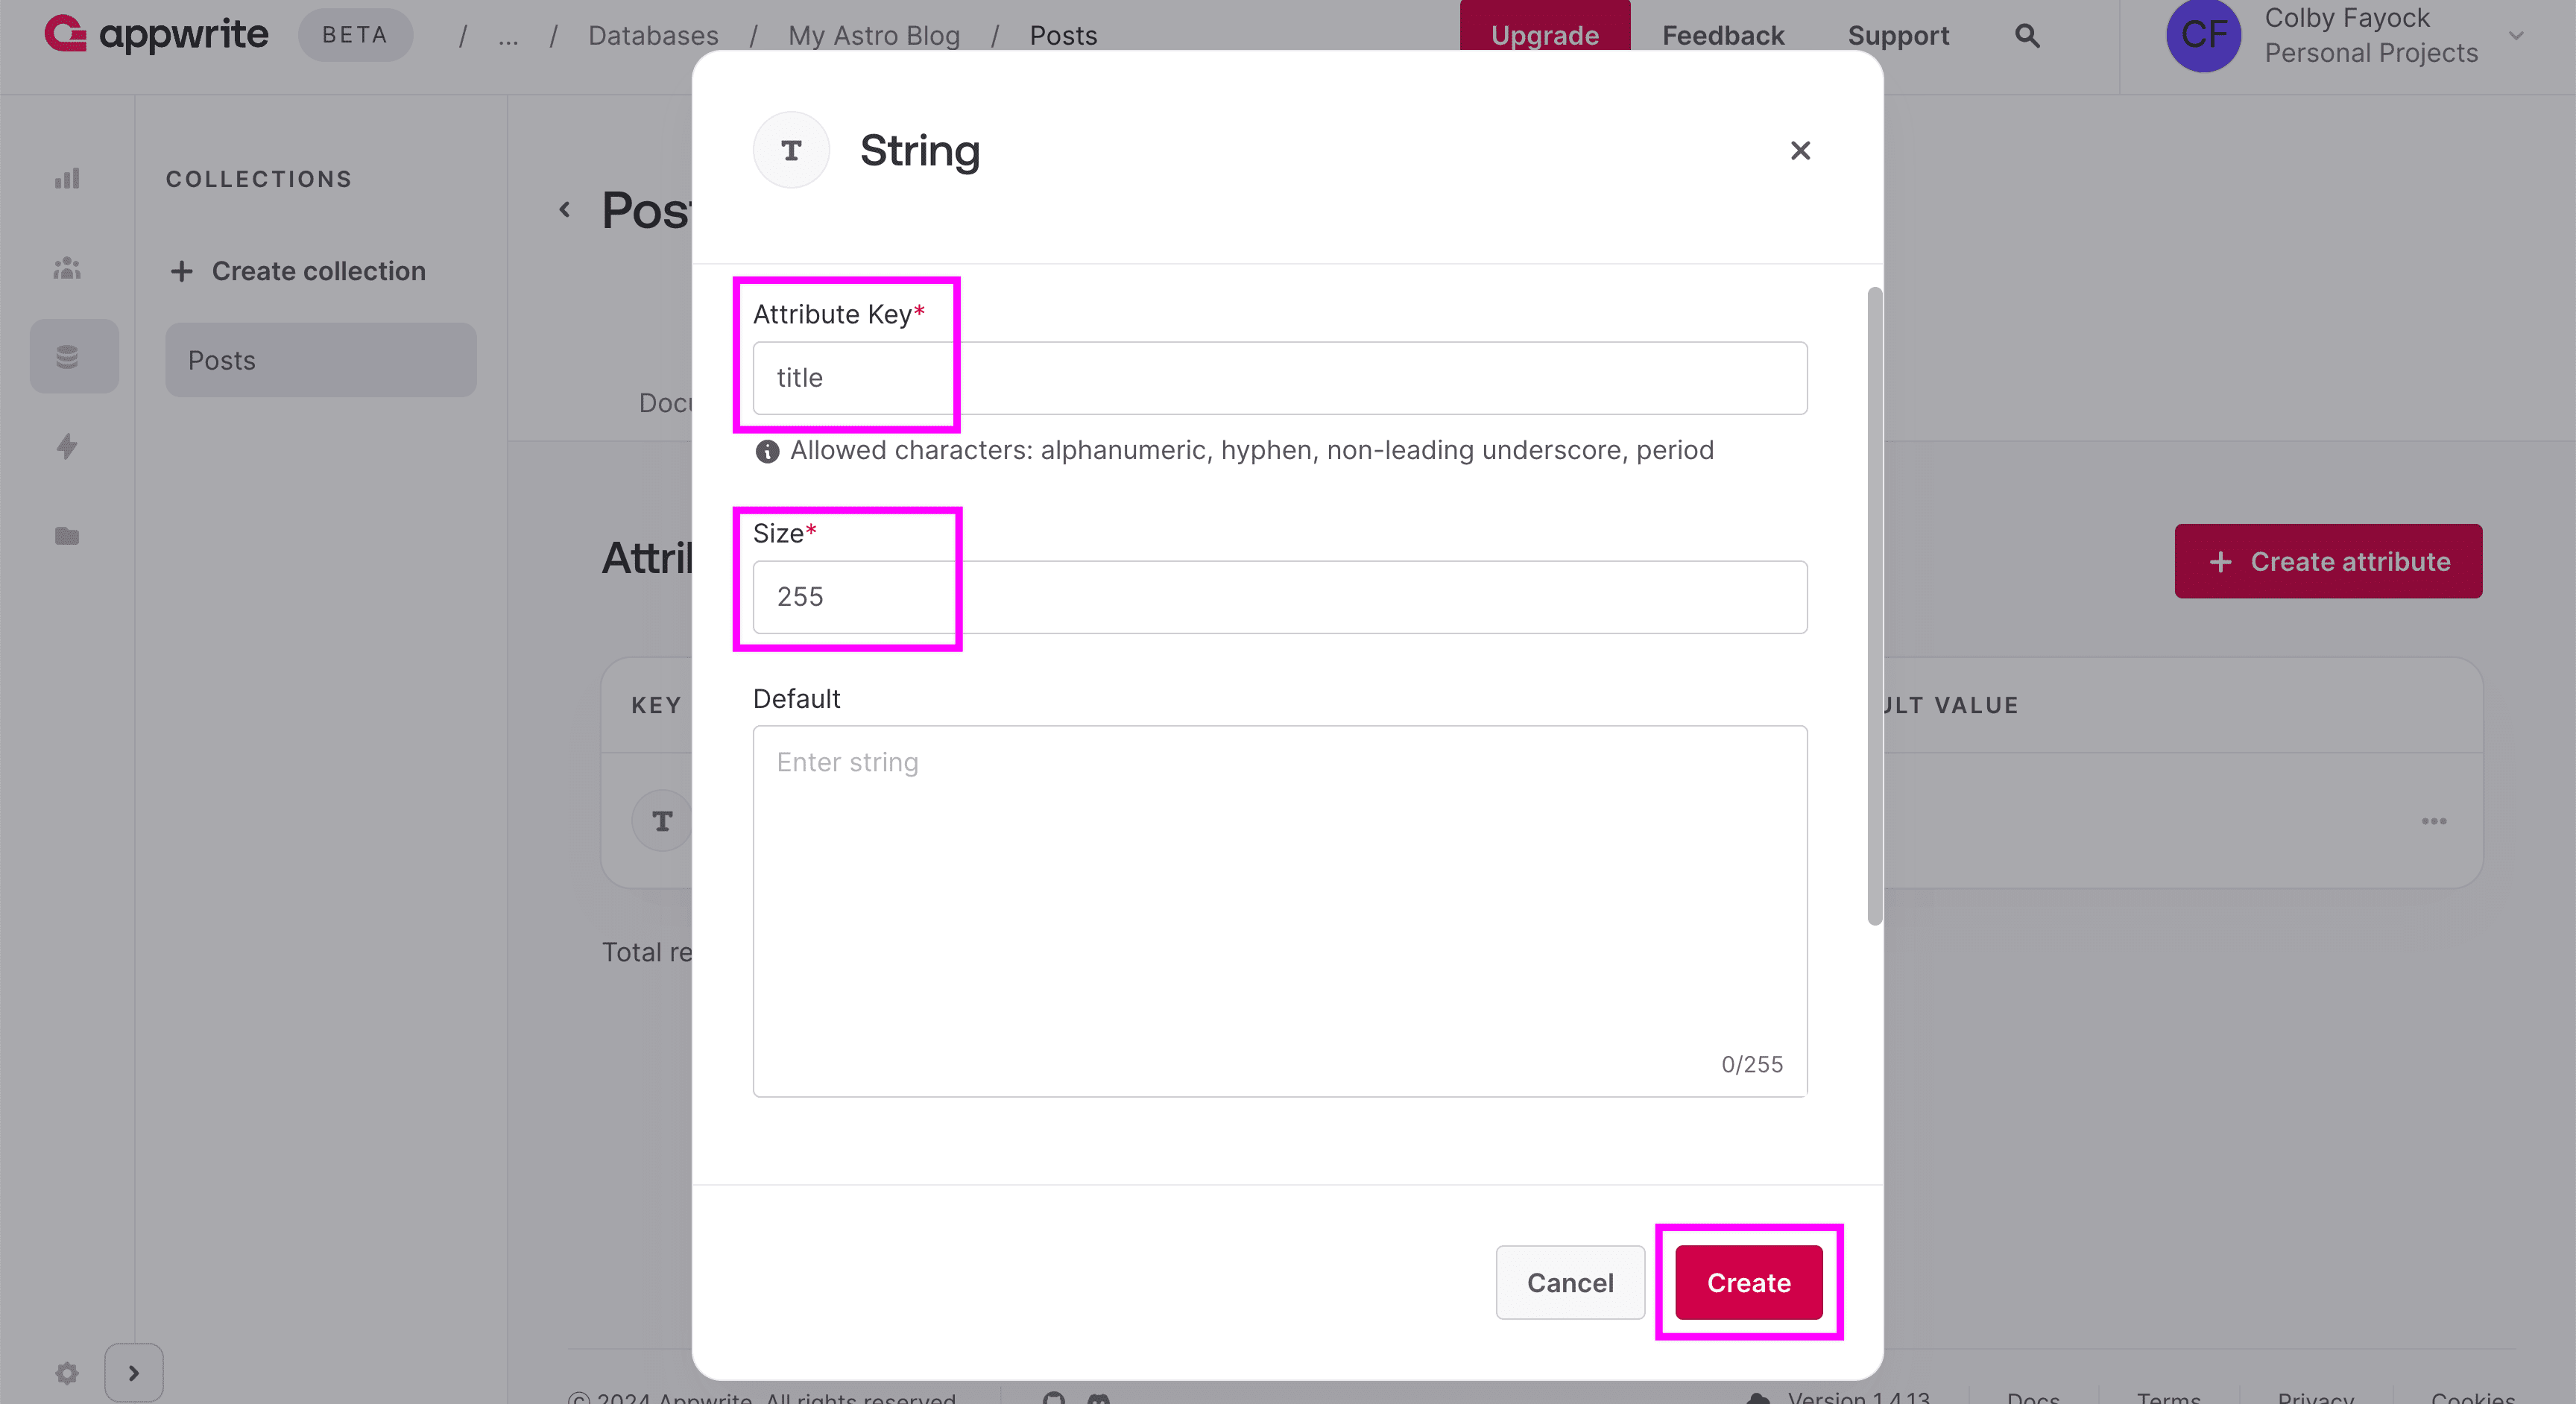
Be sure to scroll down in the modal to mark each field as required.
Create a new Attribute for each of the four fields listed above.
Importing the Databases module
Lastly, in order to interface with our database, we’ll need to import the Databases module and configure it with our client.
Inside of src/lib/appwrite.ts update the import statement to:
import { Client, Databases } from 'appwrite';Then after initializing our client add:
export const databases = new Databases(client);And next, we’ll move on to adding some data!
Step 3: Creating a New Post with Astro Forms
In order to submit a new post, we’re going to take advantage of Astro’s server capabilities.
We’ll use a simple form that submits a POST request to the page, where we’ll intercept the request and perform our new form creation with Appwrite.
This means you’ll need to have hybrid or server rendering configured: https://docs.astro.build/en/guides/server-side-rendering/#configure-server-or-hybrid
Creating a basic form
In order to submit our data, we’ll be using a standard HTML form, where we’ll want to create a new input for each of our Document’s attributes.
Create a new folder called posts inside of the src/pages directory.
Inside of src/pages/posts create a new file new.astro and inside add:
<form method="POST">
  <div>
    <label for="title">Title</label>
    <input id="title" type="text" name="title" />
  </div>
  <div>
    <label for="slug">Slug</label>
    <input id="slug" type="text" name="slug" />
  </div>
  <div>
    <label for="content">Content</label>
    <textarea id="content" name="content" />
  </div>
  <div>
    <label for="excerpt">Excerpt</label>
    <input id="excerpt" type="text" name="excerpt" />
  </div>
  <button>Submit</button>
</form>
Notice in our form, we require the Form element to have a method of POST which allows us to submit the form as a POST request to the same page.
At this point, if you submit the form, nothing will happen, but now let’s set up our form to submit our request.
Constructing form data
To start, let’s construct our form data that we’ll send to Appwrite.
Inside src/pages/posts/new.astro, we’ll check to see if the page request method is POST, which indicates we’re submitting a form:
---
if (Astro.request.method === "POST") {
}
---
Note: Leave out the fences (
---) if your page already has them and add this inside!
Here we use the Astro object to access the request and then the method.
And inside, if we are submitting a form, we want to capture our form data:
if (Astro.request.method === "POST") {
  const formData = await Astro.request.formData();
}
We’re again accessing the Astro object’s request but this time using the formData method to extract our data.
Next we want to round-up all of our form data, where in our case, we want a field for each schema attribute we created earlier:
if (Astro.request.method === "POST") {
  const formData = await Astro.request.formData();
  const data = {
    title: String(formData.get('title')),
    slug: String(formData.get('slug')),
    content: String(formData.get('content')),
    excerpt: String(formData.get('excerpt')),
  }
}
In the snippet above, we use the get method on our FormData instance to capture our value, but we want that value as a string, not a FormDataEntryValue type which is what’s returned by default. And we do this for each field so we have a nice object full of our form data.
If you add a console.log, pass through the data object, and try submitting your form, you should now be able to see all the data from the inputs.
So now let’s use this data to create a new post in Appwrite!
Creating a New Document in Appwrite
To start, let’s first import our databases module at the top of the file:
import { databases } from '@/lib/appwrite';We’re also doing to import the Appwrite SDK ID helper, which we’ll explain more in a second:
import { ID } from 'appwrite';Next, add the following after configuring all of the input data onto the data object:
const results = await databases.createDocument(
  '<Appwrite Database ID>',
  '<Appwrite Collection ID>',
  ID.unique(),
  data
);
Here we’re using the createDocument method where we’re passing in our Database ID and Collection ID as the first two arguments. You can get these at the top of the Database and Collection pages (or copy it from the listDocuments instance from earlier).
But you’ll notice an interesting 3rd argument, where we’re using the ID object’s unique method. The 3rd argument is intended to be a unique ID and rather than trying to generate that ourselves, we can import the ID helper from Appwrite to do so.
And finally our 4th argument was simply the data that we constructed from our form.
If we now refresh the page (using our existing form submission) or submit the form again, we should now be making a request on the server to create our new post!
Tip: You can add a
console.log(results)to inspect the request or a try/catch if you’re hitting errors.
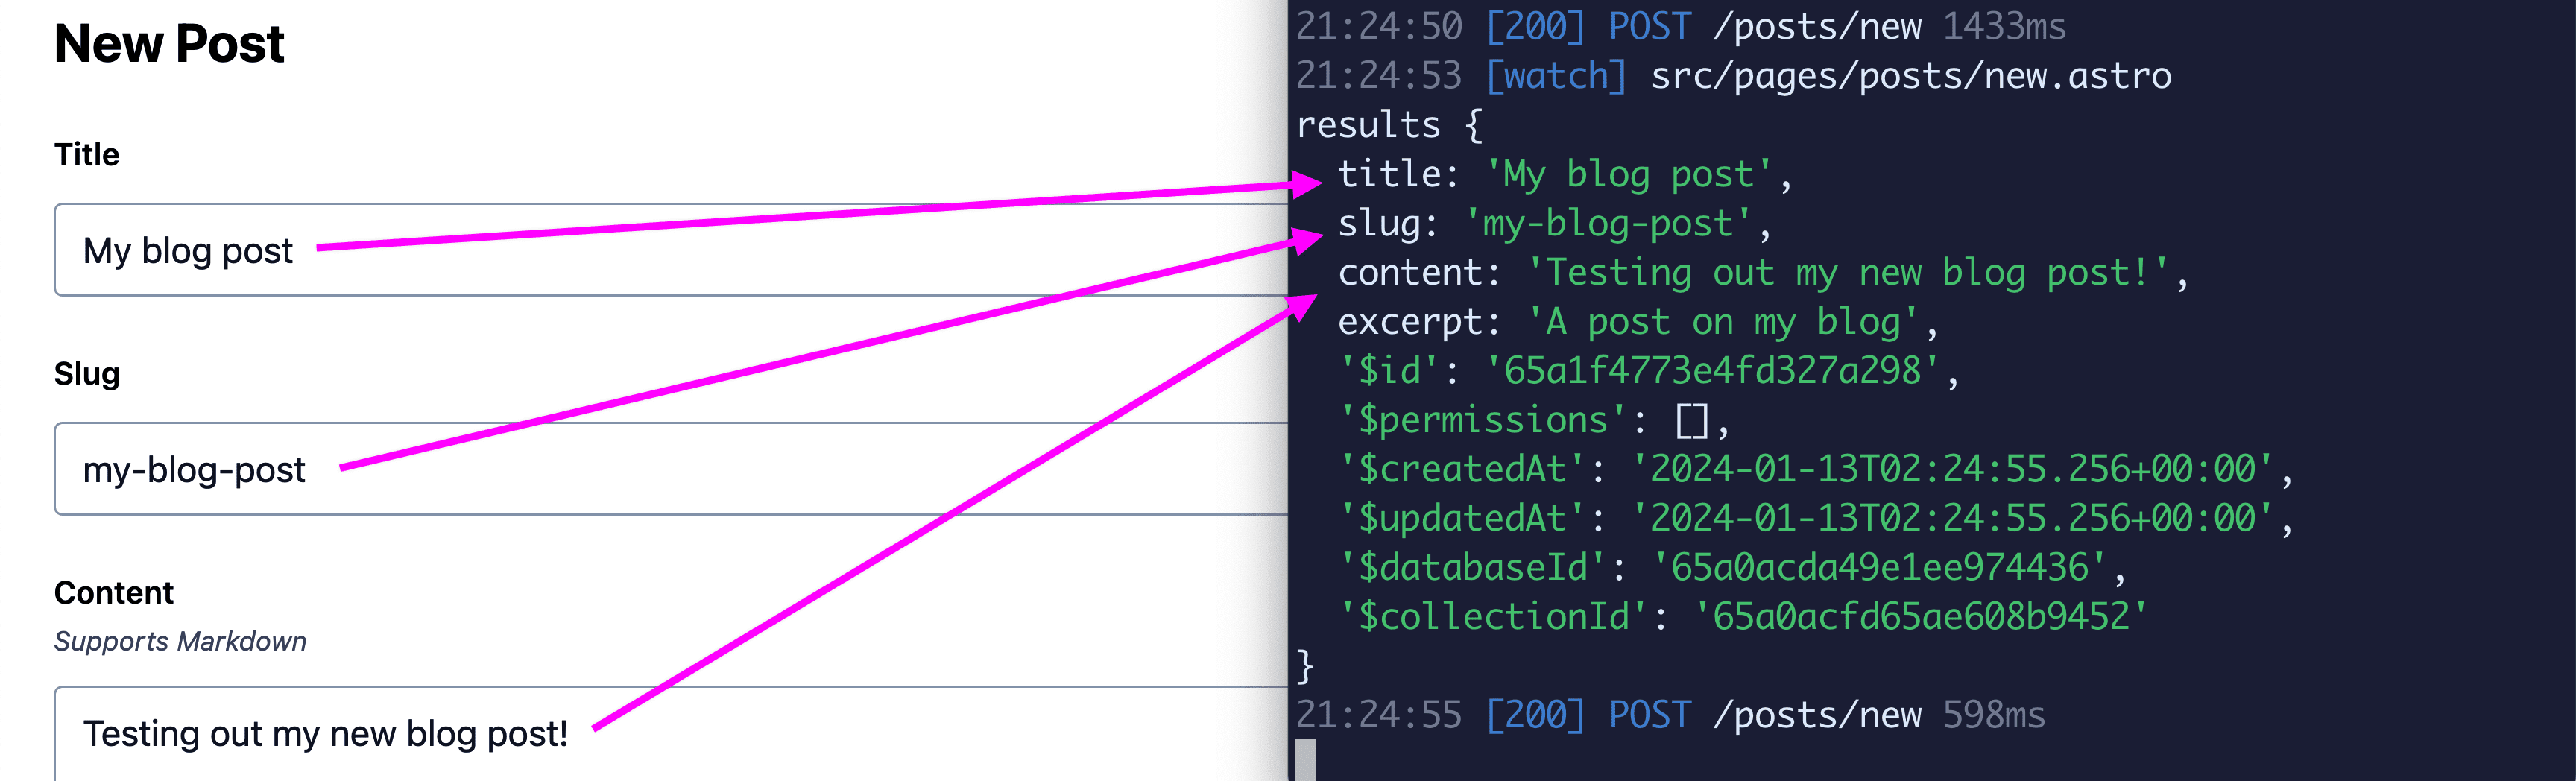
Where once we have a successful post, that means two things. First, we can head to our Appwrite Post Collection dashboard and see our new post.
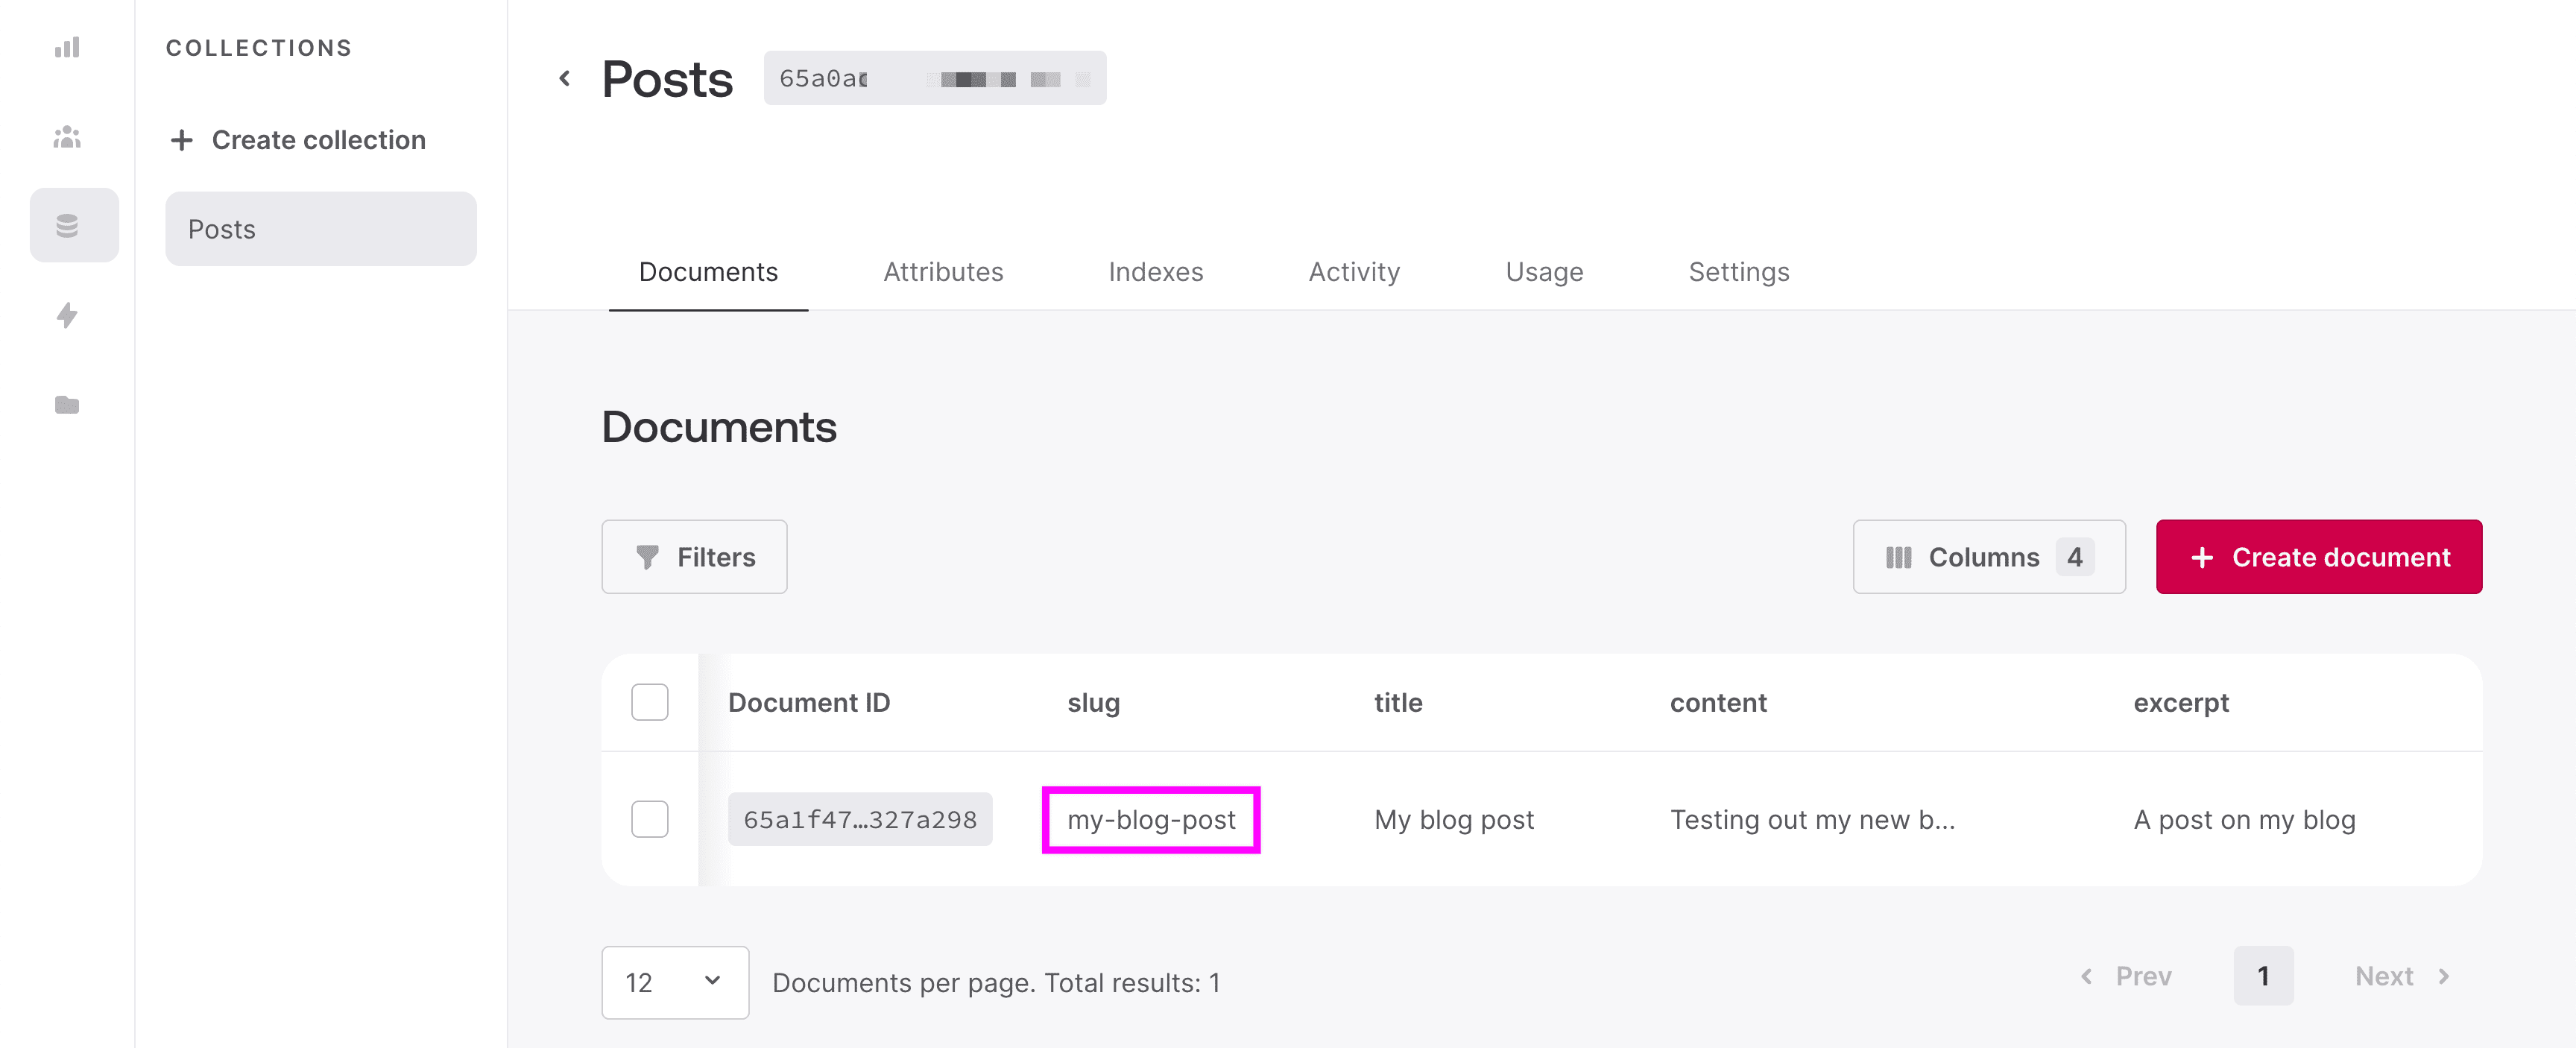
We can also now navigate back to our homepage, where because we now have form data, we can see a new post!
Redirecting on successful post creation
If someone successfully creates a post, we don’t want to leave them there to navigate away themselves, we want to navigate them away.
We have two logical options:
- Navigate to the new post’s page
- Navigate to the homepage
While we don’t yet have a new post page, that’s where I prefer to push our author to, where they can immediately review the post, so we can add a redirect right after our createDocument request:
return Astro.redirect(`/posts/${results.slug}`);Note that we’re returning the redirect, not just firing the method.
This will send our author to a dynamic path composed of the posts directory and the new slug!
Next let’s set up that individual post page.
Step 4: Getting a Single Post by Slug
Now that we created a new post, we want to be able to see it!
To do that, we’re going to create a dynamic route that allows us to dynamically build a page based on our content.
Inside of src/pages/posts create a new file [postSlug].astro. The [postSlug] part in brackets denotes that its a dynamic route where we’ll receive postSlug as a parameter.
Accessing dynamic route parameters
In order to build our dynamic pages, we need to access our dynamic route’s parameter.
At the top of the page, add:
---
const { postSlug } = Astro.params;
---
Note: Leave out the fences (
---) if your page already has them and add this inside!
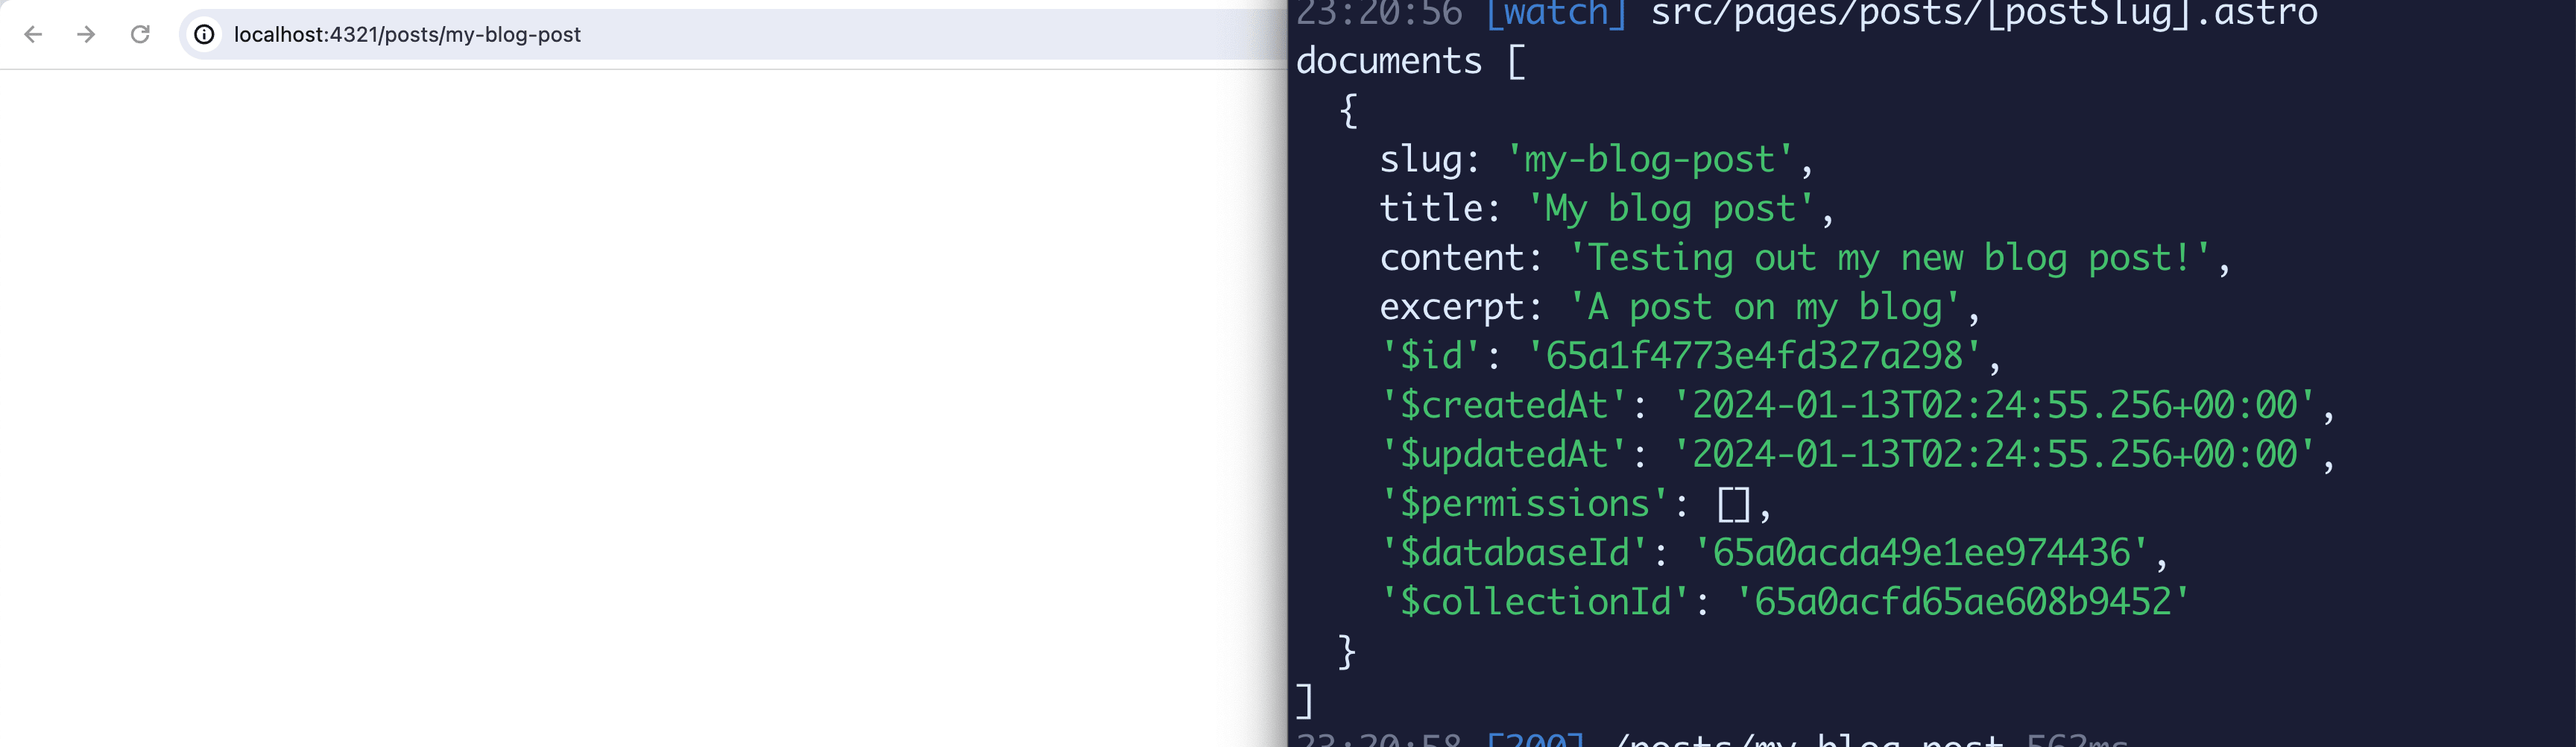
To see this work, we can add another console.log with postSlug and when we go to our new post’s route, such as /posts/my-blog-post in our browser, we should see our slug in the terminal.

But with access to our slug, we can now use that to look up our post inside of Appwrite.
Querying an Appwrite Document by Attribute
In our case, we want to query a Document by Attribute, but this isn’t a first class queryable parameter, such as a Document ID, so we need to use a special query for this.
First off, let’s import our databases instance:
import { databases } from '@/lib/appwrite';We also are going to import the Appwrite SDK Query class which we’ll explain in a second:
import { Query } from 'appwrite';Where then, let’s query for the posts using listDocuments:
const { documents } = await databases.listDocuments(
  '<Appwrite Database ID>',
  '<Appwrite Collection ID>',
  [Query.equal('slug', String(postSlug))]
);
The first two arguments are similar to when we created a post, where we need to grab our Database and Collection ID from inside of the Appwrite dashboard, but the 3rd argument is where we use an Appwrite SDK helper called Query, where we state that we want to query the lists of Documents where the Attribute of “slug” is equal to our postSlug value.
If we add another console.log for documents and refresh the page with a slug that exists, we should be able to see our new post pop right up!
So now let’s use this data to render some UI.
Displaying a post by its slug
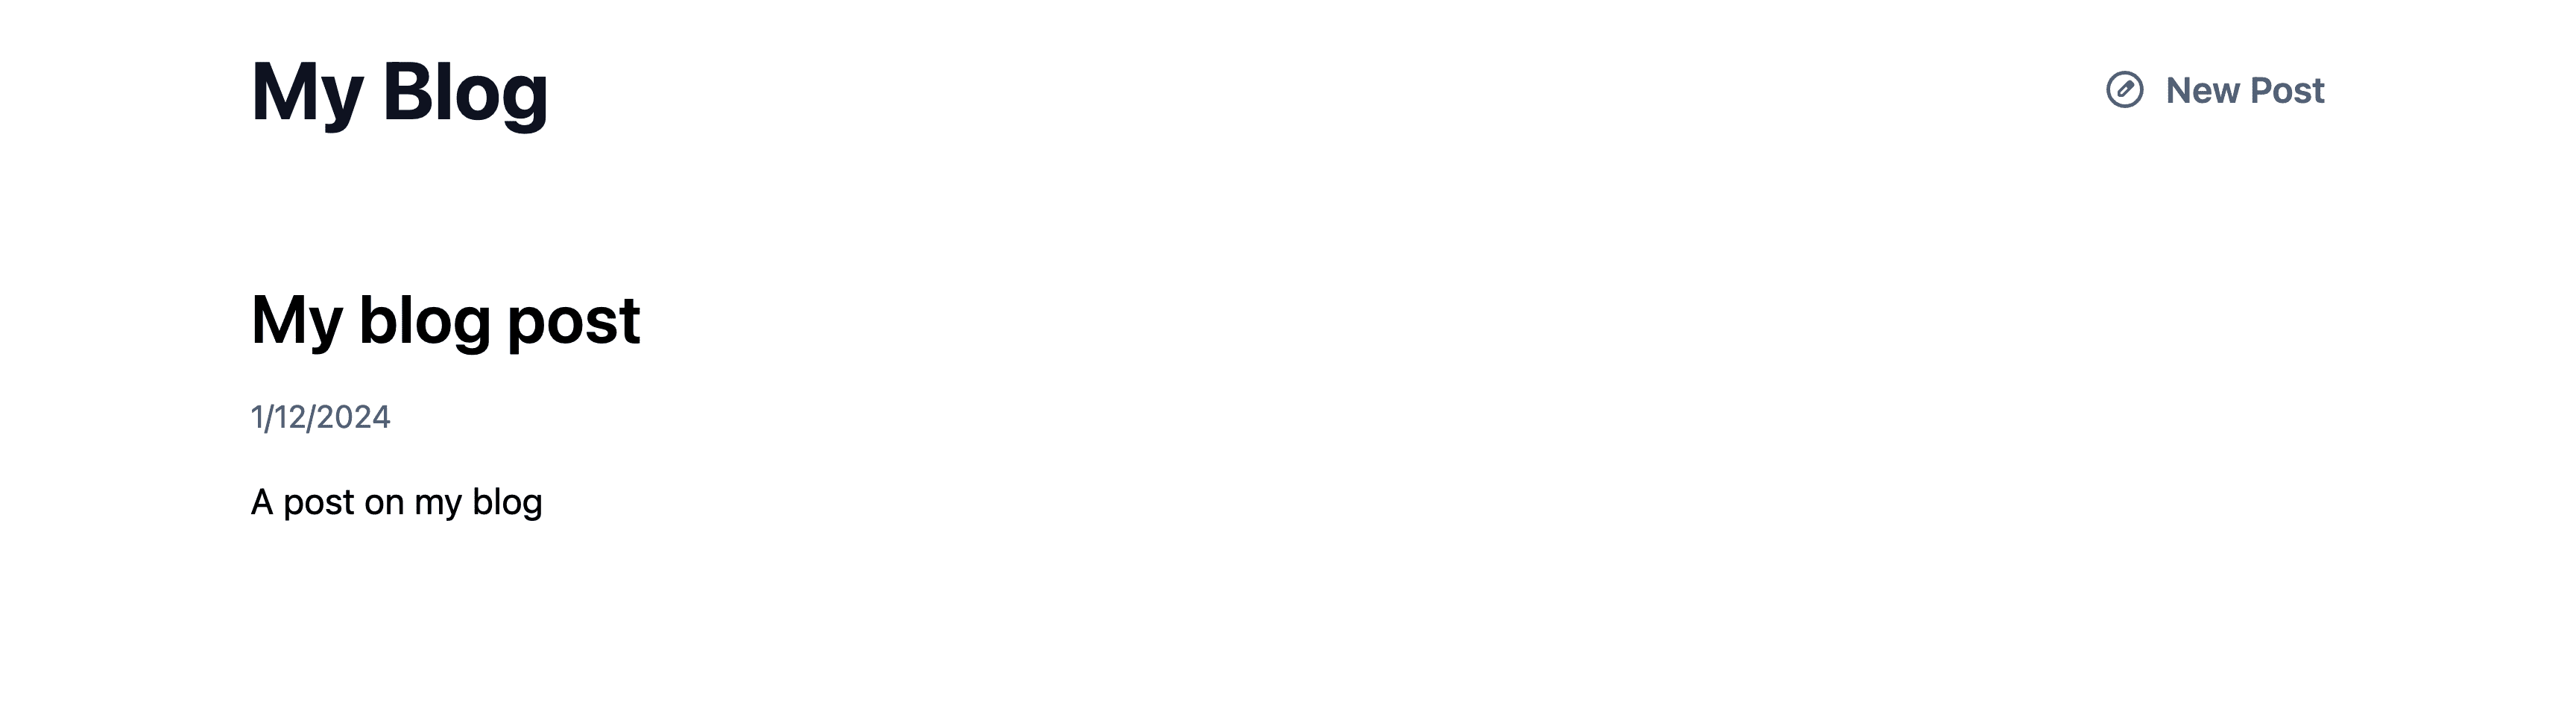
First off, let’s store our first document in an easy to access constant:
const post = documents[0];Then after our fences (---), we can start to render some UI, including the title, the date, and even the content!
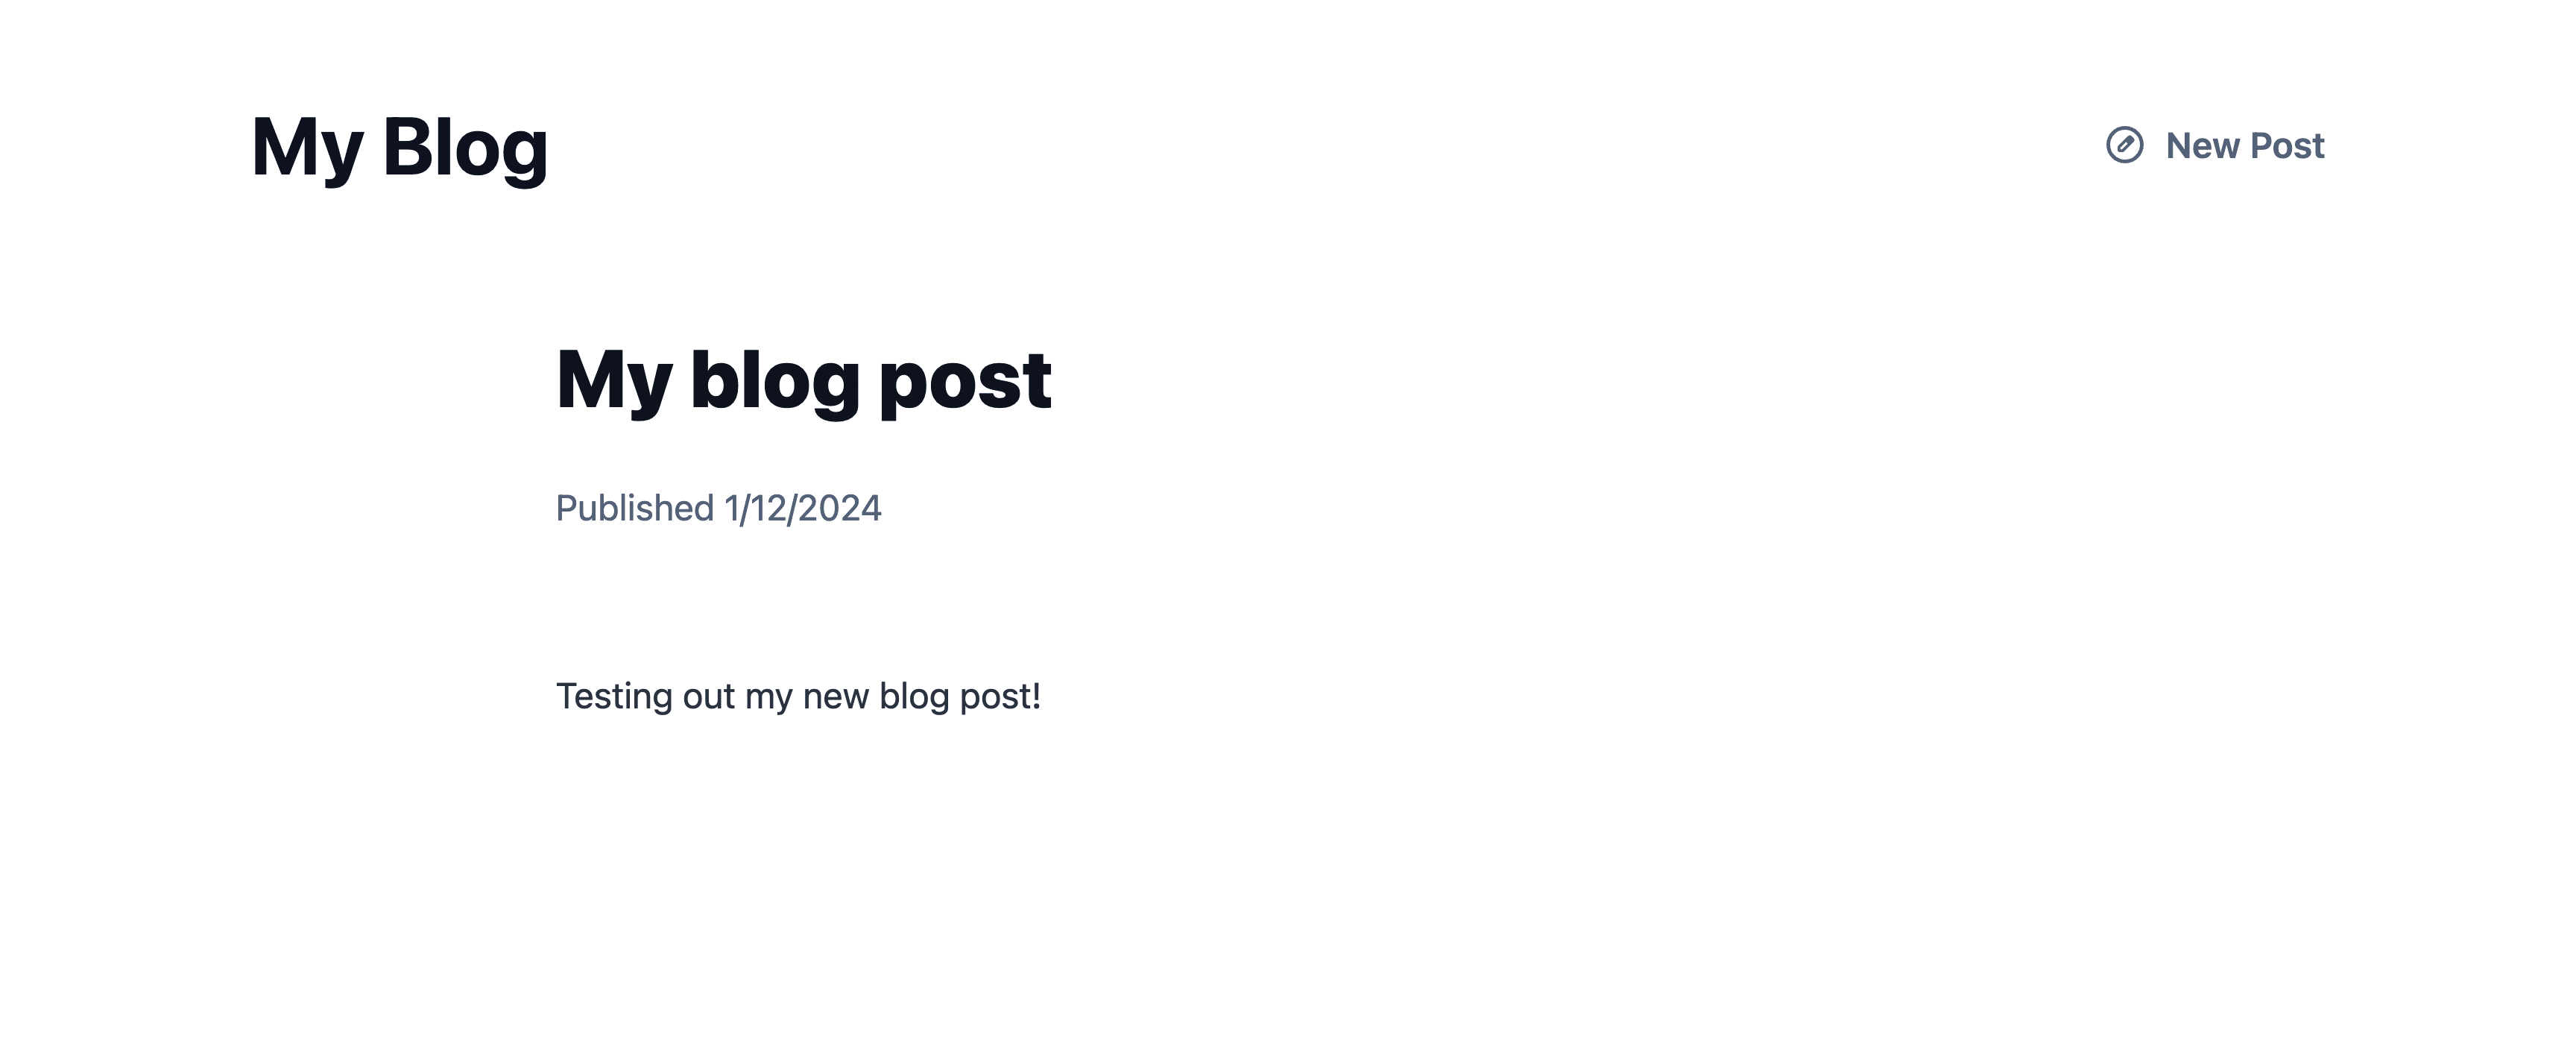
<article>
    <h1>{ post.title }</h1>
    <p>
        <time datetime={new Date(post.$createdAt).toISOString()}>
            Published { new Date(post.$createdAt).toLocaleDateString() }
        </time>
    </p>
    <Fragment set:html={post.content} />
</article>
Here we’re rendering our title, using our Document’s Created At date as our “published” date, and then we use Astro’s Fragment component allowing us to render an HTML string.
Note: We’re not currently storing our post as HTML but we’ll get to that later.
And with that, we’re able to show our post content!
But what if the post is missing?
Returning a 404 if the post is not found
While we navigated to a post that actually exists, what if it the post doesn’t?
We can look for the existence of that post and if it’s not available, redirect away, given we’re rendering this page on the server.
if ( !documents.length ) {
    return Astro.redirect('/404');
}
Here we’re using the Astro object’s redirect method to send our visitor away to a 404 page.
Tip: you can customize the 404 page!
But now, we’re able to create a blog post and people can view it, but we have an issue, our blog posts aren’t formatted and are just a wall of text!
Step 5: Converting Markdown to HTML with Marked
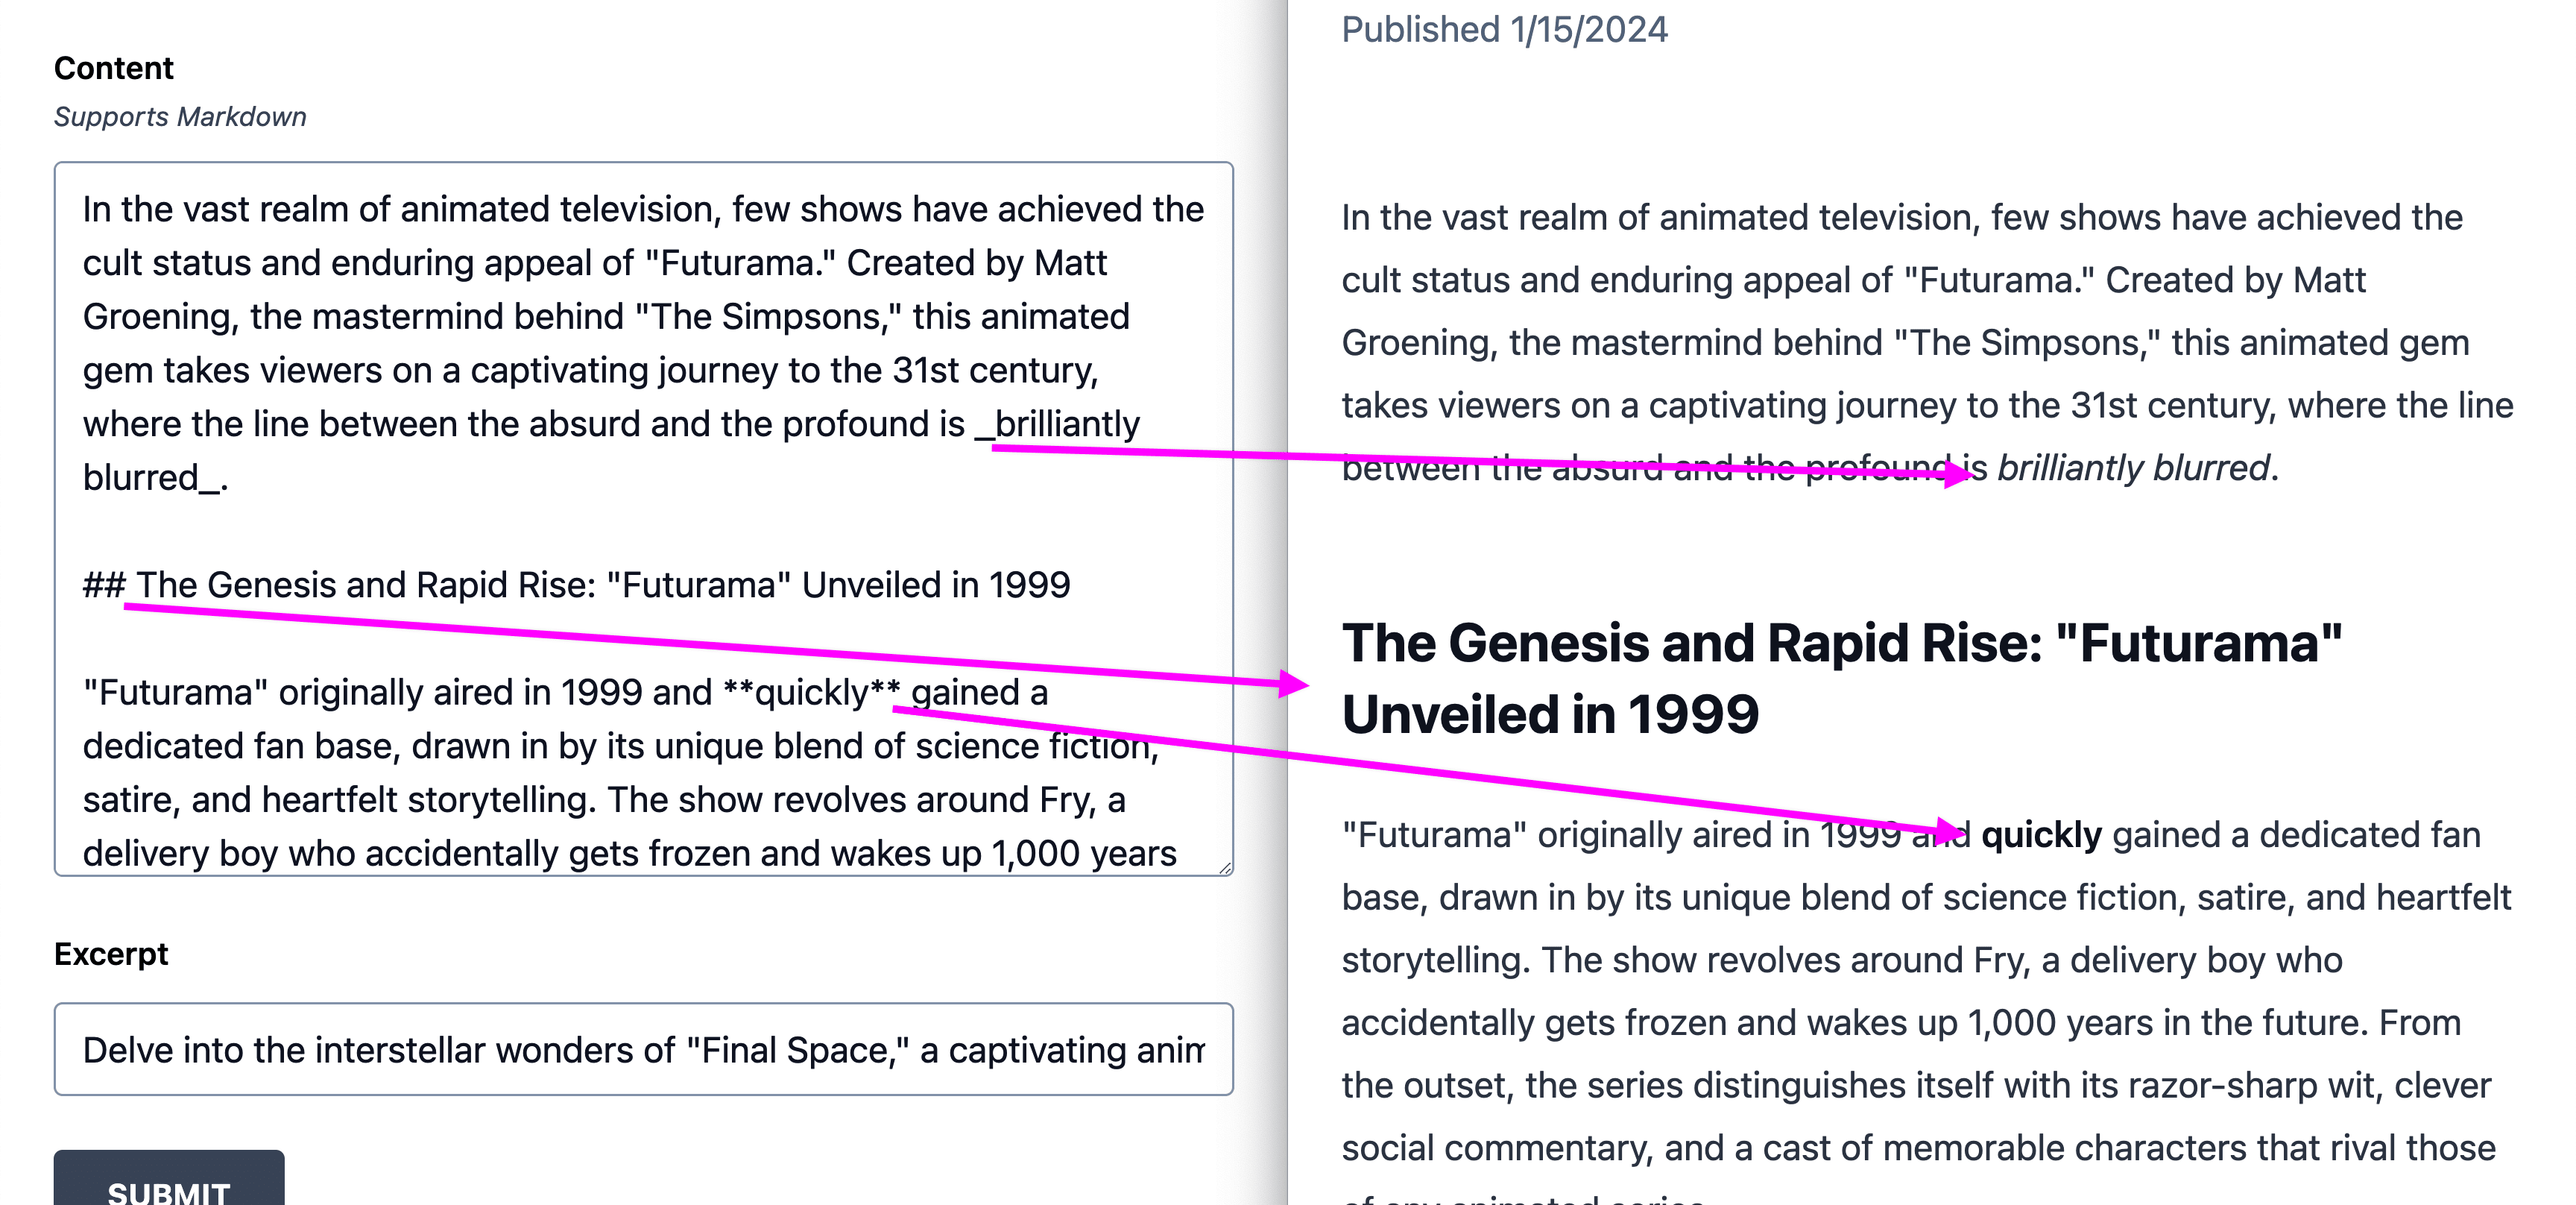
When submitting a new post, we’re taking the post content entered into our textarea “as is” and sending it to Appwrite as a string.
This works in terms of storing that information, but one thing it’s lacking is any context of how that text is formatted, particularly including any spacing, paragraph returns, or markdown if we choose to support that.
One way of addressing this is to consider our field as Markdown and before delivering that information to Appwrite, rendering that content as HTML. Markdown alone will give some pretty great content editing features for your visitors, but you don’t necessarily need to promote or support the full extent of those features if you don’t want to.
Note: Why HTML? HTML is pretty universally supported for rendering onto a page (like the Fragment component we used). You can certainly choose to store it “as is” or perhaps in a different format, but we’ll be using HTML for this example.
So let’s dig into it.
Supporting a Markdown form field by converting it to HTML
To set this up, we’re going to use the Marked package which gives us an easy-to-use helper for converting our post content.
First, install Marked:
npm install markedThen inside of our page where we’re creating a new post, where in our example we used src/pages/posts/new.astro, add:
import { marked } from 'marked';We’ll then simply wrap our form content with this method:
content: await marked(String(formData.get('content'))),Note that we’re using await here as marked returns a promise.
But let’s now give this a shot and try to submit a new post.
If we then go inside of our Appwrite Documents dashboard, find the post, and look at the content under the Data tab, we should now see our content includes HTML!
Now of course this means that we need to go back and fix our old posts unfortunately.
But this will give us a way to reliably store our post content to render into our page AND it also gives us a way to support rich formatting in our post!
Step 6: Listing Out Blog Documents
We have our new post workflow set up and our ability to view an individual post, but how about getting to see a list of these for our visitors to discover? Let’s see how we ecan list out all of our available posts.
Getting a list of available Appwrite Documents
A common place to list out posts is the homepage, so we’ll be working out of the src/pages/index.astro page.
At the top of our page file, add the following:
---
import { databases } from '@/lib/appwrite';

const { documents: posts } = await databases.listDocuments(
  '<Appwrite Database ID>',
  '<Appwrite Collection ID>'
);
---
Note: Leave out the fences (
---) if your page already has them and add this inside!
Here, we’re again importing our databases instance as well as the listDocuments method like we did to query our individual post, but this time, we’re just allowing it to list all the Documents instead of filtering it down. We’re also renaming documents to posts just for readability.
Remember, you can find and copy the ID for both your Database and Collection at the top of each page in the Appwrite dashboard, but by now, you should have them available to grab from your code!
Like usual, we can log this out to see the results.
And we can see our list of posts!
Note: Appwrite defaults to returning 25 posts, which you can use Pagination to query for more!
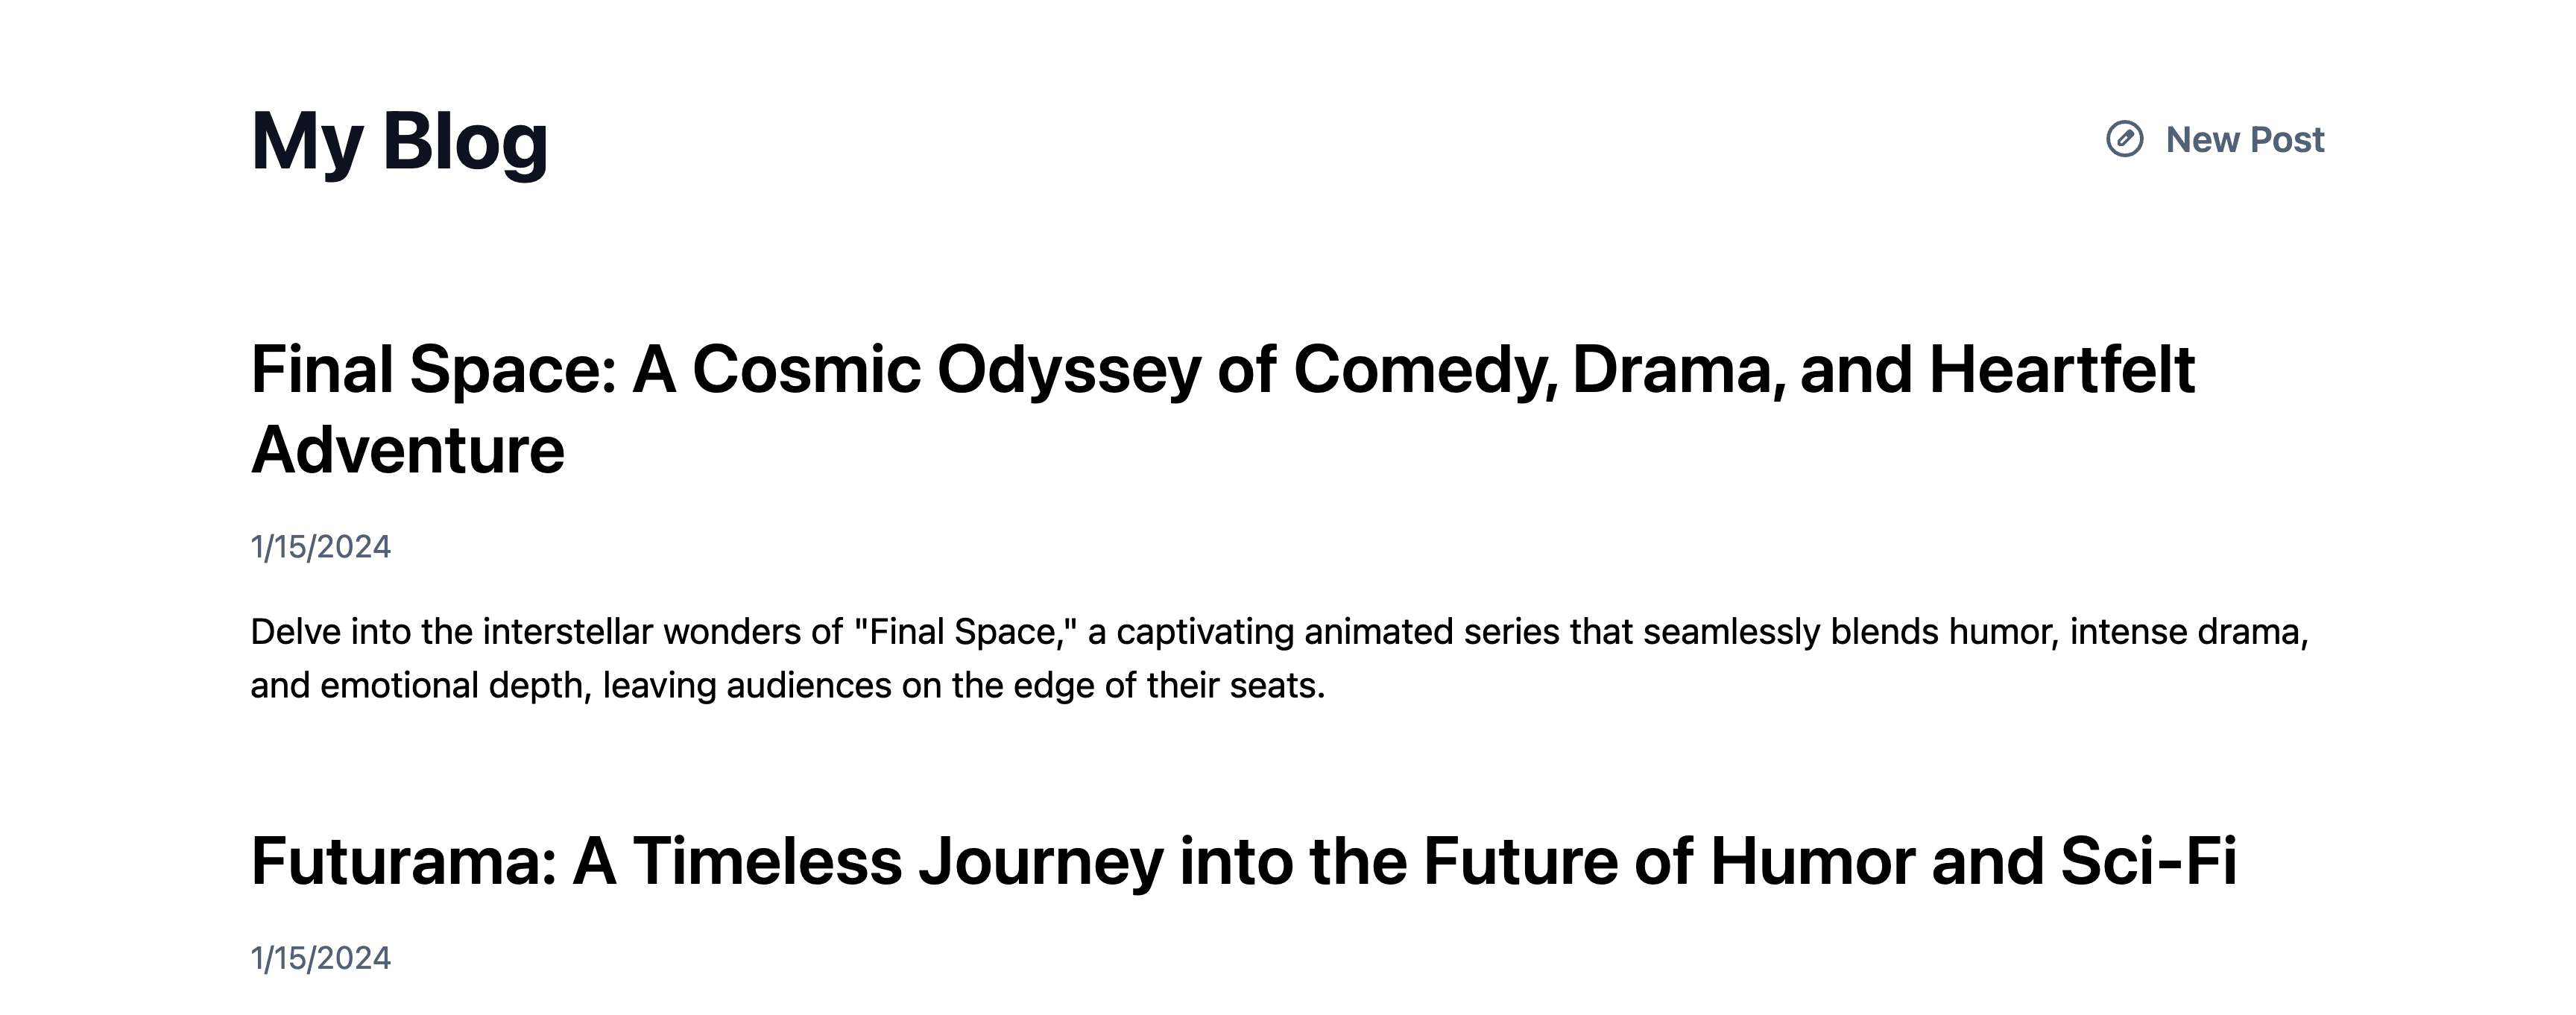
Displaying a list of posts
Now that we have our list of posts, we can then loop through each post accessing our post data to display on the page:
<ul>
    {posts.map(post => {
        return (
            <li>
                <h2>
                    <a href={`/posts/${post.slug}`}>{ post.title }</a>
                </h2>
                <p>{ new Date(post.$createdAt).toLocaleDateString() }</p>
                <p>{ post.excerpt }</p>
            </li>
        )
    })}
</ul>
We can see that we’re rendering out the title, the date, and the excerpt which is intended to be a short blurb about the post.
We also notice here that we’re using an anchor tag (a) to specify a dynamic path, so that when someone clicks on the headline, they get navigated to the post page.
But now, we can see our posts listed out on our homepage!
Authentication, Permissions, and More
The next step is to lock down your blog so that you’re the only one that can create and edit posts.
To do that, we can use a variety of authentication options through Appwrite using React as a way to manage clientside interactions and sessions.
Learn more with my course Full Stack React with Appwrite on egghead.io.