

Having a Headless CMS gives us a lot of flexibility for how we build apps and display content, but with our frontend decoupled from our backend, it won’t automatically stay up to date. To fix this, we can use Next.js Incremental Static Regeneration to keep our content fresh with configurable cache invalidation.
What is a Headless CMS?
A Headless CMS, or Decoupled CMS, is a Content Management System where the frontend of the application isn’t coupled with the CMS itself.
This method of coupling the frontend and backend was popularized with WordPress, whether the WordPress server would host the admin as well as render the frontend website.
Instead, we can grab the content from our CMS, whether WordPress or any other CMS, and use that in whatever frontend we’d like, such as Next.js.
How do we keep our website updated from a Headless source?
One of the issue with a Headless source, is our frontend has no way of knowing that the content has changed, meaning, it can’t provide fresh content.
To get around that, we have a few options, like manually triggering a new build of our site or using serverside rendering, but sometimes we need more control than that.
Next.js offers Incremental Static Regeneration (or ISR) which gives us the ability to build our sites and server them statically while providing a mechanism that occasionally refreshes the content by triggering new builds.
How can we use the Revalidate API to keep content fresh?
The fun part is this is pretty simple to do in Next.js, we just need to define the amount of time we want Next.js to consider our content “stale”.
In our code, it might look like:
return {
  props: {
    data
  },
  revalidate: 60
}
In this instance, we’re saying that we want Next.js to rebuild our page(s) at most every 60 seconds.
So in reality, it looks like:
- Site builds and responds to user with static files from build
- If less than 60 seconds, Next.js will respond to use with static files from build
- If after 60 seconds, Next.js will first respond to a user with the static files from build, but additionally trigger a refresh of the page in the background
- Next.js will now respond to users with the refreshed page
This gives us the ability to have more control over how often our content gets refreshed and as a bonus which we’ll see later, we can additionally force that to refresh on-demand whenever we want!
What are we going to build?
To see how this works, we’re going to spin up a new Next.js app from a starter that uses Headless WordPress as a source via WPGraphQL.
We’ll then configure our application to use Incremental Static Regeneration to ensure our content gets refreshed and see it happen in realtime.
Finally we’ll see how we can create an API endpoint that allows us to trigger these refreshes programmatically giving us even more control!
Step 0: Creating a new Next.js app from a demo starter
We’re going to start off with a new Next.js app using a starter that includes some simple UI that we’ll use.
In particular, we’re going to use a Headless WordPress Starter to do this, though you can follow along with any Next.js app using content from a Headless source.
Tip: want to learn how to spin up a new Next.js project with Headless WordPress? First check out my post How to Create a Headless WordPress Blog with Next.js WordPress Starter
Inside of your terminal, run:
yarn create next-app -e https://github.com/colbyfayock/next-wpgraphql-basic-starter my-fresh-blog
# or
npx create-next-app -e https://github.com/colbyfayock/next-wpgraphql-basic-starter my-fresh-blog
Note: feel free to use a different value than
my-fresh-blogas your project name!
Once installation has finished, you can navigate to that directory.
cd my-fresh-blogThe only other thing we need to do is set up an environment variable to point to your headless WordPress instance.
Create a new file in the root of the project called .env.local and inside add:
WORDPRESS_GRAPHQL_ENDPOINT="<http://yourhost.com/graphql>"But then we can start our development server:
yarn dev
# or
npm run dev
And once loaded, you should now be able to open up your new app at http://localhost:3000!

Before we move forward though, just for the sake of this article, we’re going to do one thing, and that’s disabling the caching mechanism that the site is using for Apollo, which helps performance, but will prevent our tutorial from working as expected.
Inside src/lib/apollo-client.js update the _createApolloClient function to:
export function _createApolloClient() {
  return new ApolloClient({
    link: new HttpLink({
      uri: process.env.WORDPRESS_GRAPHQL_ENDPOINT,
    }),
    cache: new InMemoryCache(),
    defaultOptions: {
      watchQuery: {
        fetchPolicy: 'no-cache',
        errorPolicy: 'ignore',
      },
      query: {
        fetchPolicy: 'no-cache',
        errorPolicy: 'all',
      },
    }
  });
}
We’re basically telling Apollo not to cache anything.
Note: we’re doing this just for tutorial’s sake so we don’t hit any snags. You may want to consider adding it back in or learning more about the Apollo caching functionality to understand how best to use it.
BefNow this site is intentionally basic. It has a homepage that lists some posts and you can navigate to the post page which shows the content of that post.
All of this content is being pulled in headlessly from WordPress, which is great, but what happens when we edit that content?
If we refresh the page when running locally, it might refresh, or you may need to restart your server, but what about when deployed?
You have a few options:
- Manually trigger a new deployment
- Use WP hooks to automatically trigger a new deployment
- Or use Incremental Static Regeneration (ISR) which will handle keeping your content as fresh as you configure
Tip: We’ll also see how we can couple ISR to force validation quicker than our configured time!
If it wasn’t clear, we’re going to use ISR to keep our content fresh on our site, using the revalidate property to configure how often it refreshes.
Step 1: Using Next.js Revalidate to automatically refresh content from a headless source
The cool thing is this first part is super easy and gets us most of the way to what we want to achieve.
To set up revalidation, all we need to do is define a revalidate flag when returning our props and telling Next.js how often we want to revalidate.
If you’re following along, head into src/pages/index.js and scroll down to the bottom of the page inside getStaticProps where we’re returning our props:
return {
  props: {
    page,
    posts
  }
}
To enable revalidation, we add the revalidate property to our top level object.
return {
  props: {
    page,
    posts
  },
  revalidate: 60
}
In the above, I set up revalidation to occur at most every 60 seconds. Let’s illustrate what this looks like.
Without ISR and revalidation, here’s how content updates:
- Site builds
- User requests site, receives static file
- Content updates in headless source
- Content does not change until new build
- User requests site, receives old static files
With ISR and revalidation, here’s how content updates:
- Site builds
- User requests site, receives static file
- Content updates in headless source
- Before 60 seconds: user requests site, receives old static files
- After 60 seconds: user requests site, receives fresh static files
Note: the very first request that occurs after the invalidation period may receive a stale, old static file, but once that request comes in, it will kick off a refresh, meaning every other user will receive the fresh content after.
So let’s test this out. You can deploy your site to a Next.js-friendly hosting platform or you can run next build and next start locally to preview how this works.
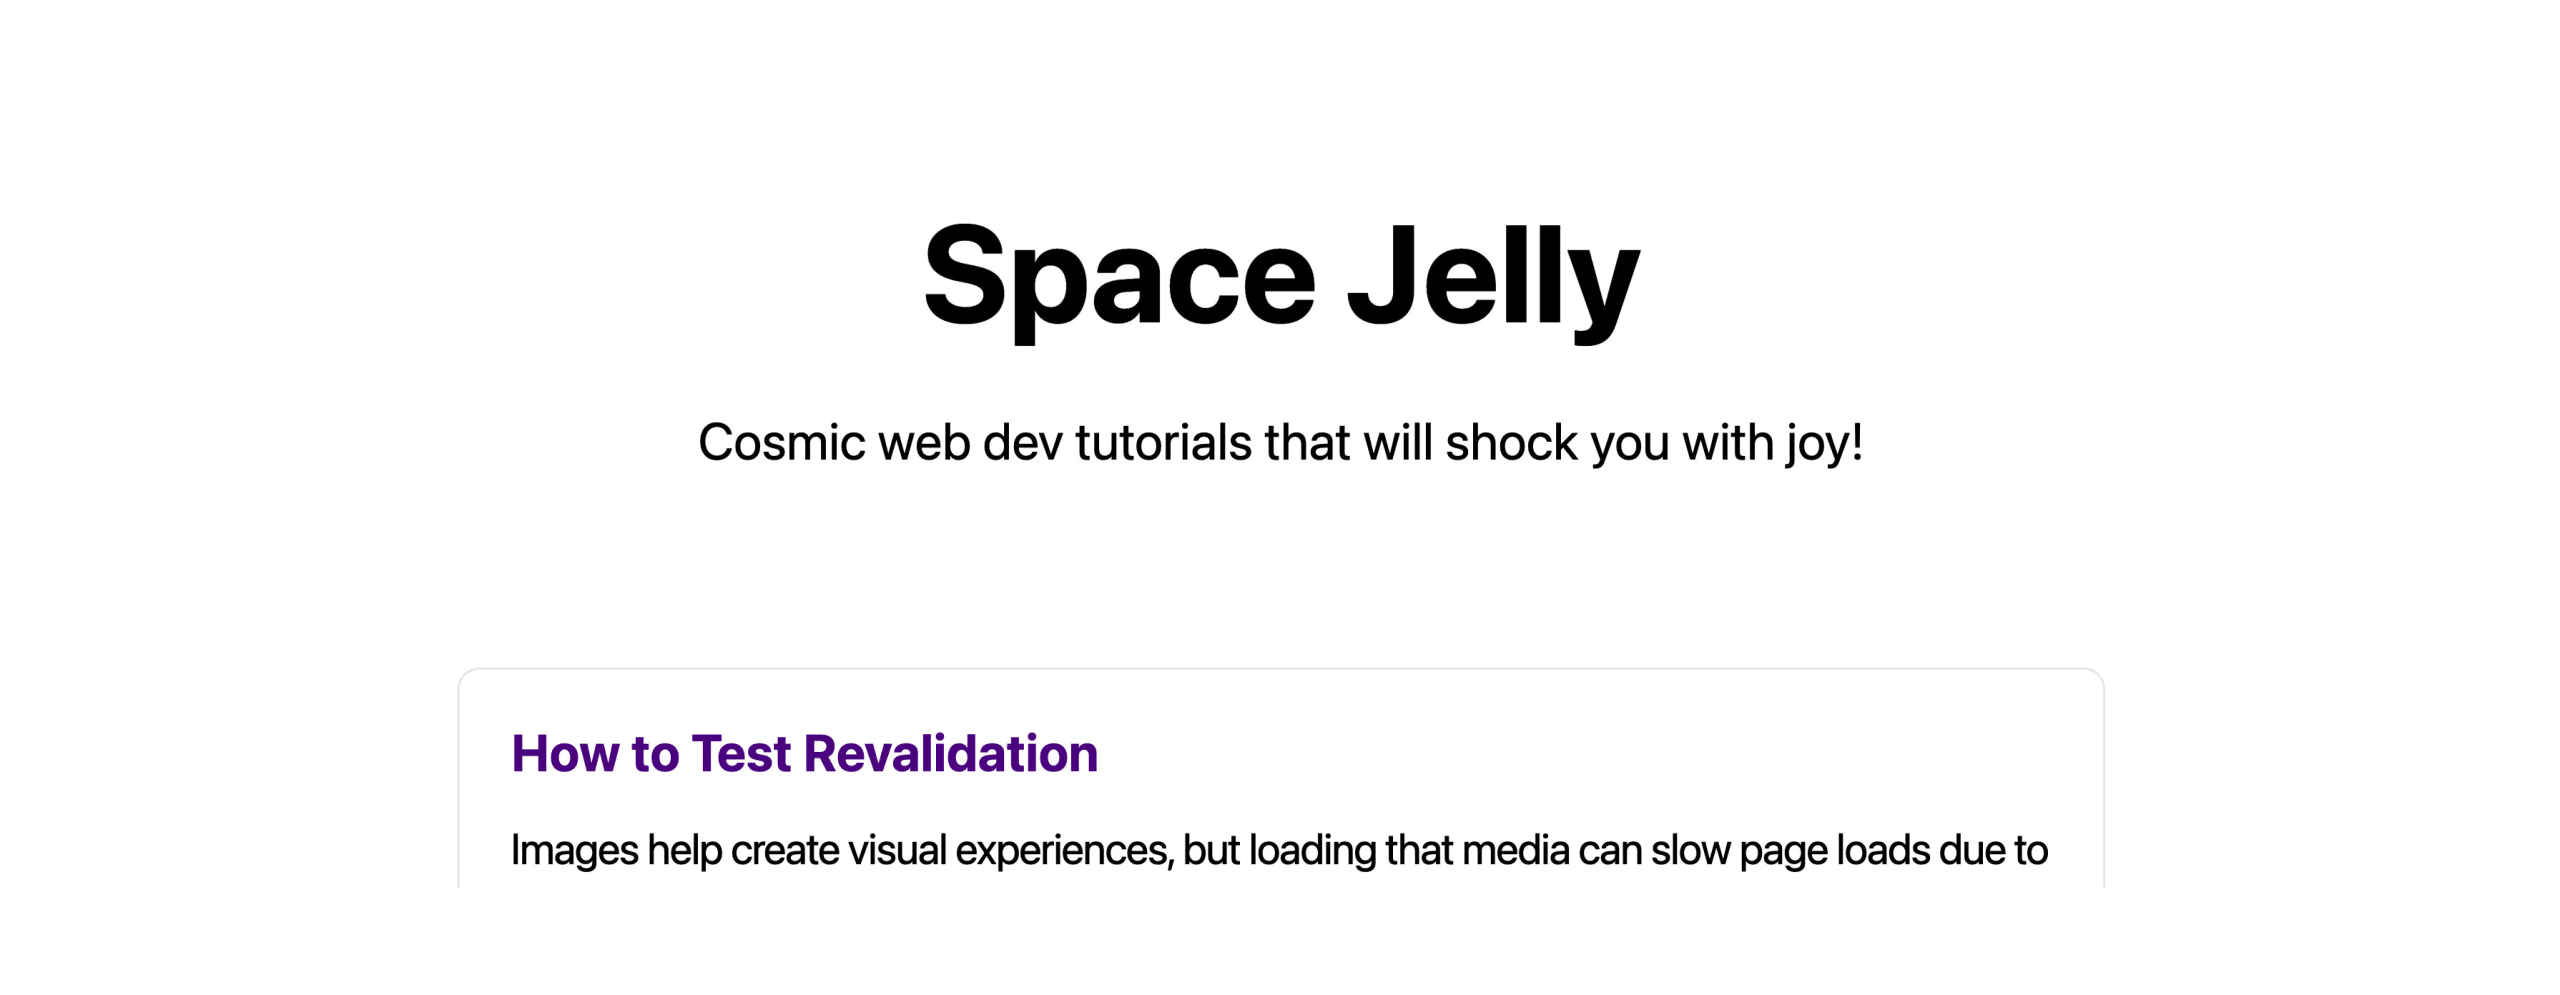
We saw in the earlier screenshot here’s how my site currently looks with my headless content:
Now what if I want to change the title of that first post?
If I wasn’t using revalidate, I’d have to build my site again or force a deploy, but with ISR and revalidate, it happens automatically.
Inside WordPress, I’m going to update that first post title to “How to Test Revalidation”.
As soon as I update the page, and try to refresh, it’s going to look exactly the same.
That’s because we set our revalidation to occur at 60 seconds, so if I now wait the rest of that minute we’ll trigger our content update.
Note: reminder, the first time you refresh, you may get the stale content, but in the background, Next.js is refreshing the content for the next request, meaning, you may need to refresh the page twice.
But here’s a twist.
Click that title and navigate to the page… uh oh, it’s back to the old title!
The issue is, we told Next.js only to update the homepage every 60 seconds, not the post page. That means, the post pages will only get updated whenever there is a new build.
To fix this, we can do the same exact thing we did on the homepage but on the posts page.
Inside src/pages/posts/[postSlug.js] at the bottom inside getStaticProps update the return statement to include our revallidate property:
return {
  props: {
    post,
    site
  },
  revalidate: 60
}
Once your code redeploys or once you build and start your local development server, we can test this again.
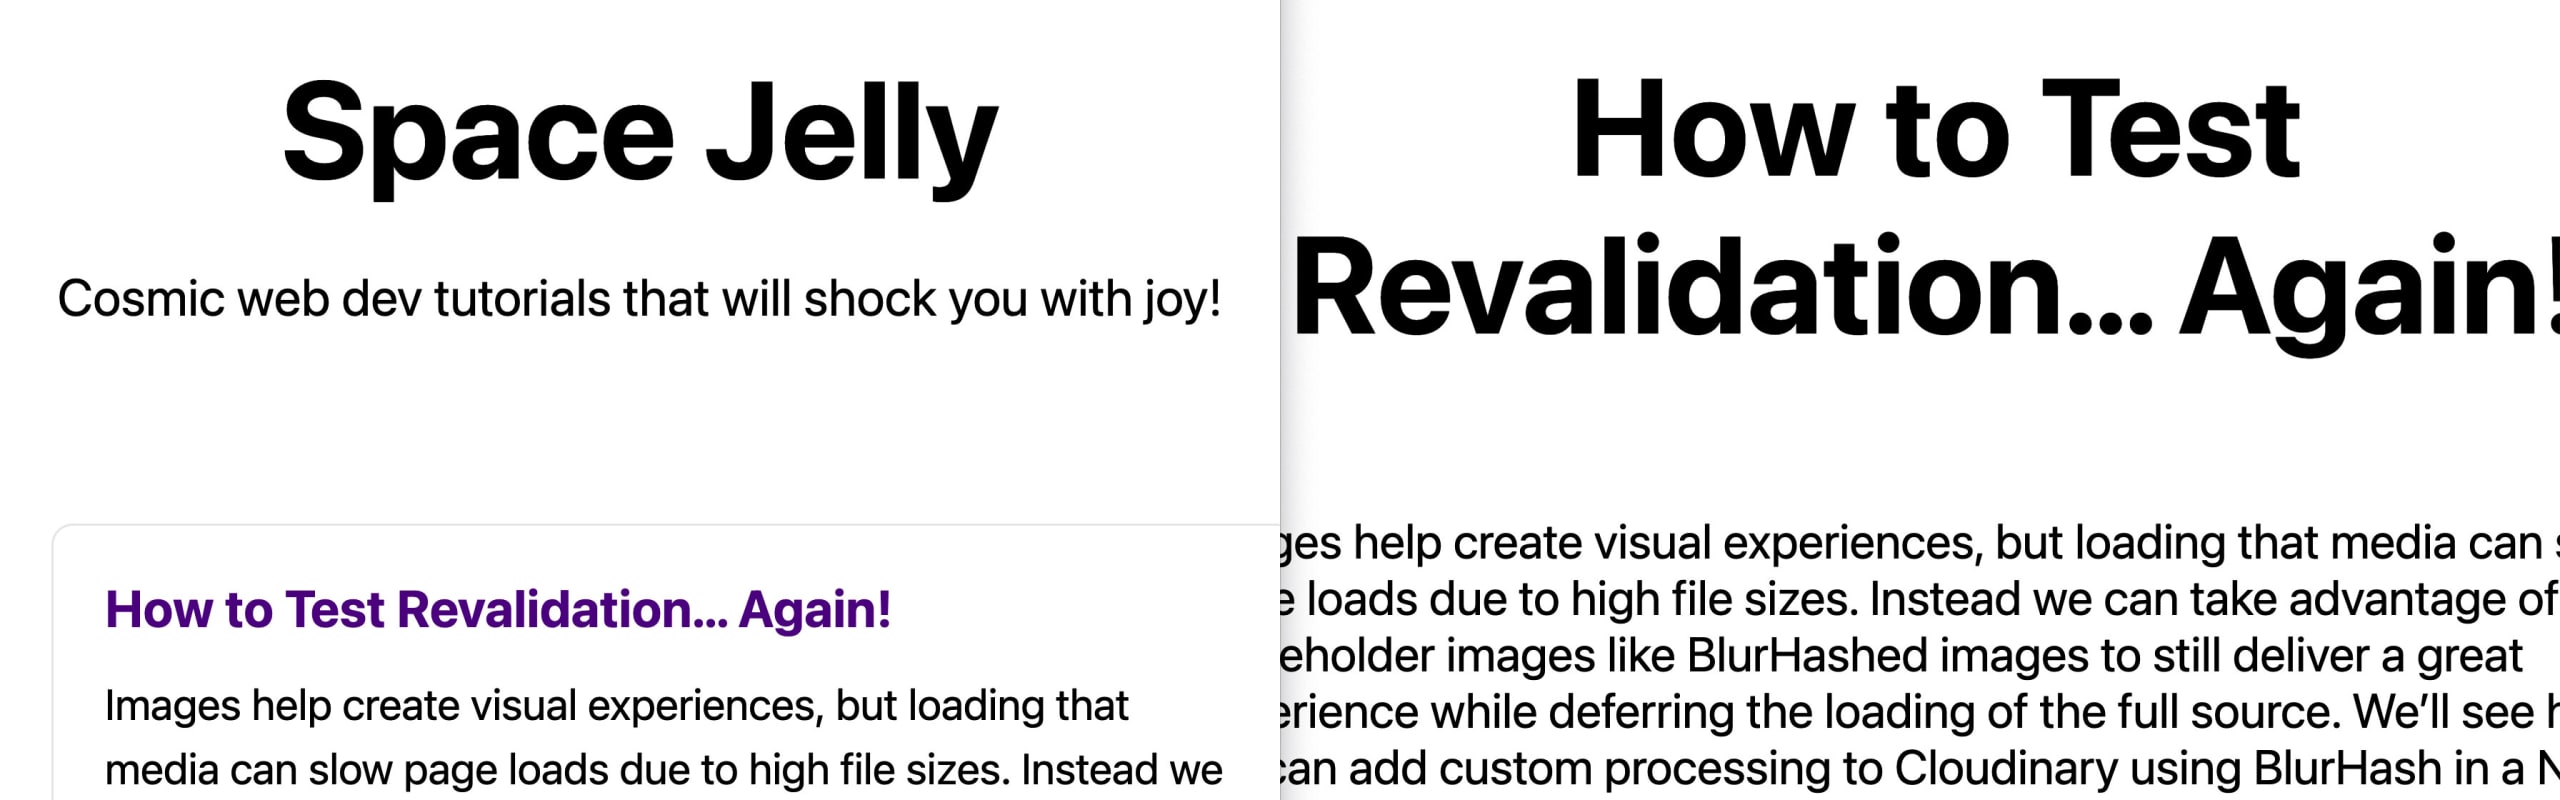
The first time we load, since we rebuilt the site, we’ll now see that new title.

But let’s update our source again, but this time to “How to Test Revalidation… Again!”.
Similar to before, it won’t refresh right away, but if we wait our 60 seconds and refresh twice (one to prime the refresh, one to get the updated content), we should see our updated title both on our post page and our homepage!
Step 2: Generating new pages from a headless source with Next.js revalidation
All examples in Step 1 showed updating existing content, but what if you want a new post to pop up?
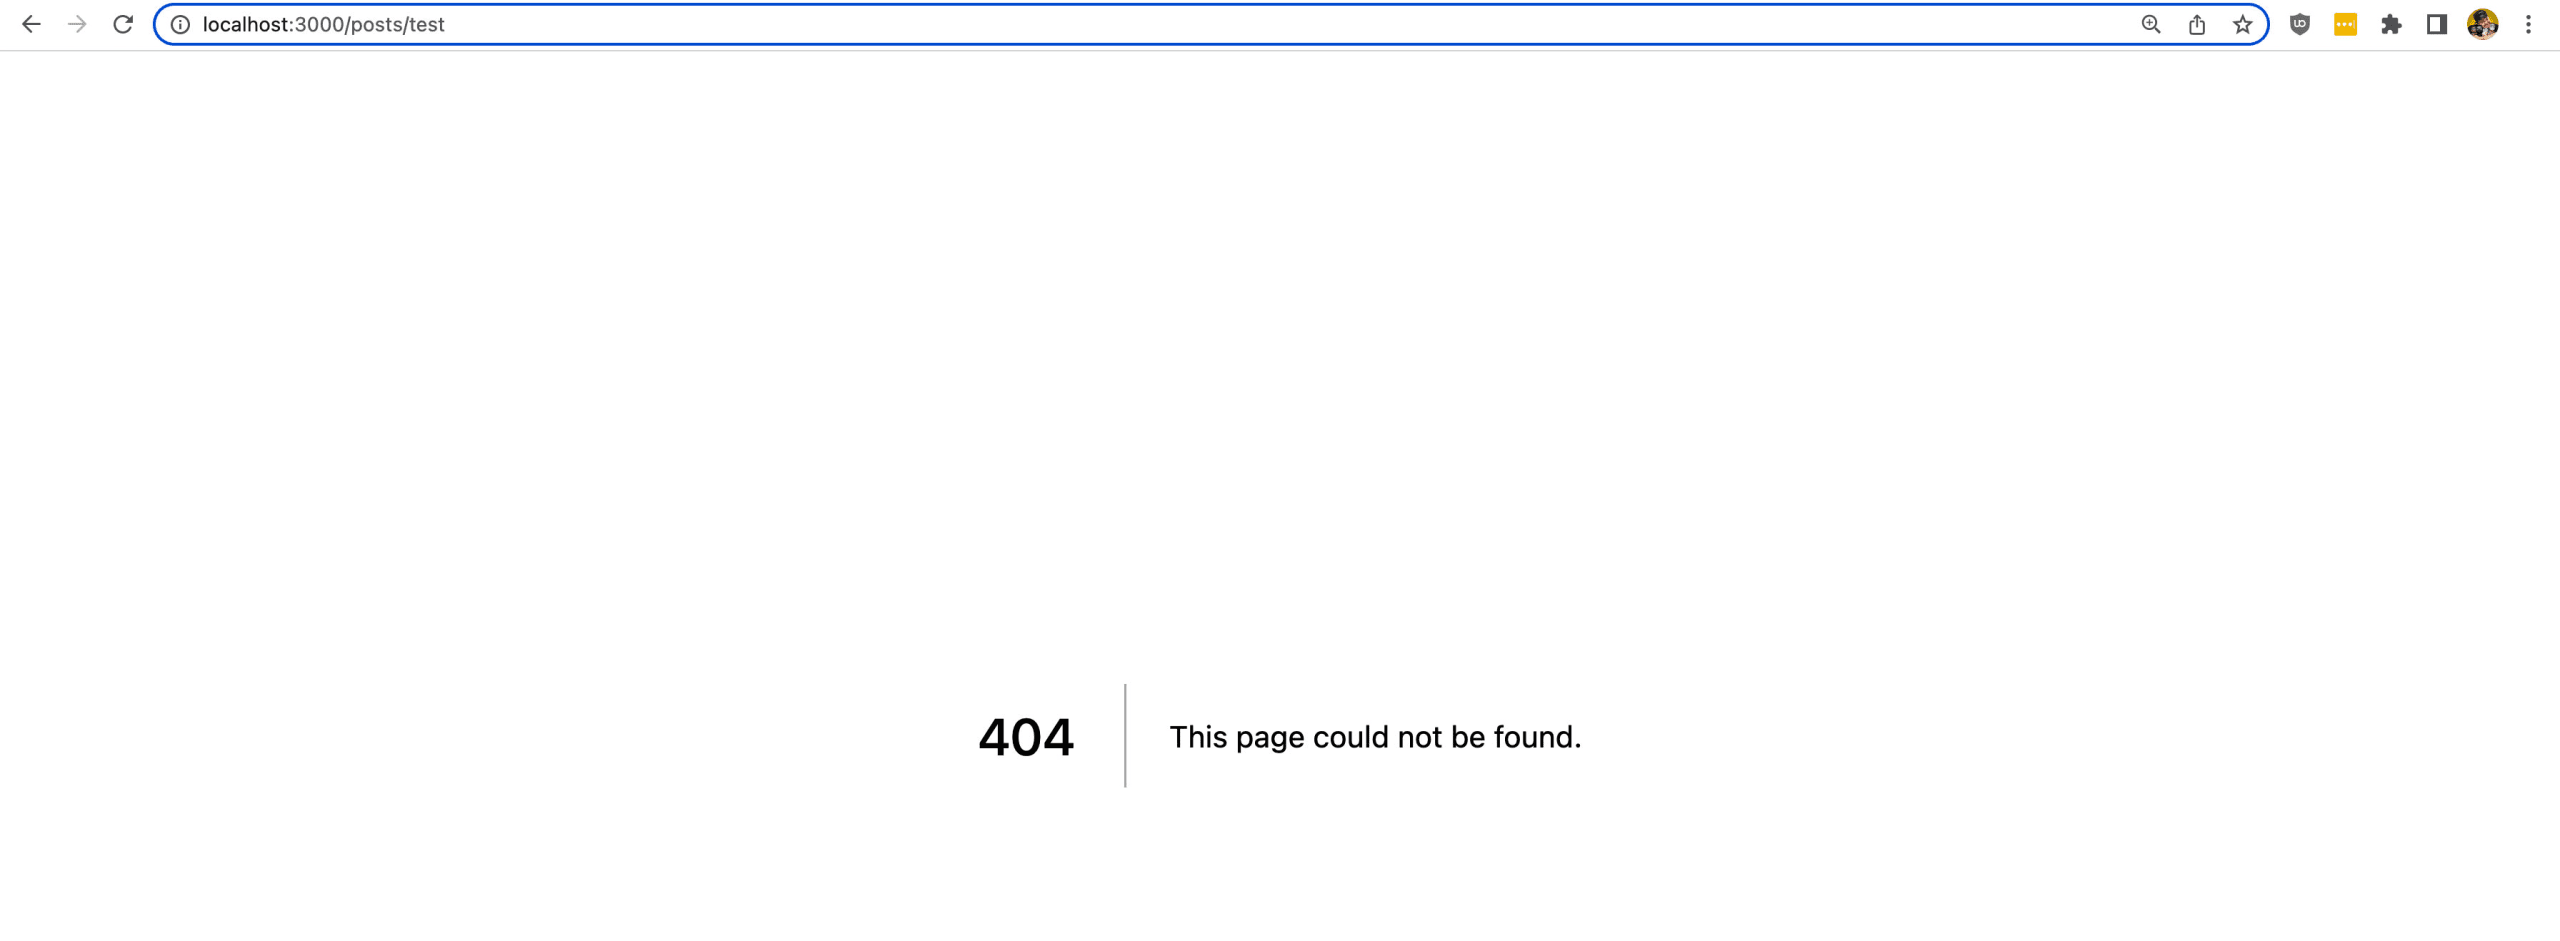
If I add a new post in WordPress (or my headless source) that should be covered in getStaticPaths such as our working example at the bottom of src/pages/posts/[postSlug].js, I’ll just keep getting a 404 no matter how long I wait.
To fix this, we need to tell Next.js that when generating paths, we want the fallback of those paths to be “blocking” which means that Next.js will actively attempt to build that page on request if it doesn’t exist.
So on our return statement inside of getStaticPaths let’s add:
return {
  paths: posts.map(({ slug }) => {
    return {
      params: {
        postSlug: slug
      }
    }
  }),
  fallback: 'blocking'
}
Now once we redeploy or run build and start locally, we’ll of course see our new post since we rebuilt.

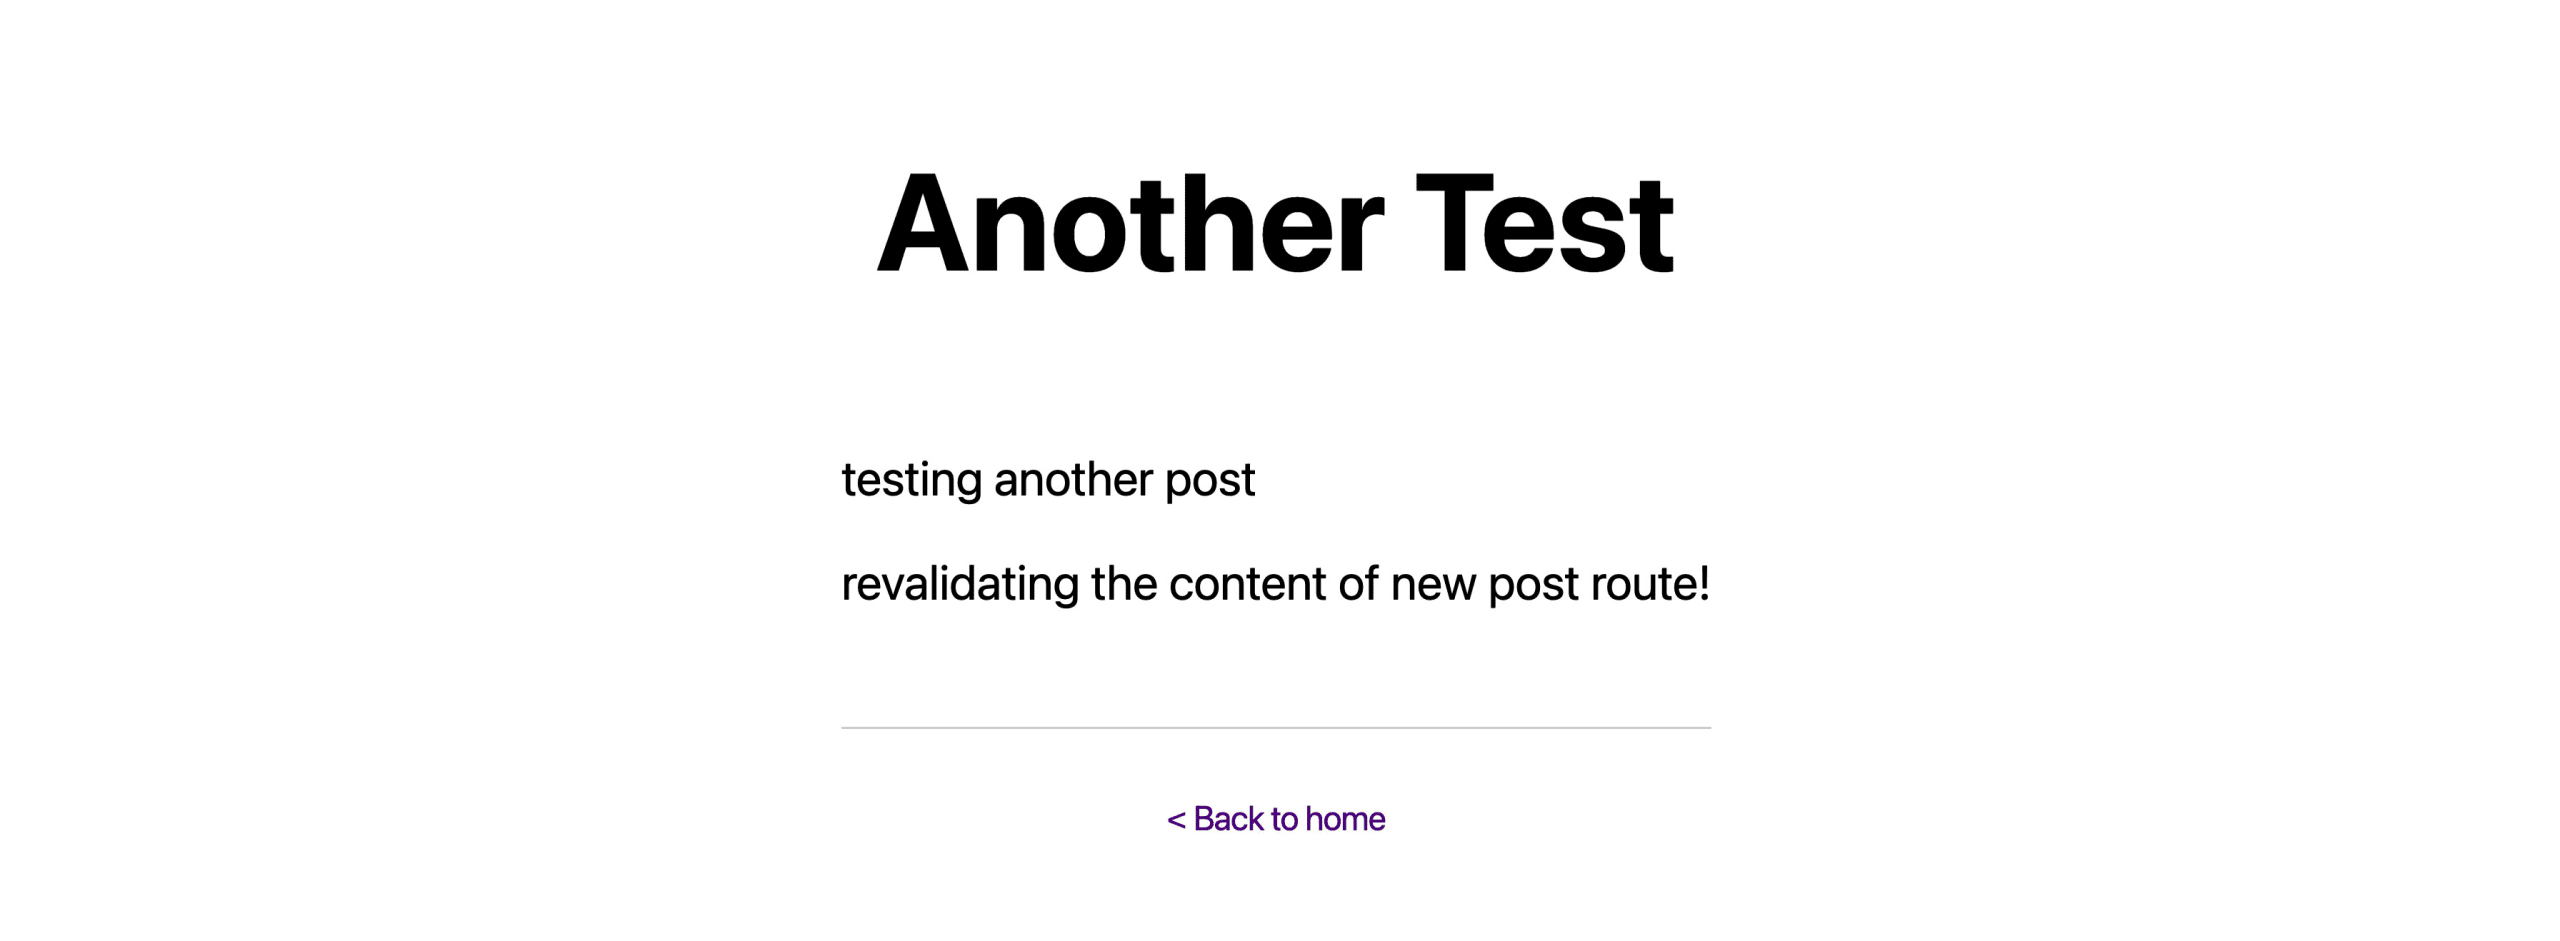
But let’s try adding ANOTHER post to test.
This time, if we try to hit our new page, we’ll notice that it loads right away (or after a few seconds if it takes time to build)!

We can even test our revalidation by updating the content.
And after the up to 60 second revalidation period, we should see our new content changes!
Step 3: Triggering revalidation on-demand using an API endpoint
When dealing with cache, we may want to have a little bit more targeting options for how we refresh our cache.
For instance, maybe we want to let our site automatically refresh daily, but if we have an important change, we want to force it to update.
We can set up our revalidate property to 86400 (or 1 day in seconds) and use a custom revalidate endpoint to trigger an update any other time we want.
Since we know how to add the revalidate property already, let’s dive right into the API.
Note: feel free to optionally change the
revalidateproperty to the 86400 value or whatever you want. Just keep in mind, the longer you set it, the longer it will take for it to refresh automatically if testing it.
Navigate to your pages directory, make sure you have an api folder, and inside add a new file called revalidate.js.
Inside src/pages/revalidate.js add:
export default async function handler(req, res) {
  if (req.query.secret !== process.env.NEXT_REVALIDATE_TOKEN) {
    return res.status(401).json({ message: 'Invalid token' });
  }

  try {
    await res.revalidate(req.query.path);
    return res.json({
      revalidated: true
    });
  } catch (err) {
    return res.status(500).send('Error revalidating');
  }
}
Note: this is basically a modified version of the Next.js Docs example Using On-Demand Revalidation
Here we’re creating a new API available at /api/revalidate where we do a few things:
- Check to see if we’re passing in the correct token for authentication
- Triggering triggering revalidation on a given path
- Handling the response whether successful or not
You’ll notice two dynamic variables here:
req.query.secretwhich correlates toNEXT_REVALIDATE_TOKENreq.query.path
The secret is used to make sure someone can’t abuse this endpoint. While this isn’t a common issue, it can create problems if your headless source does complex tasks or uses heavy resources, which could cost money, or if hit enough times, could crash.
The path is used to give us a way to use a single endpoint to dynamically revalidate any path we want.
As far as the secret goes, you’l notice that we’re comparing it to NEXT_REVALIDATE_TOKEN which means we need to add this as an environment variable.
First, inside .env.local add:
NEXT_REVALIDATE_TOKEN="<Your Secret Token>"This value can be whatever you want, though it’s common to generate a long, random string like you would a password.
Next, set and update that environment variable wherever you’re deploying your application.
Finally let’s test this thing.
If we go back to our app, we should see the same content as earlier.
Now let’s try updating the post again.
If you increased the revalidate value, you’re not going to see the content refresh for a while.
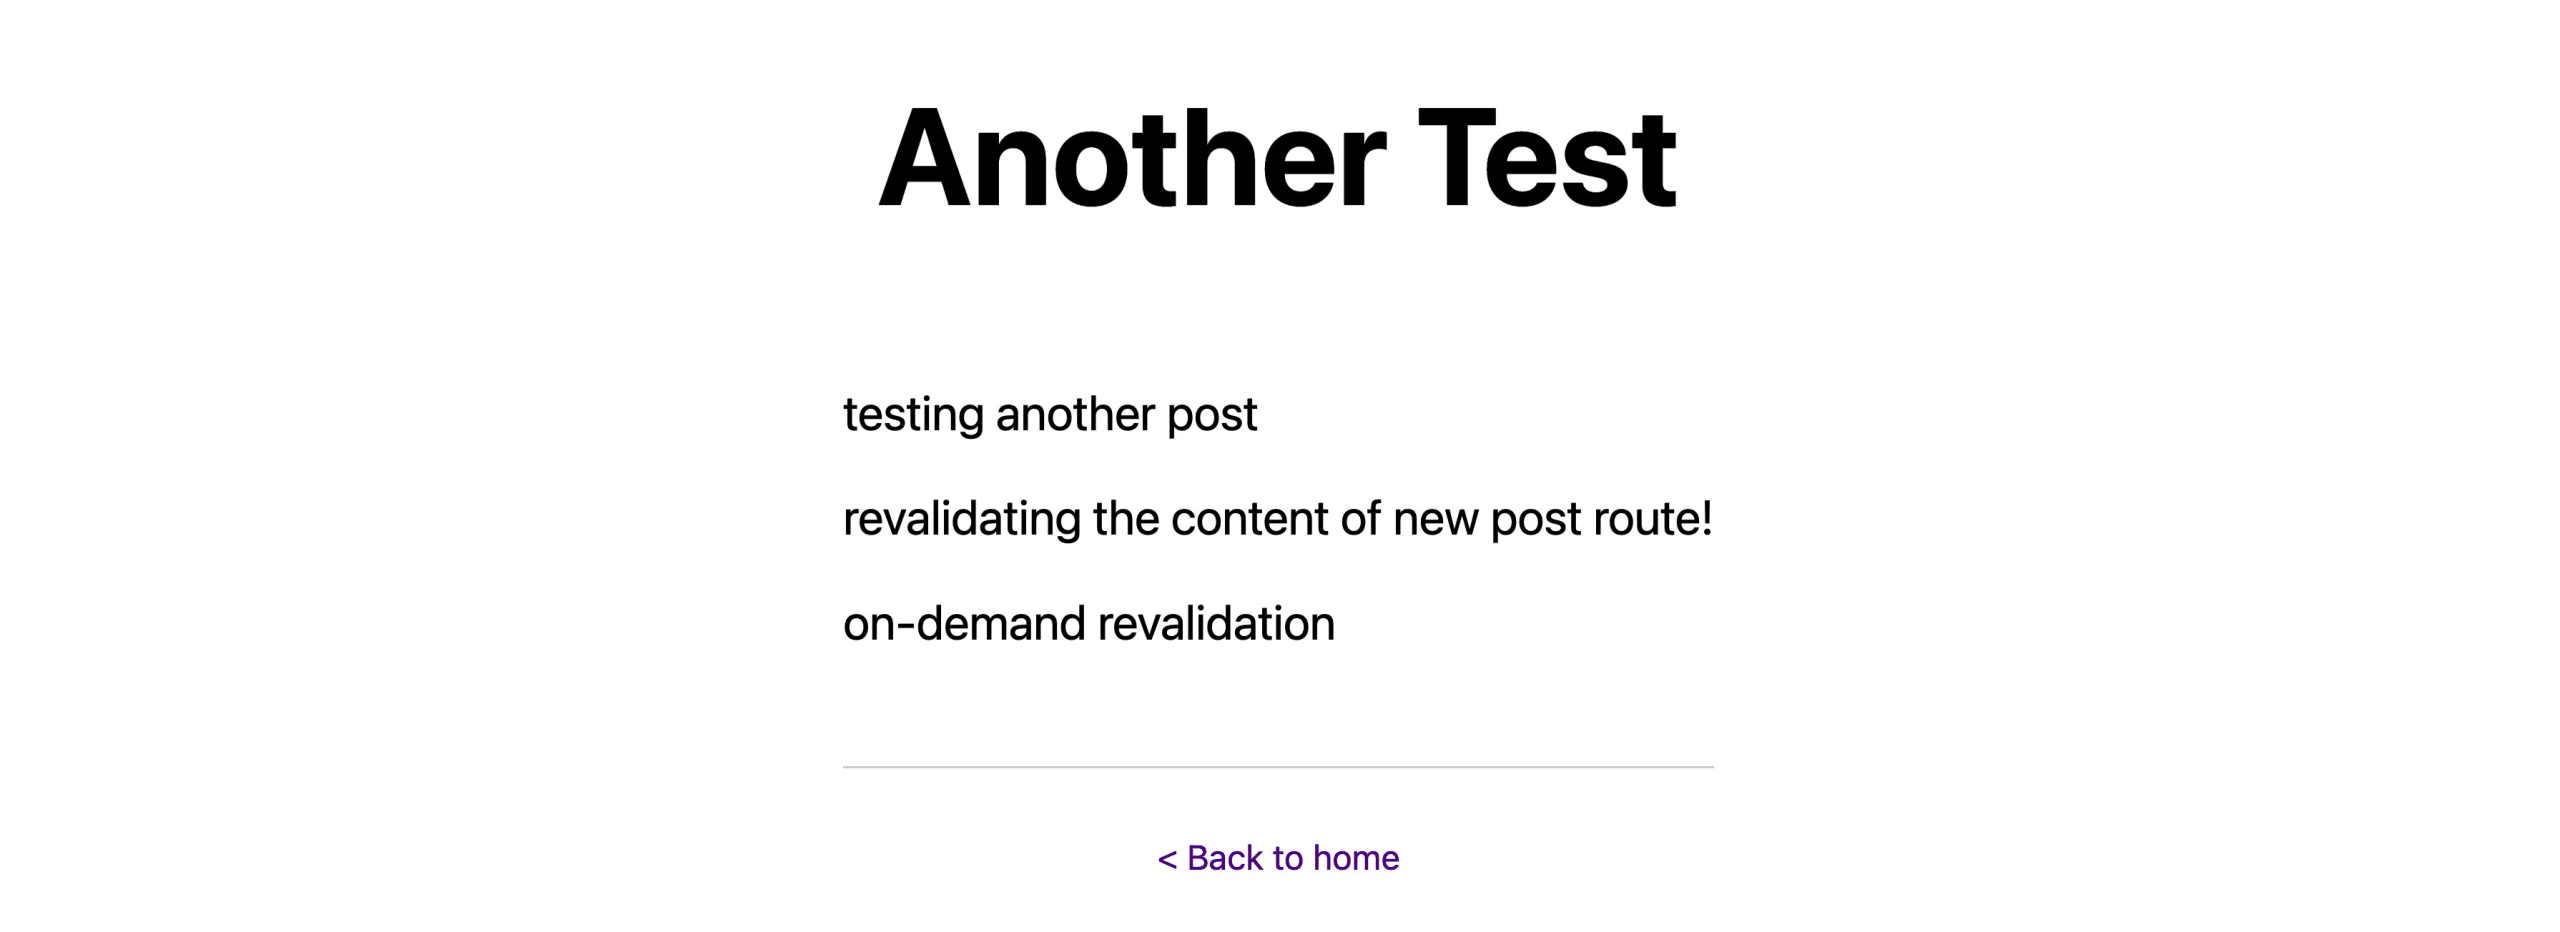
But let’s manually trigger an update.
In your browser, visit:
<Your Host>/api/revalidate?secret=<Your Token>&path=<Your Post Path>Mine looks like this:
http://localhost:3000/api/revalidate?path=/posts/another-test&secret=1234
As long as you passed in the right path and secret, you should first see a response from Next.js saying it worked.

And now that it’s worked, we should successfully see the content of our post update!
What can we do next?
Explore caching layers
In Step 0, we turned off Apollo caching, which probably isn’t the right choice for your application, but it’s important to understand how these different caching layers work and how it impacts the refresh cycle.
Explore how caching works in any and all of the tools you use, whether the caching is on your headless source, your request client (like Apollo), and Next.js to be sure you understand when content is updated, the minimum time it could take to update, and the maximum time it could take to update.
Custom on-demand validation triggering
The cool thing is we can programmatically trigger this however we want, whether that’s using WordPress hooks or whatever types of hooks our headless source has available (which is pretty common).
We could even do something completely out-of-the-box or custom using tools like GitHub Actions for our own logic or a node script running on a server.
Having an API endpoint to trigger revalidation gives us a lot of options for however our application needs to run.