
React’s state APIs give developers great ways to maintain personalization or the items you have in your shopping cart, but once you refresh the page, they’re gone! How can we can we store those values for a customer’s session locally without having to worry about a database?
What is React State?
React is a popular and useful library for making application development easier. On top of that, it provides a variety of APIs that give us more power to manage different aspects of our apps, such as allowing us to store values in “state”.
When storing something in state, we’re essentially saying that we have a special value that we want to stick around that we can dynamically update later. That could be based on interactions or something unrelated to the visitor like the amount of time that’s passed.
To do this, we can use the useState hook along with a few other APIs to make this experience painless.
Note: this walkthrough isn’t going to teach you how to work with React State itself, so if this is a totally new concept, you may want to dig into that first.
But one of the problems with this API is there’s not an option to store those values in a way that won’t disappear as soon as the browser refreshes, which can be a pain for your customers trying to shop on your store!
Fortunately we have some options for we can layer storage on top of React State and keep those values around for as long as we need.
What is LocalStorage?
LocalStorage is a browser API that allows developers to store data and later read it.
It’s basically a database inside of your browser with a little more nuance.
When using localStorage, you technically need to store values as strings using keys and values, but to store more complex data like objects and arrays, you need to stringify that data when storing and parse it when reading it.
While this data won’t automatically be persisted across multiple browsers or multiple devices as it will only be stored locally, it still gives you the ability to improve UX where you might not have an opportunity to store every minute detail in a remote database.
What are we going to build?
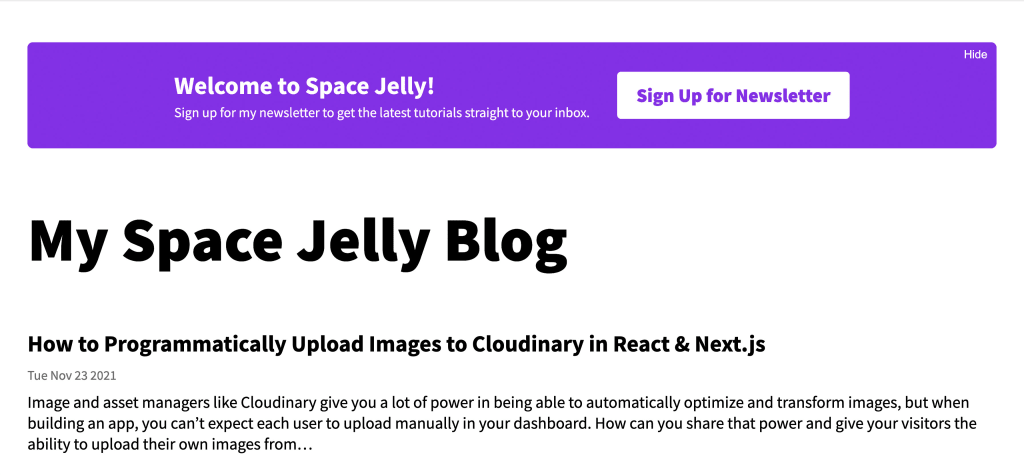
To test this out, we’re going to look at a simple example of displaying a “Welcome” banner when a new visitor arrives on the page that includes a button to sign up for our newsletter.
We don’t want this banner to show up on every visit, especially if someone’s visited before, so we’ll give the option for someone to hide or remove that banner.
We’ll set that preference in localStorage and read that value so that any time they visit again, we won’t show it until they clear their browser’s storage for that page or visit in a new browser.
For working through the project, we’ll spin up a new Next.js application where I already set up a banner and see how we can use native React state to manage our user’s preference.
Step 0: Creating a new Next.js app from a demo starter
We’re going to start off with a new Next.js app using a starter that includes some simple UI that we’ll use.
Inside of your terminal, run:
yarn create next-app my-welcome-banner -e https://github.com/colbyfayock/demo-welcome-banner-starter
# or
npx create-next-app my-welcome-banner -e https://github.com/colbyfayock/demo-welcome-banner-starter
Note: feel free to use a different value than
my-welcome-banneras your project name!
Once installation has finished, you can navigate to that directory and start up your development server:
cd my-welcome-banner

yarn dev
# or
npm run dev
And once loaded, you should now be able to open up your new app at http://localhost:3000!
If we poke around the application before we get started, we’re not necessarily doing anything special here.
I’ve preloaded the application with some data from spacejelly.dev where at that point I’m simply looping through each post and rendering them on the page.
As far as the welcome banner goes, I’m using HTML and CSS (Sass) to put together a decent looking banner that we can use, including a Hide button in the top right, which we’ll use for this walkthrough.
But now, let’s dive in and get started!
Step 1: Using React state to hide a banner on click
The first thing we’ll do is hide our banner whenever we click on the Hide button.
To do this, we’re going to use React’s useState hook which allows us to store the visibility status of our banner.
First, we need to import our hook.
At the top of pages/index.js (our homepage) import the useState hook:
import { useState } from 'react';Then we’ll set up our state instance, which will serve as our toggle to hide the banner.
At the top of the Home component add:
const [showBanner, setShowBanner] = useState(true);We’re using destructuring to take what’s returned from useState and grab our state value and a function used to update that value. Inside useState, we’re also passing the default value, which in this case is true meaning by default, we want the banner to show.
Let’s wrap our signup DIV with that state value:
{showBanner && (
  <div className={styles.signup}>
    <div className={styles.signupBody}>
      <h2>Welcome to Space Jelly!</h2>
      <p>Sign up for my newsletter to get the latest tutorials straight to your inbox.</p>
    </div>
    <div className={styles.signupCta}>
      <p>
        <a href="https://colbyfayock.com/newsletter">Sign Up for Newsletter</a>
      </p>
    </div>
    <button className={styles.signupHide}>Hide</button>
  </div>
)}
We’re using the true or false value like an if statement so that whenever it’s true it will show and when false it will not.
If we reload the page at this point, it should look exactly the same as it did when we first loaded the app, but now let’s add a trigger to change our state value.
Let’s update our Hide button with the following:
<button className={styles.signupHide} onClick={() => setShowBanner(false)}>
  Hide
</button>
We’re adding an onClick handler to our button so that whenever someone clicks our button, it will trigger the function setShowBanner with a value of false saying that we don’t want our banner to show.
But now if we load up our application and click Hide, we should see our banner immediately disappear.
This is great, exactly what we want, but if we refresh the page, we’ll see it come right back, meaning our visitors will have to click Hide every single time, which is not what we want!
Next we’ll learn how to store our state value in localStorage to persist that value.
Step 2: Storing React state in localStorage
Now that we’re successfully hiding our banner with state, we want to make sure when someone refreshes, it stays hidden (at least until they clear their site data!).
To do this we’ll use localStorage, a native API in browsers, that let’s us store data.
When we run our localStorage functions, we need to make sure that we’re in the browser and we’re outside of the React rendering flow.
We can use the useEffect hook, which allows us to do just that, so that whenever React finishes loading the component basically meaning the page is loaded, we can store our data.
First let’s update our React import statement to include useEffect:
import { useState, useEffect } from 'react';Next let’s use our new hook inside of our app.
Under our showBanner state instance add:
useEffect(() => {
    console.log('showBanner', showBanner)
}, [showBanner])
Here we’re saying that whenever our useEffect hook fires, we want to log our showBanner value. We’re also using that value as a dependency of our useEffect hook meaning that useEffect will fire when React finishes rendering but it will also fire any time showBanner changes.
To see how this works, let’s first load the page.

If we see in the web console, we’ll see our value is currently true which is the default value.
But now let’s click Hide again.

And we’ll see a second value of false because we clicked Hide.
We can use this so that any time the state value changes, we’ll store that updated value in localStorage.
Inside our useEffect hook, let’s add our value to localStorage.
useEffect(() => {
  window.localStorage.setItem('MY_APP_STATE', JSON.stringify(showBanner));
}, [showBanner]);
Here we’re using localStorage’s setItem method passing in a “key” along with the value.
Note: While you can name your key anything you want, consider using something unique to your application and environment to avoid conflicts with other apps while you develop locally.
We’re setting the value wrapped with JSON.stringify which will render our showBanner value as a string.
Technically we probably don’t need to stringify here, as our current case of using true or false will work just fine without it (it will still be stored as a string), but you should get in the habit of storing it as a string as you’ll need to do so as your state data becomes more complex.
Tip: Storing
trueorfalseas a boolean in localStorage as the value will turn it into a string with that value, but trying to do the same thing an object will give you a stored value of[object Object]!
But now we can test to see if this is working.
If we open our developer tools and go to the Application tab (in Chrome) and open the Local Storage section along with our page URL, we’ll see that our default value was already stored.

But as soon as we click Hide again, we’ll see that value update!

If we refresh the page though, we’ll still see that both our banner shows and our value reverts to the default value.
In the next step, we’ll learn how to persist that updated state value so that whenever we load our app, it will load that value into state before reverting.
Step 3: Getting a stored value from localStorage and loading it into React state
Finally to make sure our state is persisted any time someone refreshes, we need to grab our stored value and set it in our app.
To do this, we’re going to add a second useEffect hook above our existing hook.
Above our existing useEffect hook add:
useEffect(() => {
  const data = window.localStorage.getItem('MY_APP_STATE');
  if ( data !== null ) setShowBanner(JSON.parse(data));
}, []);
Here we’re running a useEffect hook only when the component first renders. Once it does, we’re using localStorage’s getItem method to grab the data associated with our key.
If that data does not equal null (basically does it exist) we use our state update function and set it with our stored data value passed in to JSON.parse.
But now, when we try to Hide our banner and refresh the page…
We’ll see that our banner no longer shows, and our Local Storage panel shows the persisted value!
You can even select your stored value in the Local Storage panel, hit the Delete key, and refresh the page (or just clear your site data), where you’ll see the banner reappear because you cleared the data. But then when you Hide it again, it’ll persist that state.
What else can we do?
Managing more complex state
This was a very simple example of using React state, storing a single boolean value, but often React state becomes much more complex in real applications.
The good news is this method will work for any data that you need to persist including large complex objects, just pay attention to how you organize your data within that state instance to keep it sane!
Persisting state to a remote location
You can even use this same method to persist the state in a data base or remote location so if your visitors are logged in, they’ll get the same experience or account details anywhere they’re logged in.
That said, don’t take the approach of blanket adding any and all state details into a database as you want to consider what will actually help a cross-device user experience and would the additional requests to a remote origin eat too much of your visitor’s bandwidth?
Working with more native Browser APIs
Working with native APIs from the browser is often very possible but can sometimes be a little tricky.
Here’s more resources for learning how to use React to interact with those APIs.