What is CORS?
CORS is a security mechanism that uses headers to establish which origins, if any, are permitted to make requests to a server.
By default, not providing any headers would prevent any origin other than the server itself from making a request, which is good from a security perspective.
But luckily it’s easy to configure whether you’re building a public API or want to allow requests from a different environment.
What are we going to build?
We’re goin to spin up a simple API endpoint that doesn’t do much more than proxy some dynamic data for the sake of creating a usable endpoint.
To do this, we’ll use Vercel Functions, without a framework,
If you’re spinning up a simple API endpoint without a front end, you likely wouldn’t want to use a service like Vercel, Netlify, or similar and should instead spin up a lambda function directly on AWS or another cloud provider, but for the sake of this example, it’s much easier to get it up and running using Vercel or Netlify and focus on CORS.
Step 0: Creating a New API Route with Vercel
To get started, we’ll need to set up a new API route.
You don’t need to use Vercel, but it’s what I’ll be using, so if you want to follow along exactly with the examples, you can either use a starter that I created to make it easy to set up or add a new API route to your Next.js (or similar) project.
Tip: The concepts we’ll be walking through here should be able to apply to any API, though the API patterns to get there may be slightly different.
To use the Starter, head over to the following link and follow the instructions in the README.
https://github.com/colbyfayock/demo-vercel-function-starter
Once you have the project spun up, you should be able to visit the starting endpoint at http://localhost:3000/api/hello and see “Hello, world!”.

Otherwise, if you’re using Next.js, you can create Route Handlers to handle the requests.
What the API route looks like doesn’t matter too much for our example (ex: POST vs GET), the important part is that you’re able to make requests to it to test it out.
For my purposes though, I’m going to use the NASA API to make a simple request to the photo of the day and return the results:
export async function GET(request: Request) {
  const results = await fetch('https://api.nasa.gov/planetary/apod?api_key=DEMO_KEY').then(r => r.json());
  return new Response(JSON.stringify(results));
}
Note: The NASA API allows you to use the
DEMO_KEYinstead of having to generate your own for a limited amount of requests, but you can easily generate your own free API key at api.nasa.gov.
But whenever you’re ready, we can get started working with CORS!
Step 1: Enabling Cross-Origin Requests with CORS
When working with services like Vercel, CORS is not enabled by default.
This means, whenever you create an API route in Next.js or simply create a Vercel Function outside of the context of a framework, by default you won’t be able to make requests to that endpoint from a domain other than the one it’s deployed to.
This is called a Cross-Origin Request, where this can be handy if you’re creating a standalone API or want other environments or organizations to be able to access your API.
To allow another origin (or domain) to access your API, we can enable CORS by setting some headers that get returned with our request.
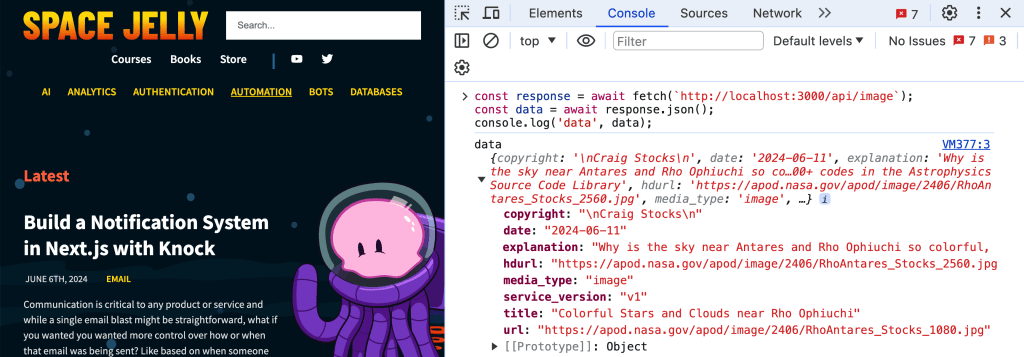
Testing this out, let’s first try to open a new tab to another website (I’m using spacejelly.dev), open the web console, and try to make a request to your API endpoint either on localhost or wherever it’s deployed, such as:
const response = await fetch(`http://localhost:3000/api/image`);
const data = await response.json();
console.log('data', data);
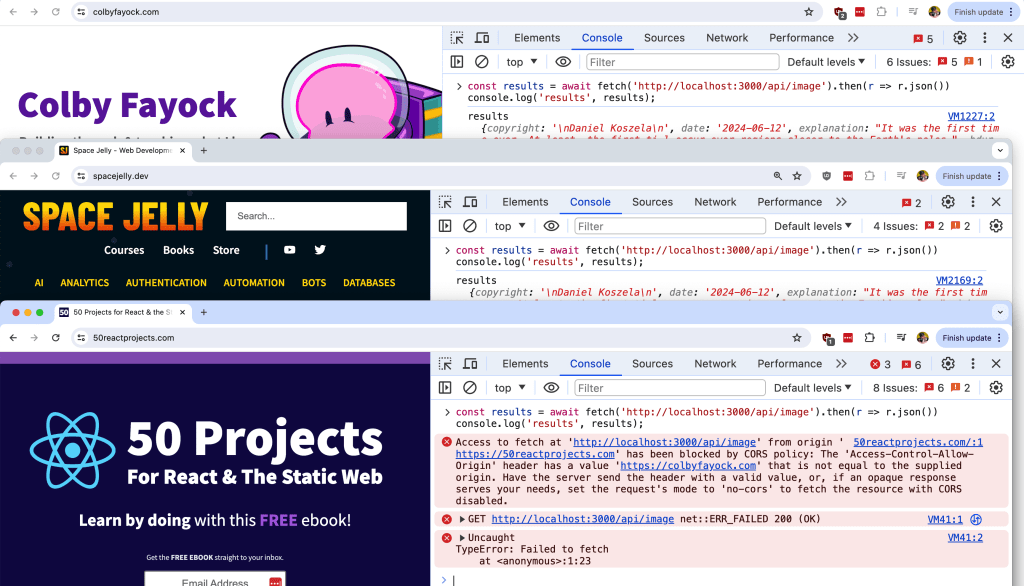
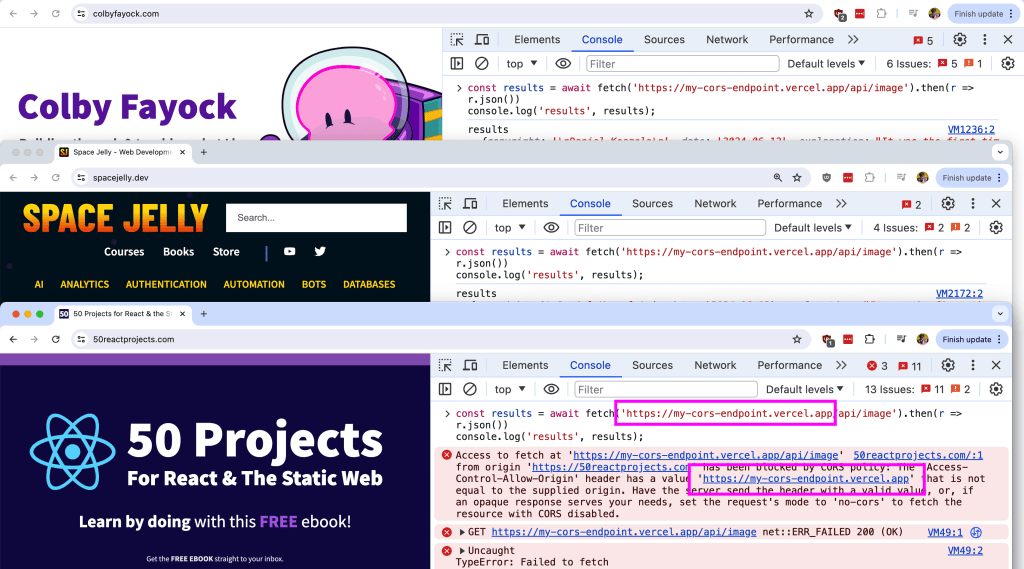
You’ll immediately see an error talking about CORS.

So how do we fix this? We can add some response headers that open up CORS to the domain we’re requesting from.
Let’s update our function to Response to the following:
return new Response(JSON.stringify(results), {
  headers: {
    'Access-Control-Allow-Origin': '<Your Origin (Ex: https://spacejelly.dev)>',
  }
});
Tip: Make sure to replace the origin in the above with the website you’re testing requests from.
Here we’re using Access-Control-Allow-Origin to define the origin we want to permit requests from.
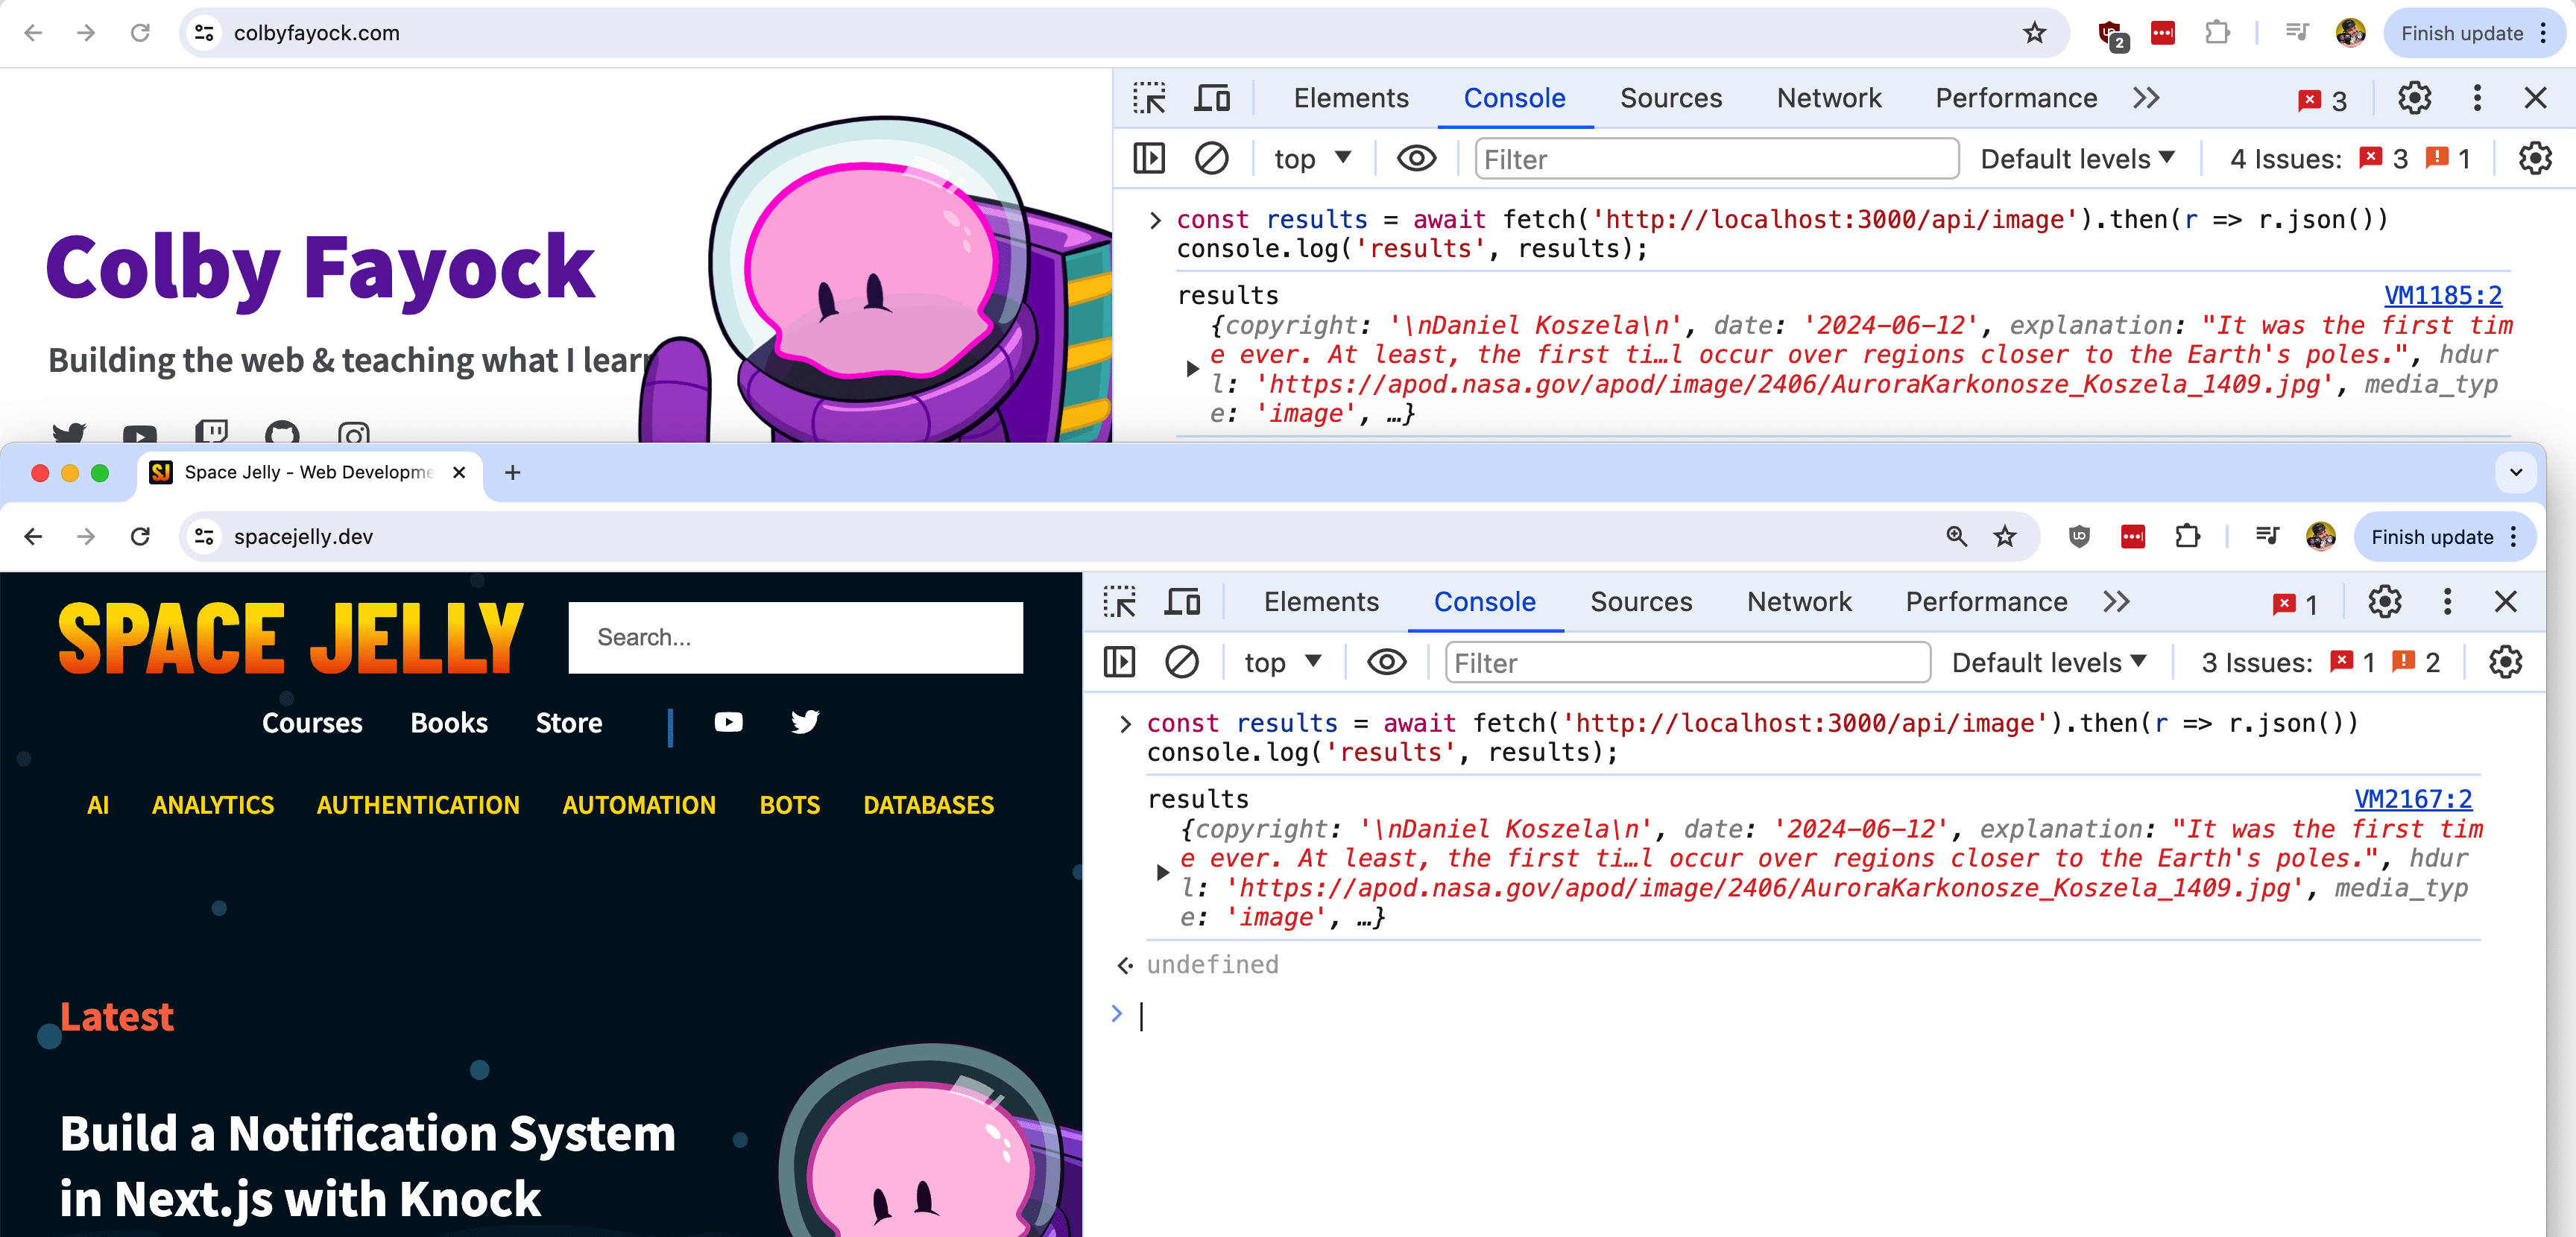
And now when we make that same request, we should see our results logged to the console!

That wasn’t too bad, but this only permits a single origin from hitting the endpoint, what if we want to allow any origin to hit our endpoint?
Step 2: Enabling API Endpoint Access to All Origins
If you want your API endpoint openly available to any origin, we can make a simple update by using the * as our origin instead of a domain.
Warning: Now before we do this, you need to be careful when exposing your endpoint to any origin, as this immediately creates potential security implications.
Typically when developers allow an endpoint to be openly available, they’re using other means of preventing bad actors from accessing their data like an API Key and Secret or the endpoint is truly meant to be publicly available like the NASA endpoint we’re using.
Just be sure that opening your endpoint to all origins is exactly what you want to do, otherwise you can use the method in Step 1, or continue to Step 3.
To open up the endpoint to all origins, update the response headers to:
headers: {
  'Access-Control-Allow-Origin': '*',
}
And now we should be able to make a successful request from any origin!

But again, this likely isn’t what we actually want to do unless we’re building a public API. So what if we want to restrict access, but we have more than one origin?
Step 3: Allowing Cross-Origin Requests from Multiple Origins
We already know that the Access-Control-Allow-Origin header only allows either a single domain or a * value to allow all domains, but this can either be too restrictive or not restrictive enough.
What if we want to enable CORS for several domains?
Though we can only return one origin, we can do so dynamically, so we can determine what origin the request is coming from, check to see if it’s an allow origin, and if it is, return that origin as the header.
To start off, let’s create a list of allowed origins at the top of our endpoint file:
const ALLOWED_ORIGINS = [
  'https://colbyfayock.com',
  'https://spacejelly.dev'
];
Tip: Update the list with your domains, or feel free to use mine to test!
Next, in order to find out what origin our request is coming from, we can check the headers of the request.
If using Vercel, we can easily use the request object to access the header we want, in particular, the origin header.
First, ensure that your request function has the request argument available and add:
export async function GET(request: Request) {
  const requestOrigin = request.headers.get('origin');
That value will give me the origin based off of where I’m making the request from, so if I’m requesting from spacejelly.dev, it will give me https://spacejelly.dev, and so on.
To see if this origin is valid, we can search our allowed list:
const accessOrigin = ALLOWED_ORIGINS.find(origin => origin === requestOrigin);And this is the value that we’ll dynamically return in our response headers!
headers: {
  'Access-Control-Allow-Origin': accessOrigin,
}
Now if you’re using TypeScript, you’ll notice that we’ll be getting an error for our headers values because accessOrigin may be undefined, so we can define a default value of grabbing the first header from the list.
Update accessOrigin to:
const accessOrigin = ALLOWED_ORIGINS.find(origin => origin === requestOrigin) || ALLOWED_ORIGINS[0];Tip: If the code block isn’t wide enough, notice the
||statement at the end of the snippet.
But now, similar to the last step, we should be able to access our request from our listed origins, but if it’s another origin, we should get blocked!

You can also dynamically add values to the list itself, such as making a request from within the function, but depending on the service you use, you can also use environment variables, such as adding the origin of the deployed environment.
If using Vercel, you have a variety of system environment variables available, such as VERCEL_PROJECT_PRODUCTION_URL which not only allows you to dynamically set the production domain, but also prevents any origins from your ALLOWED_LIST from being visible in the CORS response.
To use this, update ALLOWED_LIST to:
const ALLOWED_ORIGINS = [
  `https://${process.env.VERCEL_PROJECT_PRODUCTION_URL}`,
  'https://colbyfayock.com',
  'https://spacejelly.dev'
];
Now as far as testing this, when using your local environment with the Vercel CLI, this value will be undefined, but when deployed to production, we’ll see that the “allowed” header returned is our production environment!

Step 4: Configuring an OPTIONS Endpoint for Preflight Requests
So far we’ve worked with GET requests, but another way you might be making a request is by using the POST method and passing along some custom headers.
One example might be if you’re setting the content type to something like JSON, which can be helpful to letting the browser know what to expect from the request.
If for instance, we updated our endpoint to a POST and tried to make a request with the Content-Type set:
const results = await fetch('http://localhost:3000/api/image', {
    method: 'POST',
    headers: {
        'Content-Type': 'application/json'
    }
}).then(r => r.json());
console.log('results', results);
We’ll immediately see it fail.

But if you notice this time, we get a different error. We get a Preflight Request error.
When passing the headers, the browser tries to make a “preflight request” using the OPTIONS HTTP method to validate the request and when doing so, if that method isn’t set up, it will immediately fail.

The good news is this is pretty easy to set up!
In your endpoint, add another function called OPTIONS with:
export function OPTIONS(request: Request) {
  const requestOrigin = request.headers.get('origin');
  const accessOrigin = ALLOWED_ORIGINS.find(origin => origin === requestOrigin) || ALLOWED_ORIGINS[0];
  return new Response(JSON.stringify({ status: 'Ok' }), {
    status: 200,
    headers: {
      'Access-Control-Allow-Origin': accessOrigin,
    }
  });
}
This is basically the same request as our POST request (formerly GET in my example), except instead of a dynamic response, we’re setting a static response (this value doesn’t matter).
If we try to now make a request to our endpoint, our request will still fail!
But it might fail for different reasons…
First off, unfortunately it looks like at the time of writing this, the Vercel CLI has an issue with OPTIONS requests, but if you’re not using Vercel, you may not run into this issue.
But to test this out, you can push the code to a preview branch or production deployment, make the test request to that deployed endpoint, and the request should now pass!
Once that’s resolved, or if you’re not using the Vercel CLI, we’ll now get an error that the Content-Type header is not allowed. We now need to explicitly configure this header in our response!
Similar to the origin, we can either set the header name, a *, or with this header, we can set multiple names.
In our case, we just need Content-Type, so add the following to both the OPTIONS and POST request:
'Access-Control-Allow-Headers': 'Content-Type',And now, if we try to make the request again, it should work and get the response!

What else can we do?
Let browsers know that the origin header is dynamic
MDN recommends that when dynamically setting a header like the origin that we indicate this in our response.
You can set this up by adding the Very header with a value of Origin:
'Vary': 'Origin'
