

How can we dynamically generate calendar links?
A lot of popular calendar services, like Google Calendar and Outlook, have web versions available or inherently are made for the web. As part of that, they have the ability to create new events using a link that additionally takes parameters to preconfigure some of the details.
Google Calendar for instance can take a “text” and “details” URL parameter that will then set those values for us when visiting that URL.
We can take advantage of this URL “API” if you will to dynamically generate links to create an easy to use UI for our visitors to add our events to their calendar.
What are we going to build?
We’re going to create button in React that allows our visitors to easily add an event to their calendar by clicking a link for their preferred calendar tool.
The different calendars we’ll cover here are Google Calendar, Outlook, Office365, Apple via an .ics file, and Yahoo.
We’ll do this by dynamically creating those links with a link generator library and adding them to a dropdown styled with Tailwind.
Step 0: Creating a new React app
We’ll be working out of a vanilla React application created with Vite but this can work in any application that supports React, such as Next.js or Astro.
Most of these concepts are also easily able to be used with vanilla JavaScript, but the examples will be shown specifically for React.
To follow along, you can either work through your existing app or create a new React Vite application with:
npm create vite@latest my-calendar-link -- --template react-tsNote: You can optionally use the
reacttemplate, but I’ll be using Typescript
Navigate into that directory and install the dependencies:
cd my-calendar-link
npm install
Once ready, install Tailwind by following the instructions on the Tailwind Documentation site: https://tailwindcss.com/docs/guides/vite
At that point, you can spin up your development server:
npm run devAnd we’re ready to go!
Step 1: Dynamically Generating Calendar Links
To get started, we ultimately need a way to generate links that we can populate with dynamic information, which will be the basis of how all of this works.
All of the calendar platforms we’re going to cover, except one, have a URL API of sorts that take in dynamic attributes that when visited, pre-populate an event creation form, when our visitor can then add ot their calendar.
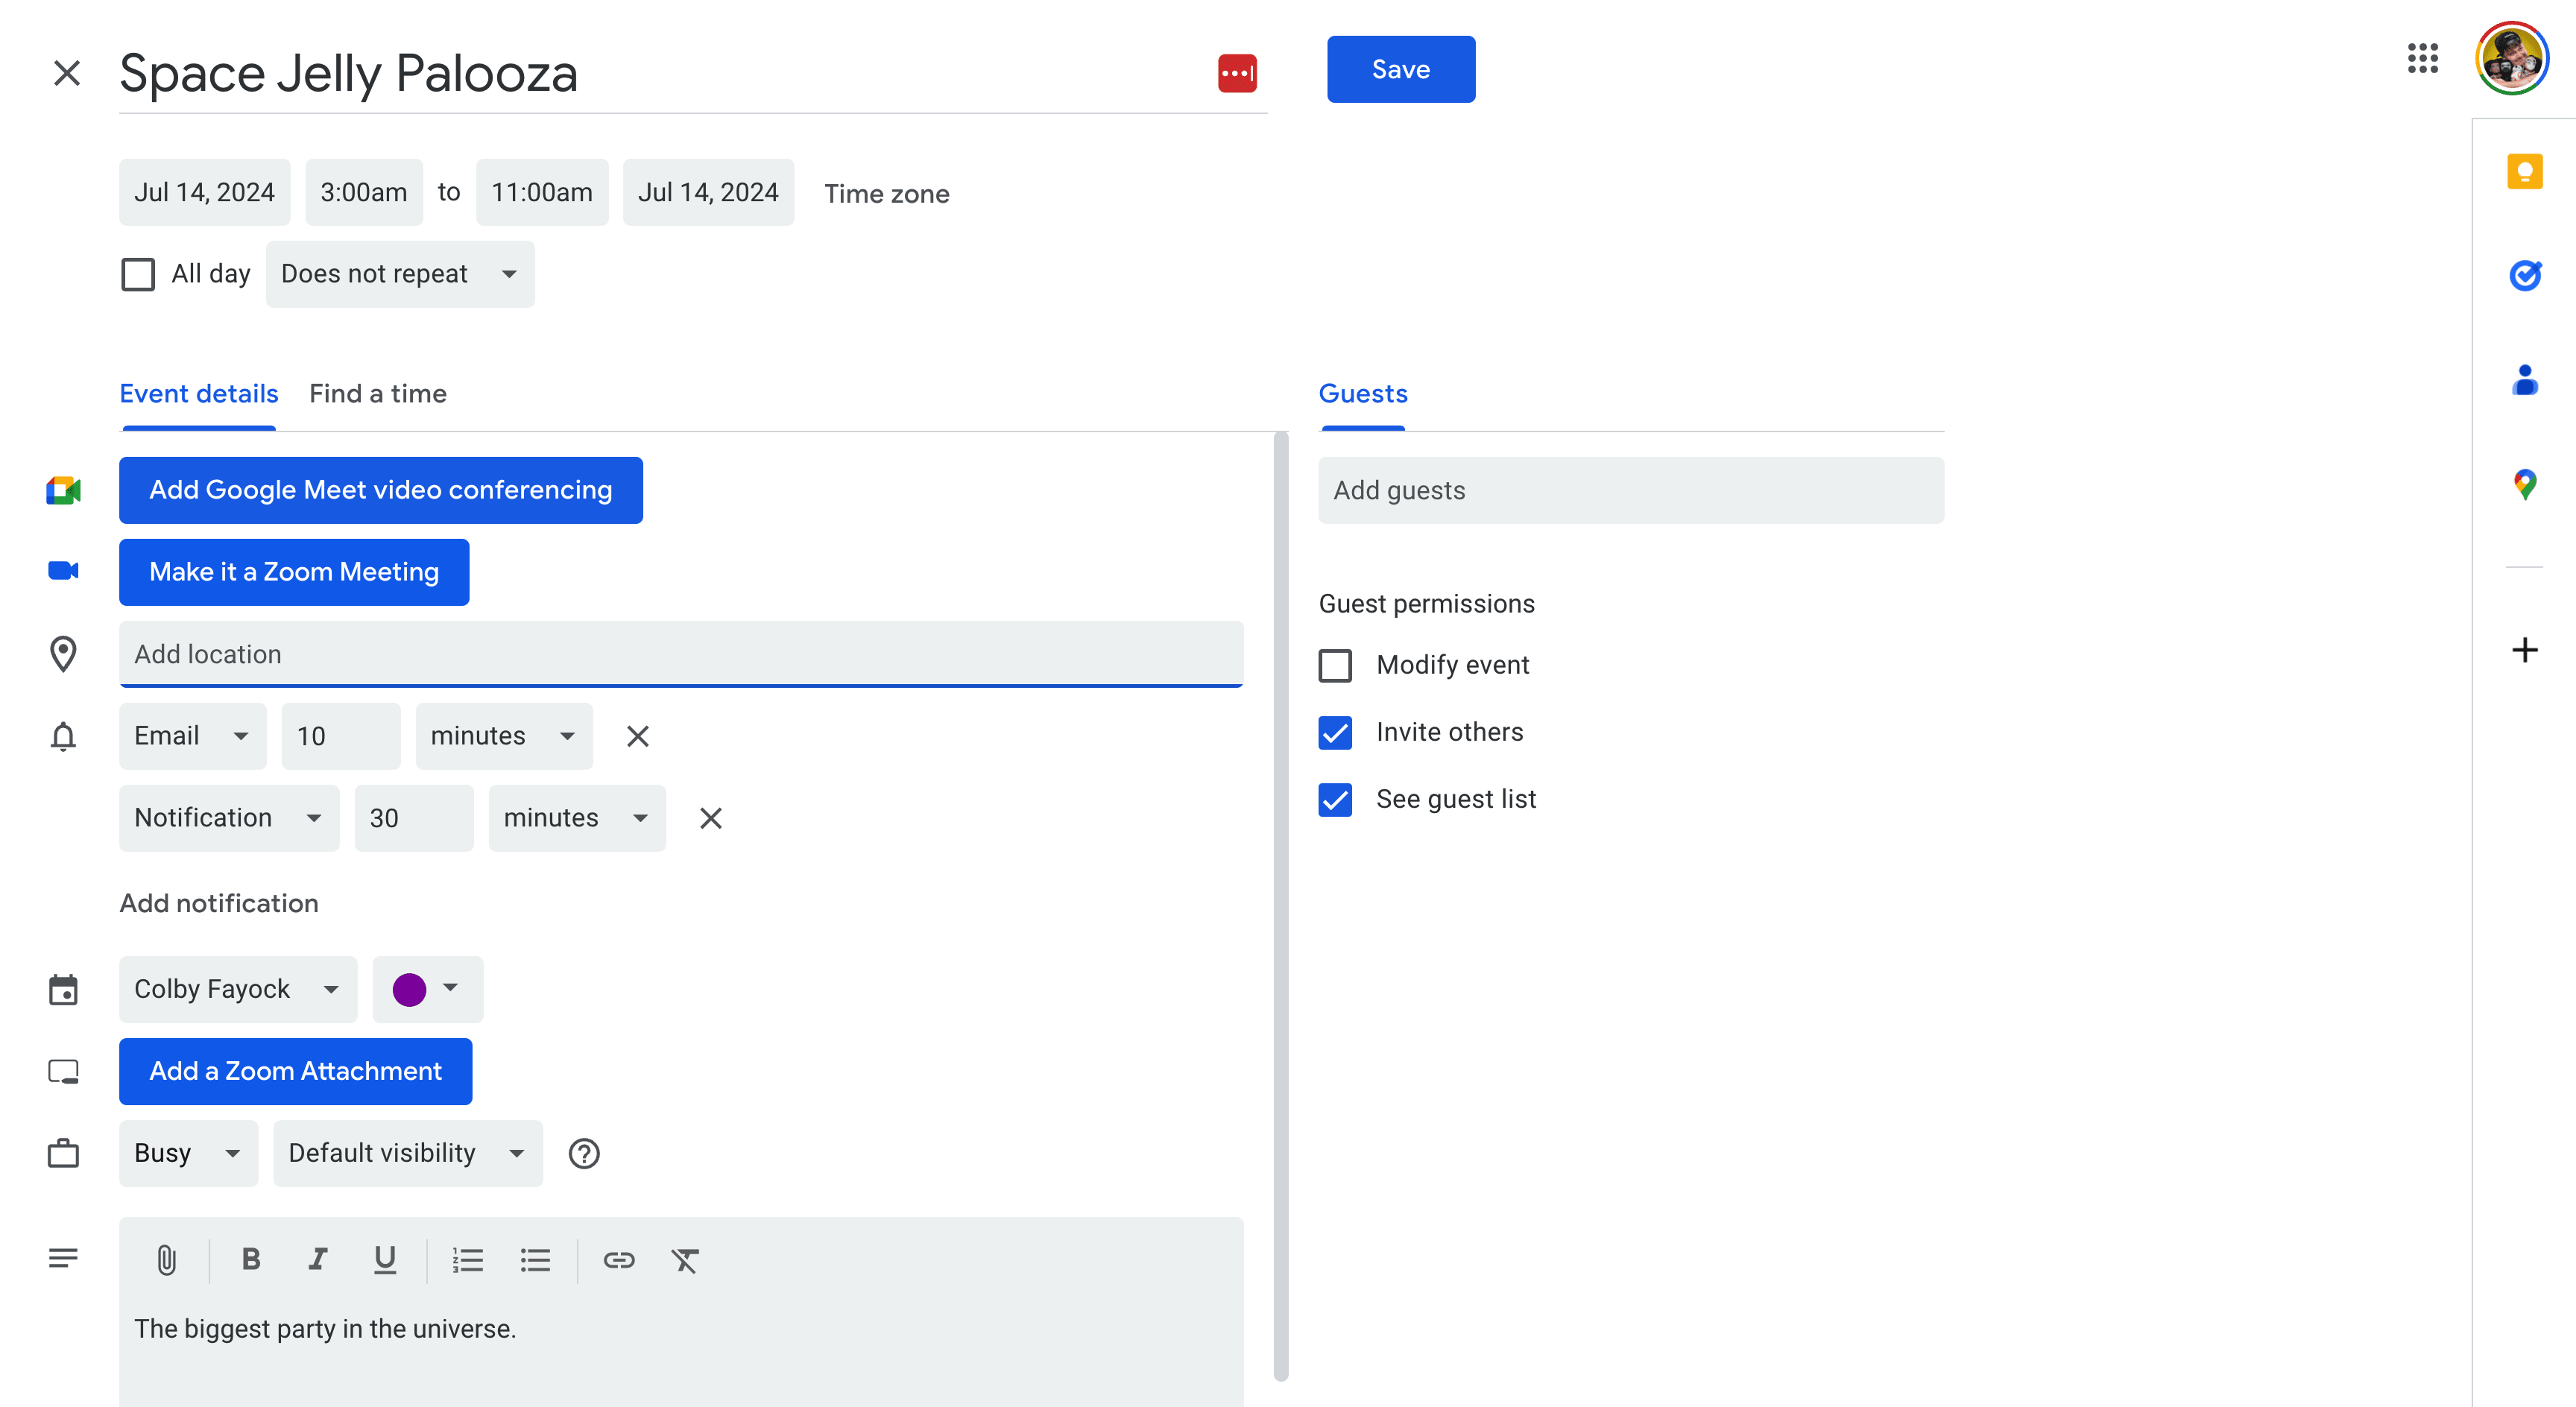
To see how this works, we can start off with Google Calendar, who’s URL pattern is:
http://www.google.com/calendar/event?action=TEMPLATE&dates=DATE_START%2FDATE_END&text=TITLE&location=LOCATION&details=DESCRIPTIONBreaking that down, we have a base URL of [http://www.google.com/calendar/event](http://www.google.com/calendar/event) with the following query parameters:
- action: The API’s action type which in our case is TEMPLATE
- dates: The datetime range of the event
- text: The main title of the event
- location: Where the event will occur
- details: What you want to add to the event description
So if I fill all of those out with my details and go to that link, I’ll see it automatically filled out inside of a new event:

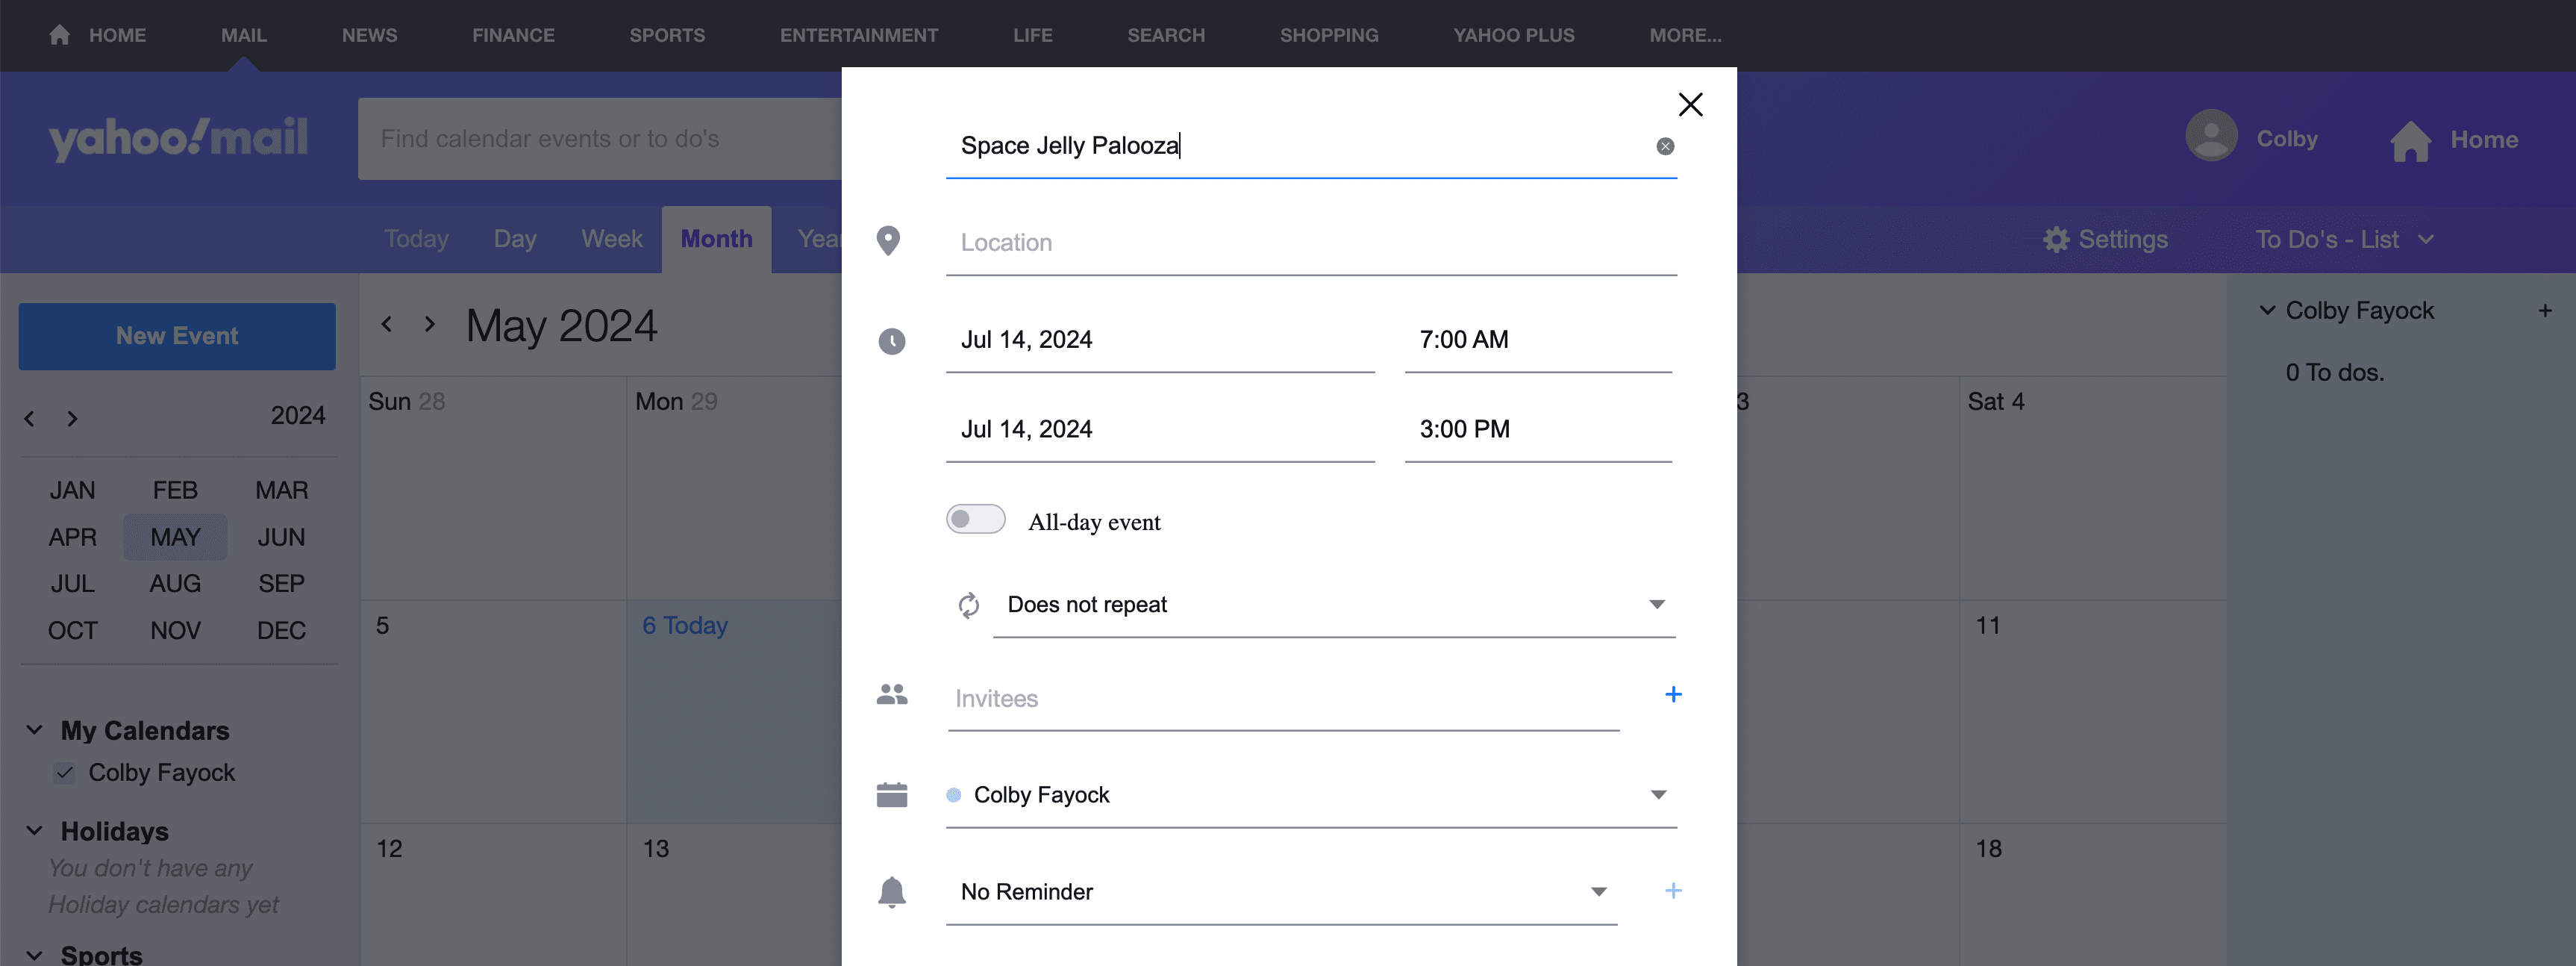
Here are the other templates for Office365, Outlook, and Yahoo:
Office365: https://outlook.office.com/calendar/0/action/compose?allday=false&body=DESCRIPTION&enddt=DATE_END&path=%2Fcalendar%2Faction%2Fcompose&rru=addevent&startdt=DATE_START&subject=TITLE
Outlook: https://outlook.live.com/calendar/0/action/compose?allday=false&body=DESCRIPTION&enddt=DATE_END&path=%2Fcalendar%2Faction%2Fcompose&rru=addevent&startdt=DATE_START&subject=TITLE
Yahoo: https://calendar.yahoo.com/?desc=DESCRIPTION&dur=false&et=DATE_END&st=DATE_START&title=TITLE&v=60
Once’s missing here, Apple via an .ics file, which you can dynamically generate, but we’re not going to cover that.
While we could manually create a bunch of functions to generate the template URLs above (and you can if you prefer), instead, we can install a simple helper package to easily and confidently generate these for us.
So to start, we’re going to install Calendar Link by running:
npm install calendar-linkOnce installed, we can head to the top of the file (or component) that we’ll be adding our dynamically generated links and import the our modules:
import { google, outlook, office365, yahoo, ics } from "calendar-link";Tip: You don’t have to generate all of them! Pick only the ones you want to support, though the more options the better chance you’ll help your visitor.
Each of these imports are simple functions that when passed an event object with a specific structure, returns a dynamic URL for that service.
So for our Google example above, instead of manually creating the URL, we can add:
const googleUrl = google({
  title: 'Space Jelly Palooza',
  description: 'The biggest party in the universe.',
  start: '2024-07-14 10:00:00 +0300',
  duration: [8, 'hour'],
});
And if I try to add that as a link:
<a href={googleUrl} target="_blank">Add to Google Calendar</a>Upon clicking it, it’ll open up a new tab that allows me to create a new event with all of my details!
I can take that further and do the same for all of the other services I want to support, such as outlook and yahoo:
const event: CalendarEvent = {
  title: 'Space Jelly Palooza',
  description: 'The biggest party in the universe.',
  start: '2024-07-14 10:00:00 +0300',
  duration: [8, 'hour'],
};

const googleUrl = google(event);
const outlookUrl = outlook(event);
const yahooUrl = yahoo(event);
In the above I’m additionally using the CalendarEvent type imported from the calendar-link package:
import { CalendarEvent } from "calendar-link";If I try to now open the Yahoo link for instance, I get the same creation interface but in Yahoo!
And while there’s more, the tricky one is dealing with .ics files, which is particularly useful with Apple devices.
But calendar-link handles this easily as well:
const icsUrl = ics(event); Making it easy to set up a new event in Apple’s Calendar.
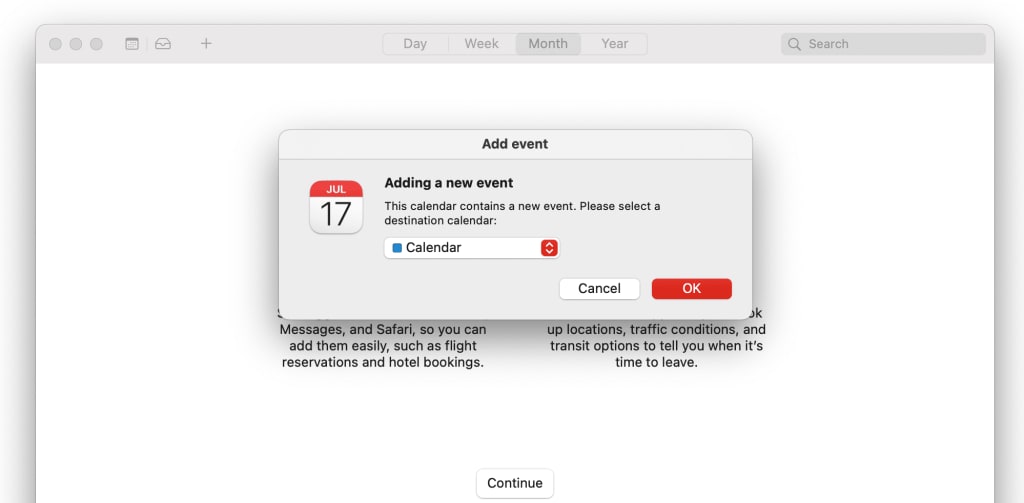
Note: I don’t use Apple Calendar, hence the blank app.
But now let’s give a little nicer of an interface to work from.
Step 2: Creating an Add to Calendar Button to Open Calendar Menu with Tailwind
In the first step, we generated our links and I already started including the calendar links in an unordered list:
<ul>
  <li>
    <a href={icsUrl} target="_blank">Add to Apple (iCal)</a>
  </li>
  <li>
    <a href={googleUrl} target="_blank">Add to Google Calendar</a>
  </li>
  <li>
    <a href={office365Url} target="_blank">Add to Office365</a>
  </li>
  <li>
    <a href={outlookUrl} target="_blank">Add to Outlook</a>
  </li>
  <li>
    <a href={yahooUrl} target="_blank">Add to Yahoo</a>
  </li>
</ul>
This works relatively well for a simple list, but it’s a lot of unnecessary UI to show someone who’s navigating around your app, so we can hide these links from initial view inside of an Add to Calendar button.
Note: I’ll be using Tailwind for styling, particularly in this step, for showing and hiding content
First, we can add an Add to Calendar button above the list of links:
<button className="flex gap-2 bg-white border border-zinc-600 rounded px-4 py-3 font-bold">
  Add to Calendar
</button>
We want this button to control whether the menu is opened or closed, so we can set this button to toggle a simple boolean stored in state whenever clicked:
First import useState from react:
import { useState } from 'react';Then set up a new state instance:
const [isOpen, setIsOpen] = useState(false);We can trigger setIsOpen from our button:
<button
  className="bg-white border border-zinc-600 rounded px-4 py-3 font-bold"
  onClick={() => setIsOpen(!isOpen)}
>
  Add to Calendar
</button>
Then use that to control the visibility of our menu:
<ul className={isOpen ? 'opacity-100' : 'opacity-0 invisible' }>We’re using opacity instead of display none to hide so that we can use a CSS transition to fade the menu in and out. We also include invisible which prevents the links from being clickable (just hidden) within the DOM.
Tip:
.invisibleusesvisibility: hiddenin contrast to.hiddenwhich usesdisplay: nonewhich would prevent our ability to fade our menu in and out.
But first, if we try to click our button, we can see that it works! Clicking it shows it and hides it.

We have an issue though, the menu is simply being hidden, so it’s taking up a ton of space in the flow of our document, so instead of just letting it sit there, we can style it to overlay on top of the content when open.
First, let’s position the menu itself absolutely to its parent:
<ul className={`${isOpen ? 'opacity-100' : 'opacity-0' } absolute top-full left-0 min-w-full`}>But our parent isn’t configured to contain our absolutely positioned child, so let’s wrap our button with a simple span that allows for this to occur.
Wrap the button and unordered list with the following span:
<span className="inline-block relative">
  <button>
  <ul>
</span>
If we try to click our button now with content around it, we should see that it overlays on top instead of taking up a bunch of extra space.
Finally to round this step out, we can add a few extra styles to make the menu look a bit nicer and provide a better UX for visibility and click areas.
On our unordered list, add:
<ul className={`${isOpen ? 'opacity-100' : 'opacity-0' } absolute top-full left-0 min-w-full border shadow-lg py-2 px-1 transition-opacity`}>This includes the transition-opacity class which will allow our menu to fade in and our.
Then we can update each of our link elements to:
<a href={googleUrl} target="_blank" className="block text-zinc-800 hover:bg-zinc-50 px-4 py-2 whitespace-nowrap">
  Add to Google Calendar
</a>
Which gives some extra space and formatting.

Step 3: Adding Icons to Calendar Links
Finally, I like to include icons when it makes sense for recognizable products or services, which includes companies like Google and Microsoft with their office suite.
So we can add some SVG icons to make our links easily recognizable when our visitors want to find which calendar to add it to.
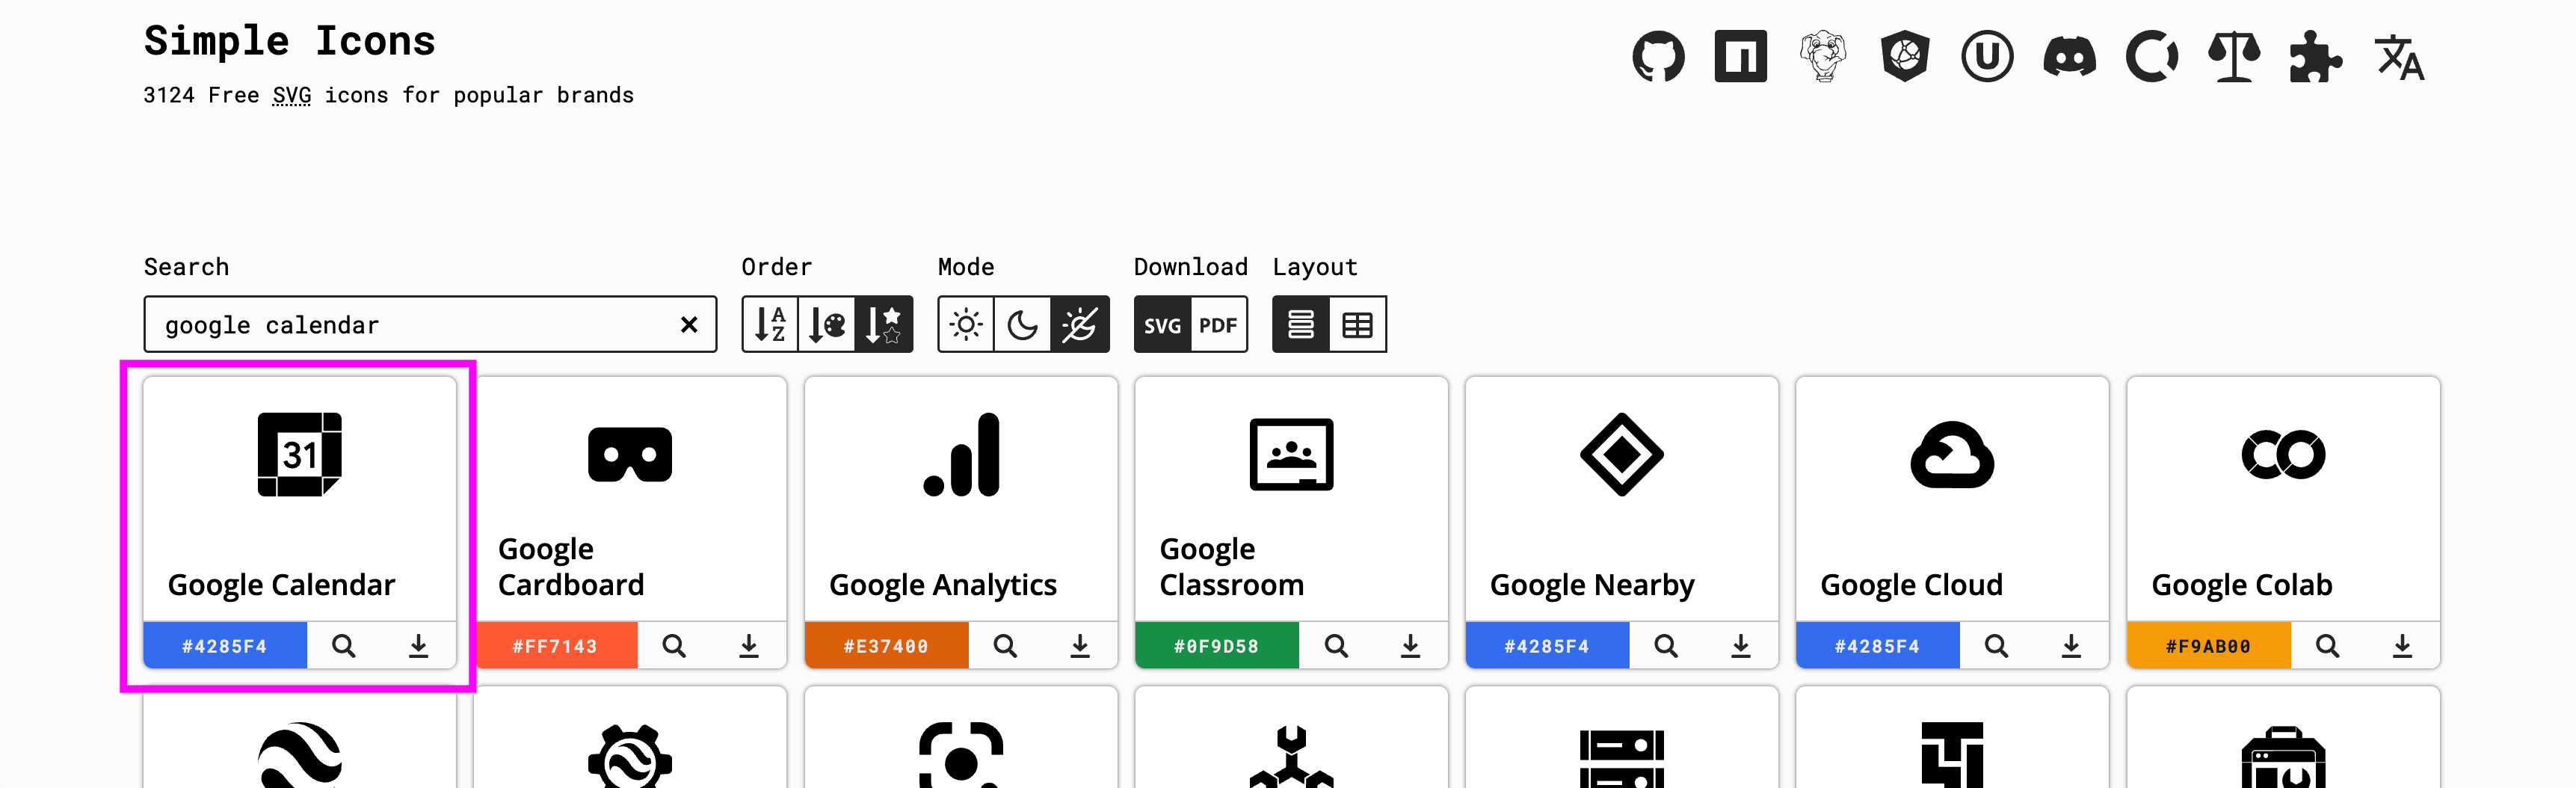
A nice website to find SVG icons for brands is Simple Icons. While they won’t have every one of our icons (Yahoo), they’ll have most.
Note: As noted on Simple Icons, some brands of specific guidelines for how you can use it, if you can use it at all, so pay attention to the notes to avoid running into trouble using logos where or how you shouldn’t.
Starting with Google Calendar, probably the most popular, we can easily search for it and find it for our first icon.
If you hover over the icon, you’ll notice it shows a copy indicator, where when you click it, you can easily copy the SVG code for that icon.
The issue however, is it’s not immediately JSX friendly (React syntax), so we can copy and paste that code into a free web tool SVG 2 JSX, which easily converts it for us, where once converted, we can drop it into our app inside of our Google Calendar link:
<a href={googleUrl} target="_blank" className="block text-zinc-800 hover:bg-zinc-50 px-4 py-2 whitespace-nowrap">
  <svg xmlns="http://www.w3.org/2000/svg" viewBox="0 0 24 24">
    <path d="M18.316 5.684H24v12.632h-5.684V5.684zM5.684 24h12.632v-5.684H5.684V24zM18.316 5.684V0H1.895A1.894 1.894 0 000 1.895v16.421h5.684V5.684h12.632zm-7.207 6.25v-.065c.272-.144.5-.349.687-.617s.279-.595.279-.982c0-.379-.099-.72-.3-1.025a2.05 2.05 0 00-.832-.714 2.703 2.703 0 00-1.197-.257c-.6 0-1.094.156-1.481.467-.386.311-.65.671-.793 1.078l1.085.452c.086-.249.224-.461.413-.633.189-.172.445-.257.767-.257.33 0 .602.088.816.264a.86.86 0 01.322.703c0 .33-.12.589-.36.778-.24.19-.535.284-.886.284h-.567v1.085h.633c.407 0 .748.109 1.02.327.272.218.407.499.407.843 0 .336-.129.614-.387.832s-.565.327-.924.327c-.351 0-.651-.103-.897-.311-.248-.208-.422-.502-.521-.881l-1.096.452c.178.616.505 1.082.977 1.401.472.319.984.478 1.538.477a2.84 2.84 0 001.293-.291c.382-.193.684-.458.902-.794.218-.336.327-.72.327-1.149 0-.429-.115-.797-.344-1.105a2.067 2.067 0 00-.881-.689zm2.093-1.931l.602.913L15 10.045v5.744h1.187V8.446h-.827l-2.158 1.557zM22.105 0h-3.289v5.184H24V1.895A1.894 1.894 0 0022.105 0zm-3.289 23.5l4.684-4.684h-4.684V23.5zM0 22.105C0 23.152.848 24 1.895 24h3.289v-5.184H0v3.289z"></path>
  </svg>
  Google Calendar
</a>
But when trying to preview this, the icon is way too big and doesn’t fit well.

To fix this, we’re first going to use flexbox on our link to make our icon and text sit side-by-side:
<a href={googleUrl} target="_blank" className="flex items-center gap-2 text-zinc-800 hover:bg-zinc-50 px-4 py-2 whitespace-nowrap">
  <svg xmlns="http://www.w3.org/2000/svg" viewBox="0 0 24 24">
    <path d="M18.316 5.684H24v12.632h-5.684V5.684zM5.684 24h12.632v-5.684H5.684V24zM18.316 5.684V0H1.895A1.894 1.894 0 000 1.895v16.421h5.684V5.684h12.632zm-7.207 6.25v-.065c.272-.144.5-.349.687-.617s.279-.595.279-.982c0-.379-.099-.72-.3-1.025a2.05 2.05 0 00-.832-.714 2.703 2.703 0 00-1.197-.257c-.6 0-1.094.156-1.481.467-.386.311-.65.671-.793 1.078l1.085.452c.086-.249.224-.461.413-.633.189-.172.445-.257.767-.257.33 0 .602.088.816.264a.86.86 0 01.322.703c0 .33-.12.589-.36.778-.24.19-.535.284-.886.284h-.567v1.085h.633c.407 0 .748.109 1.02.327.272.218.407.499.407.843 0 .336-.129.614-.387.832s-.565.327-.924.327c-.351 0-.651-.103-.897-.311-.248-.208-.422-.502-.521-.881l-1.096.452c.178.616.505 1.082.977 1.401.472.319.984.478 1.538.477a2.84 2.84 0 001.293-.291c.382-.193.684-.458.902-.794.218-.336.327-.72.327-1.149 0-.429-.115-.797-.344-1.105a2.067 2.067 0 00-.881-.689zm2.093-1.931l.602.913L15 10.045v5.744h1.187V8.446h-.827l-2.158 1.557zM22.105 0h-3.289v5.184H24V1.895A1.894 1.894 0 0022.105 0zm-3.289 23.5l4.684-4.684h-4.684V23.5zM0 22.105C0 23.152.848 24 1.895 24h3.289v-5.184H0v3.289z"></path>
  </svg>
  Google Calendar
</a>
We can then set a size on our icon to make sure it’s displaying in a big enough size to look good, but not too big to take over the menu:
<svg className="w-4 h-4" xmlns="http://www.w3.org/2000/svg" viewBox="0 0 24 24">And now that’s looking much better!

We can now apply the same to the rest of the links, finding an Apple logo and Outlook logo to start. There isn’t an Office365 logo, so I used Microsoft. And there isn’t a Yahoo logo, so for that one, I used a generic Calendar link, though feel free to use what you think is appropriate.
But now our menu is looking much better and it’s super easy to find the links we need!

What else can we do?
Closing calendar menu when clicking outside
One issue our Calendar menu faces is if you click outside, the menu seems stuck. It doesn’t dismiss the menu.
This is generally poor UX, we want it to close if someone clicks outside.
Luckily we can listen for clicks outside of an element and perform an action (closing our menu) on click.