

Writing content is hard enough, so you want to build a writing an editing experience that you or your client loves. Let’s see how we can easily add a beautiful WYSIWYG editor to a React app in minutes, complete with an AI assistant, with Novel.
What is a WYSIWYG editor?
A WYSIWYG editor, or What You See Is What You Get, is a visually rich way of writing and editing content in a way that allows you to see the formatting as you’re working on the content.
A common way to provide this interface like seen in apps like Notion is to use slash commands (ex: /command) where you would then be prompted to select the formatting type you want, such as a header or quote, and continue adding text in that “block” of content.
It’s a great way of working with content, but it can be challenging building this type of interface, which i swhere Novel comes in.
AI-Powered Rich Text Editor with Novel
Novel is a WYSIWYG editor that not only provides the visual writing and editing experience, it adds an AI command that helps assist you with the actual content you’re writing.
It works by interfacing with the OpenAI API to provide the context of the current content and requesting a completion to help you keep writing.
Out-of-the-box, Novel is a React component, so it requires the ability to work in that environment.
Luckily, we’ll be using Astro, which supports React components!
What are we going to build?
We’ll use React to add the Novel AI WYSIWYG editor to an Astro app. This includes adding a React component to an Astro app and setting up an API endpoint to stream completions from OpenAI to our component.
For the API endpoint, we’ll use Vercel’s AI SDK, which gives us some helpers to make it easier to work with the OpenAI SDK.
Step 0: Getting Started in Astro
This post is written so that you can follow along with pretty much any standard Astro application, whether you’re using your existing website or starting from scratch.
If you want to start up with a brand new Astro app, you can run:
npm create astro@latest my-appwrite-blogSelect the options you’d like and dive right in!
Step 1: Installing React in Astro
To get started, we need to add React to our Astro environment.
Like any other integration, we can use the astro add command to easily set this up or install it manually.
We’ll follow along with the easy way, so in your terminal, run:
npx astro add reactThis will first install the Astro React dependencies from npm then set up the React integration in your Astro config.
And that’s all you need to do! So let’s dig in and create our first React component.
Step 2: Creating a React component in Astro
Next we can start to use React in our Astro app.
Because we’ll need React for our AI component which we’ll add later, we need to build our entire form in React, so let’s start by creating a form component.
Inside src/components create a new file FormNewPost.tsx and inside add:
const FormNewPost = () => {
  return (
    <form>
      <div>
        <label htmlFor="title">Title</label>
        <input id="title" type="text" name="title"/>
      </div>
      <div>
        <label htmlFor="slug">Slug</label>
        <input id="slug" type="text" name="slug"/>
      </div>
      <div>
        <label>Content</label>
        <textarea id="content" name="content"/>
      </div>
      <div>
        <label htmlFor="excerpt">Excerpt</label>
        <input id="excerpt" type="text" name="excerpt"/>
      </div>

      <button>Submit</button>
    </form>
  )
}

export default FormNewPost;
Note that we’re using the .tsx extension for our FormNewPost file. While you can use .jsx as well, be sure to include one of the two variations.
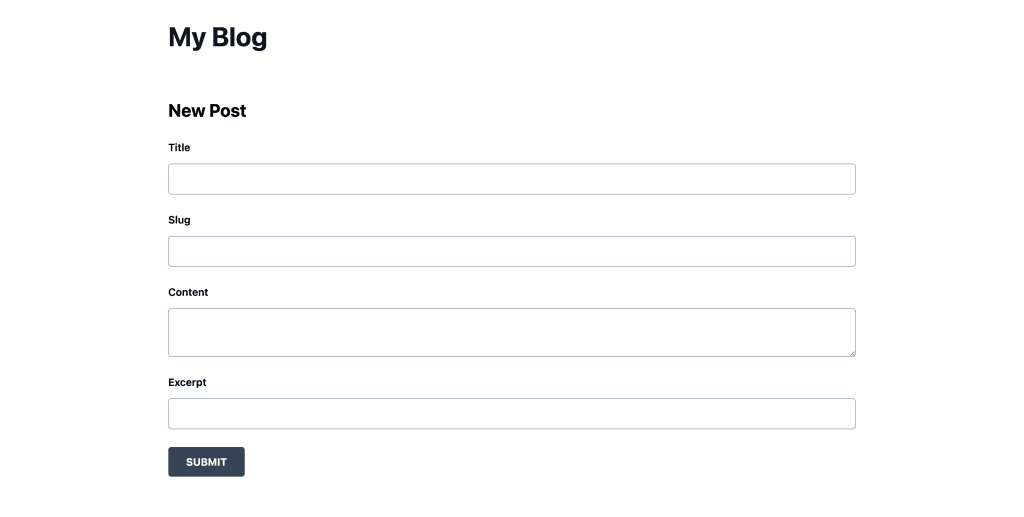
This gives us a pretty basic form inside of a React component with a few input fields to start us off with.
Tip: If you want to copy in some styles, check out my commit which includes some Tailwind classes.
But how do we get this into an Astro component?
Well, it kind of “just works”.
Head over to your Astro page where you want to add your form and at the top of the file between the fences (---), import your React component:
---
import FormNewPost from '@/components/FormNewPost.tsx'
---
Note: Remember to update the path to where your component is located and using
.tsxor.jsx.
Then, we simply drop our component in the page where we’d like, just like any other component:
<FormNewPost />And once we load up our page, we should be able to see our new React component render our form!
But the content field we dropped in is just a plain textarea, let’s see how we can make that a better experience for our authors (or ourselves!).
Step 3: Adding a WYSIWYG text editor to React with Novel
To give a rich content editing experience, we’re going to use the WYSIWYG (What You See Is What You Get) editor component Novel.
Beyond some of the AI stuff which we’ll get to later, its a wrapper around the TipTap editor which unlocks a lot of awesome features to give us Notion-like editing experiences in our own app.
The trick with Novel though, is it’s a React component, which is why to this point, we’ve had to set up React.
But let’s not stop there, let’s get started with Novel.
In your terminal run:
npm install novelNext, we can import the Novel editor at the top of our React form.
Inside src/components/FormNewPost.tsx, or wherever your form is located, add:
import { Editor } from 'novel';Next, let’s replace our existing content textarea field with our new Editor component:
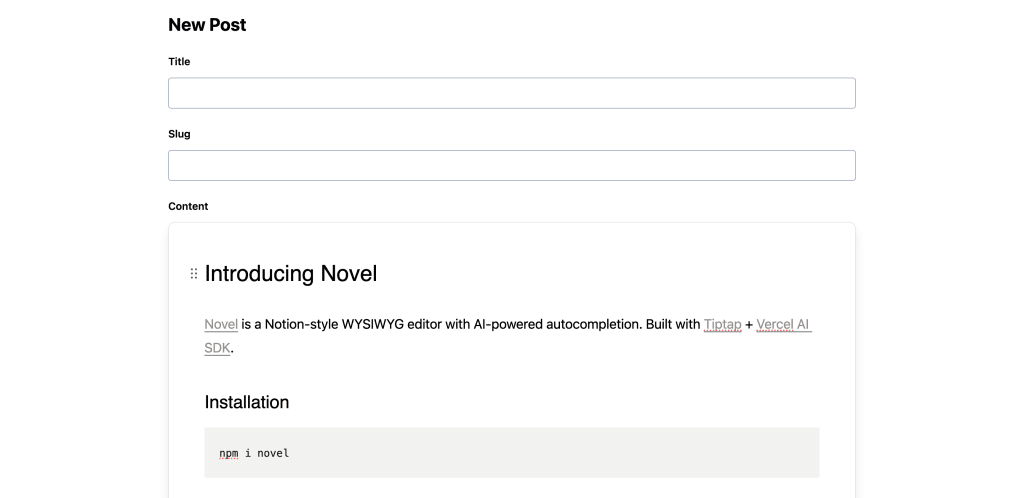
<Editor />Now if we reload the page, uh oh, it doesn’t seem like anything loads.

One of the great parts of Astro is that by default, Astro will statically render your React component so that it doesn’t ship any JavaScript to the browser. So our form we built? It’s not using any of the JS inside the browser that typically comes with React.
But we actually want React to load in the client for our Editor component, so to fix this, we need to apply the client:load attribute to our React component.
Inside of our Astro page, where we’re rendering FormNewPost, add:
<FormNewPost client:load />And as soon as the page reloads, we can now see our Editor!
Now these were just the default settings. While we’re not going through all the settings, let’s talk about a few…
completionApi: Customize the API endpoint used to ping OpenAI for chat completions. We’ll be using the default for this which we’ll get to later
disableLocalStorage: By default, Novel will store the current state of the editor in localStorage. This can be great for persisting edits and changes even when someone refreshes, but it can also create issues for the same reasons, if that doesn’t make sense in your UX flow. In the case of an Add New Post page, it probably makes sense to disable it, but add a warning if they try to leave the page without saving.
Tip: You could also manually define the storage key used for local storage with
storageKeyso that you can purge or update the cached content depending on your UX flow.
onUpdate / onDebouncedUpdate: Callback for whenever content changes. We’ll used debounced to avoid spamming API requests. We’ll cover this later.
There are also other options for helping the experience including adding extensions, but we’re not going to cover that here.
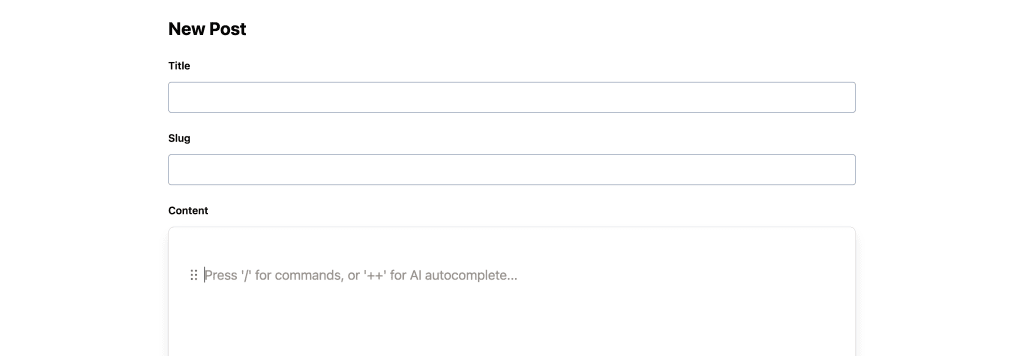
For now, let’s provide some safe defaults:
<Editor
  disableLocalStorage={true}
  defaultValue={{
    "type": "doc",
    "content": []
  }}
/>
Here we’re disabling localStoarge so that when creating a new post, we start with a fresh canvas, and a default value made up of the data structure that Novel expects, basically providing no content.
And now, if we reload the page, we can now see we’re starting off fresh without the pre-loaded content from the component!
Next up, let’s see how we can tap into what makes this component special, the AI-powered completions!
Step 4: Adding AI Chat Completions with OpenAI and Vercel AI SDK
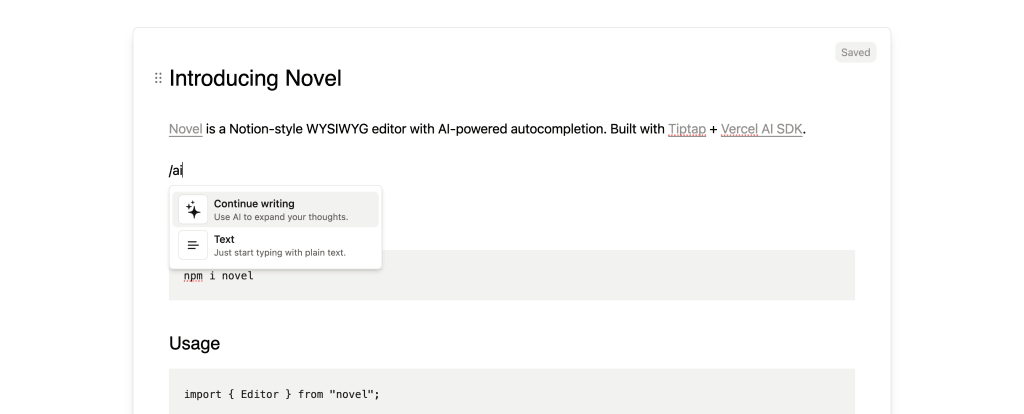
The Novel editor in itself is nice, but a big differentiator is its ability to request AI-powered completions.
It does this by automatically pinging an API endpoint, that we need to set up ourself, which it then streams into the application on our behalf.
While we could theoretically put in any chat completion service or model we want, we’ll be using OpenAI. And to make working with the OpenAI service easier, we’ll use Vercel’s AI SDK.
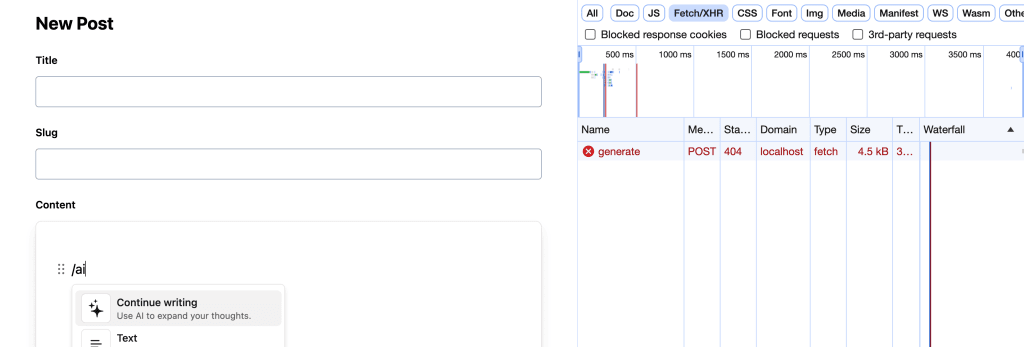
By default, the Novel Editor makes requests to the endpoint /api/generate so we’ll stick with that.
If you go inside of your editor and try to run the /ai command, you’ll notice you’ll see the endpoint triggered, but then you get an error.
So let’s set this up.
Inside of your Astro project, create a new file called generate.ts inside of the src/pages/api/ directory and in that file, add:
import type { APIRoute } from 'astro';

export const POST: APIRoute = async ({ request }) => {
  // Do something here
}
This gives us a new API endpoint located at /api/generate that accepts a POST request.
If you try to run the /ai command again, you’ll see we get a different error this time, a 500, because it exists, but it just doesn’t work yet.
To make it work, we need to do two things:
- Set up and install the OpenAI SDK
- Use the AI SDK to make using the OpenAI SDK easier
Note: you will need an OpenAI account to follow along!
Let’s first install both SDKs with:
npm install openai aiNext, we can import both at the top of our src/pages/api/generate.ts file:
import OpenAI from 'openai';
import { OpenAIStream, StreamingTextResponse } from 'ai';
In order to configure OpenAI, we’ll need to pass in our API key into a new instance of OpenAI, which we can place above our endpoint definition:
const openai = new OpenAI({
  apiKey: String(import.meta.env.OPENAI_API_KEY),
});
It’s important to set up this API key as an environment variable to avoid the chance of accidentally committing it or exposing it in your code. You can find your API key inside of your OpenAI account under the API Keys page and you can set this as a variable inside of your .env file.
But now, we get to the interesting part!
First, whenever Novel makes a request, it sends a JSON payload including a “prompt”, which we pass along to OpenAI, along with more of a prompt, which helps gives us our AI completion.
To get that prompt, let’s first grab it from the request.
Inside of the POST function, add:
const { prompt } = await request.json();Next, we’re going to use the chat.completions.create method on our OpenAI instance to get our chat completions.
For this walkthrough, I’m going to stick with the default settings Novel provides as an example, including the base prompt.
Under your prompt variable, add:
const response = await openai.chat.completions.create({
  model: 'gpt-3.5-turbo',
  messages: [
    {
      role: 'system',
      content:
        'You are an AI writing assistant that continues existing text based on context from prior text. ' +
        'Give more weight/priority to the later characters than the beginning ones. ' +
        'Limit your response to no more than 200 characters, but make sure to construct complete sentences.',
    },
    {
      role: 'user',
      content: prompt,
    },
  ],
  temperature: 0.7,
  top_p: 1,
  frequency_penalty: 0,
  presence_penalty: 0,
  stream: true,
  n: 1,
});
This seems like a lot, but it’s a lot of configuration, so let’s step through it.
We’re using the Create Chat Completions method where we:
- Define the model we want to use, where here we’re specifying
gpt-3.5-turbo - We specify two messages we want to send, including a base prompt that provides context to the AI generating the completion as well as a second message that includes the prompt from the Novel editor
- Include a few other configurations that help improve the results for the specific use case, which I won’t cover here, but you can learn more about on the OpenAI Docs
- Specify that we want the results streamed, which is important, as we’ll be streaming the results to the editor in our UI
These settings are all configurable and I encourage you to play around with them once we’re done integrating this, especially the base prompt, to help craft the responses to better suit your needs.
But finally, our results will be waiting for us in a response, so let’s now return it so that our app can consume it.
Add the following after the completion code:
const stream = OpenAIStream(response)
return new StreamingTextResponse(stream)
We create a new OpenAIStream with our response which we then return as a StreamingTextResponse from our endpoint. This allows our app to then read that as a stream, which it can show as it receives content, whether than having to wait for it to load all at once.
If we now head back to our application and try to use our /ai command, we should now see that it feeds in text from our new endpoint!
Tip: It’s helpful to already have some text in the editor before running the AI command, otherwise it won’t have any context to base its response off of.
Now that we’re able to reliably write our content, let’s see how we can send it somewhere.
Step 5: Reading and submitting form data
With all of our new content, we need a way to be able to submit it somewhere.
While most of the form fields are able to be read as standard form data, our new AI editor requires us to store the content where we can then access it at submit time.
To start, we have two callbacks we can use onUpdate and onDebouncedUpdate, where we’ll use onDebouncedUpdate to avoid getting updates for every single little details.
On our editor, let’s add:
<Editor
  disableLocalStorage={true}
  defaultValue={{
    "type": "doc",
    "content": []
  }}
  onDebouncedUpdate={(editor?: TipTapEditor) => {
    // Store content
  }}
/>
If you notice we’re referencing the type TipTapEditor, which we’ll need to import from the TipTap package directly, as Novel wraps the TipTap editor:
import type { Editor as TipTapEditor } from '@tiptap/core';We rename the type to avoid a conflict with our existing Novel Editor.
Now that we’re locked into our update callback, let’s use our editor instance to grab our content.
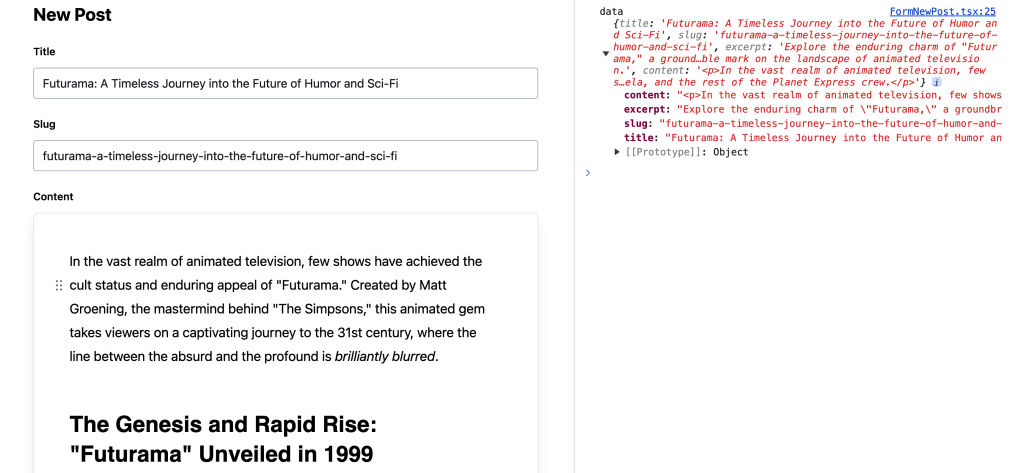
We can access the HTML with editor.getHTML() or we can grab a JSON representation with editor.getJSON(). We’ll use getHTML() to store the HTML version.
If we console log this out, we can see what this looks like any time we edit the content:
onDebouncedUpdate={(editor?: TipTapEditor) => {
  console.log(editor?.getHTML())
}}
So let’s now use this to store our content.
First we need to set up a new instance of state.
Import the following at the top of the file:
import { useState } from 'react';Then at the top of the component set up state with:
const [content, setContent] = useState<string>();And in our callback, let’s update it to store the HTML content in our state!
onDebouncedUpdate={(editor?: TipTapEditor) => {
    setContent(editor?.getHTML())
}}
Feel free to console log out the state variable content now to test it out!
But this means we have our content, how can we submit along with the rest of the form?
On our form element, we can add an onSubmit callback where we can read the form, add our content, then pass that along to wherever we’re sending it.
First, add the onSubmit handler to the form:
<form onSubmit={handleOnSubmit}>Then let’s define that function:
async function handleOnSubmit(event: SyntheticEvent<HTMLFormElement>) {
  event.preventDefault();

  const target = event.target as typeof event.target & {
    title: { value: string };
    slug: { value: string };
    excerpt: { value: string };
  }

  const data = {
    title: target.title.value,
    slug: target.slug.value,
    excerpt: target.excerpt.value,
    content
  }
}
Before we walk through this, be sure to also import the SyntheticEvent type from React:
import type { SyntheticEvent } from 'react';But here’s what we’re doing in our handleOnSubmit function:
- Prevent the default functionality from occurring, which would submit the form to the page
- Create a new
targetconstant which represents our form and in the process, casts the types of the data we’re reading - Read the form data from our form and append our content from our state instance
This leaves us with a data object, which we can use to submit wherever we’re storing our data!
Publishing dynamic content
While we didn’t cover here where to send the data, we have a lot of options for where we send this, whether that’s a database, a form service, or some kind of CMS.
To learn how we can set up our own database and later integrate it with other platform services like authentication, check out How to Create a Blog with Astro & Appwrite.